Imagine the excitement of bringing home your first batch of fluffy day-old chicks—tiny peeps filling the air, soft feathers against your palm—only to face the harsh reality of stressed, huddling babies or worse, unexpected losses in those critical first days. For many new backyard poultry enthusiasts, especially in humid subtropical areas like Barishal where heavy rains and variable indoor conditions are common, the biggest hurdle isn’t choosing breeds or feed—it’s building a beginner chick brooder setup for indoors that keeps chicks warm, safe, dry, and thriving without fire risks, overwhelming odors, or health setbacks.
This comprehensive guide draws from university extension services (like Missouri Extension, UGA, and MSU), practical backyard experience, and updated 2026 best practices to help you achieve 95%+ survival rates. We’ll cover everything from zero-prep checklists to troubleshooting ammonia in humid climates, safer radiant heat options over traditional lamps, and smooth transitions to outdoor life. Whether you’re raising 5–25 chicks in a garage, spare room, or apartment balcony area, you’ll get step-by-step instructions, real-world examples, and pro tips to turn beginner anxiety into confident success.
Why Indoor Brooding Is Ideal for Beginners (and When to Choose It)
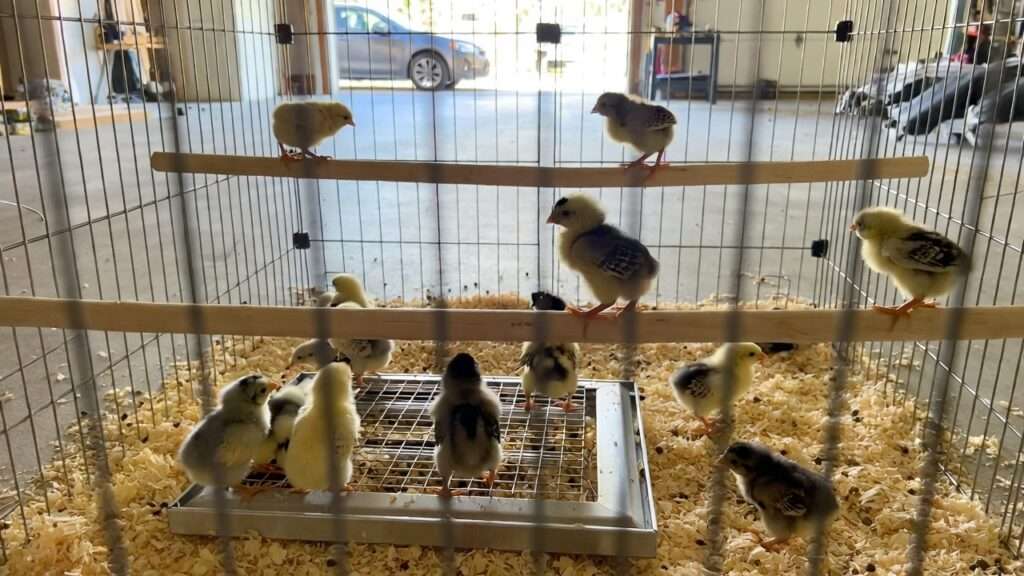
Indoor brooding—often in a garage, basement, or dedicated room—offers unmatched control for first-timers. In regions with frequent monsoons or unpredictable weather, like much of Bangladesh, it protects vulnerable chicks from drafts, predators, and sudden temperature drops that can cause chilling and high mortality (up to 20% in poor setups).
Key benefits include:
- Constant monitoring without trekking outdoors.
- Shielding from cats, dogs, rats, or wild birds.
- Easier temperature stability in air-conditioned or fan-cooled spaces.
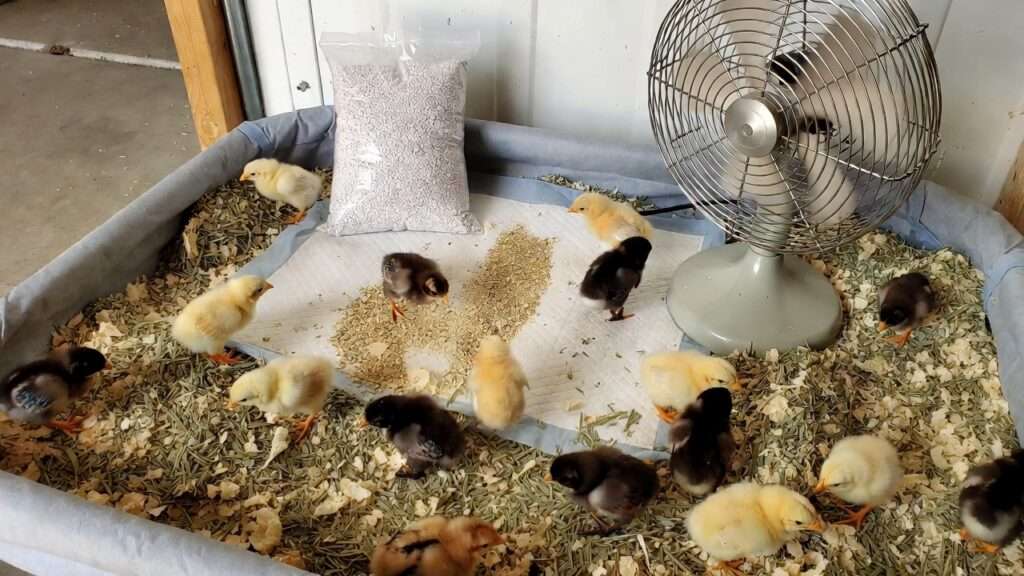
Potential drawbacks? Odor from droppings, dust affecting household air, and limited space. Solutions are straightforward: prioritize ventilation (small fans or cracked windows), absorbent bedding, and frequent spot-cleaning. This guide focuses on setups for small flocks (5–25 chicks), perfect for homesteaders or urban hobbyists integrating poultry with home gardening or future crop rotation systems.
Essential Supplies Checklist for a Beginner Indoor Chick Brooder
Gather these before chicks arrive—aim for setup 24–48 hours in advance to test everything.
Budget Tiers
- Budget (<$50 equivalent): Basic plastic tote, red heat lamp (with caution), pine shavings, mason jar waterer/feeder.
- Mid-range ($100–200): Larger stock tank or playpen, radiant heat plate, chick-specific feeders, hemp bedding.
- Premium/Safest: Brinsea EcoGlow or similar heat plate, wire-topped enclosure, digital thermometer/hygrometer combo.
Core Items
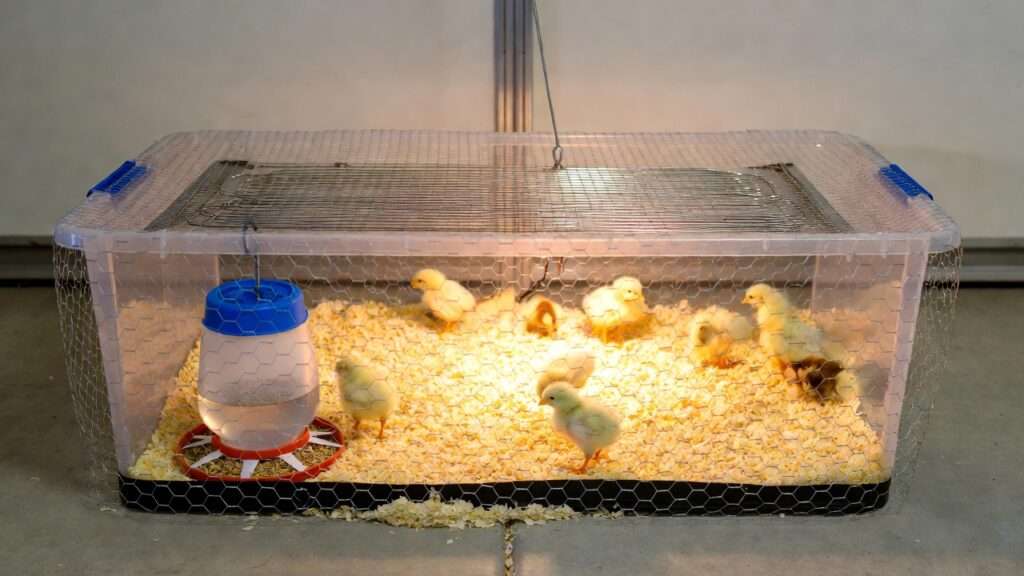
- Enclosure: Plastic storage bin (for 5–10 chicks), galvanized stock tank, puppy playpen, or dog crate. Pros/cons: Bins are cheap and secure but need custom lids; playpens expand easily. Aim for 0.5–1 sq ft per chick initially, scaling to 2 sq ft by week 4–6.
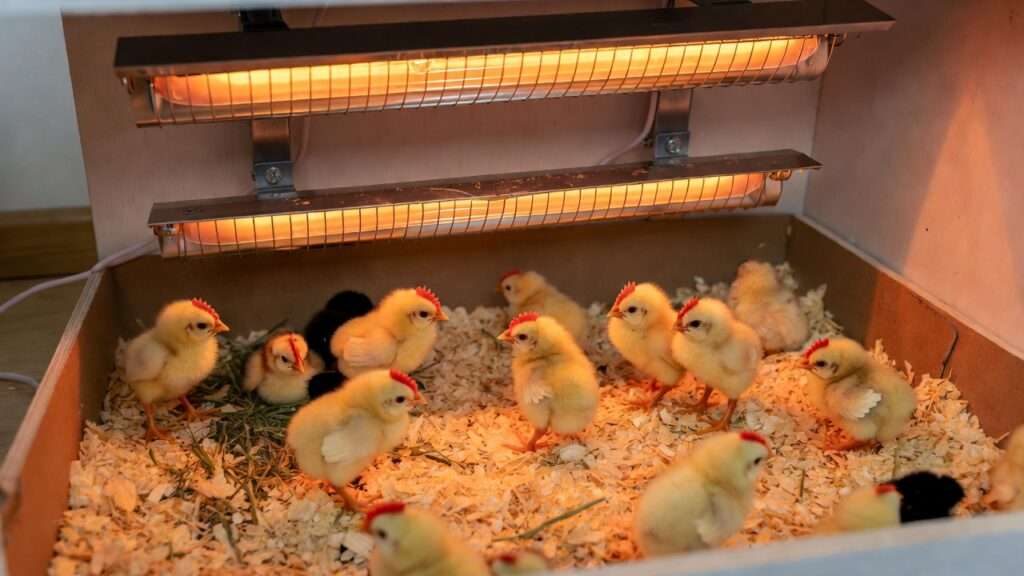
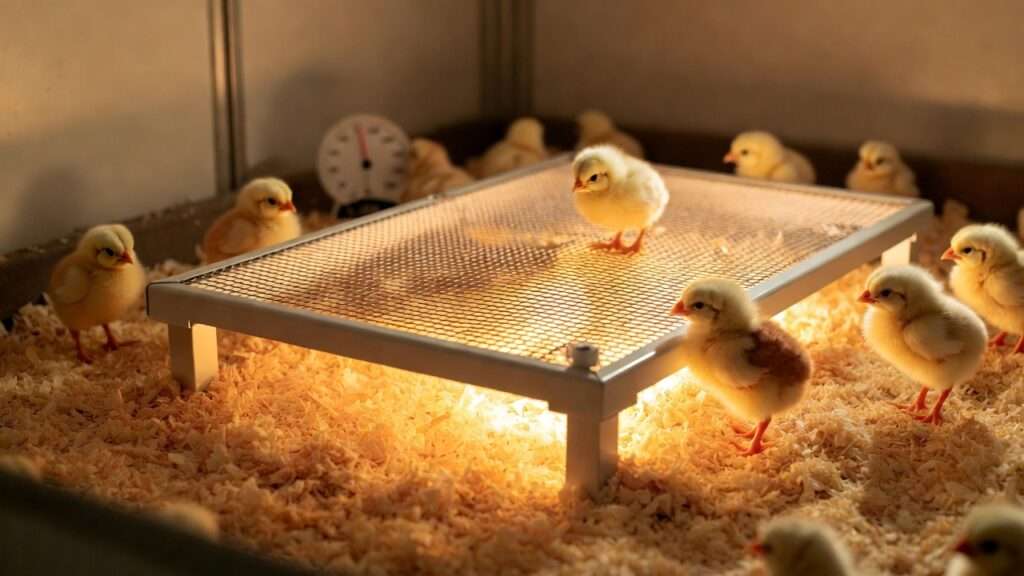
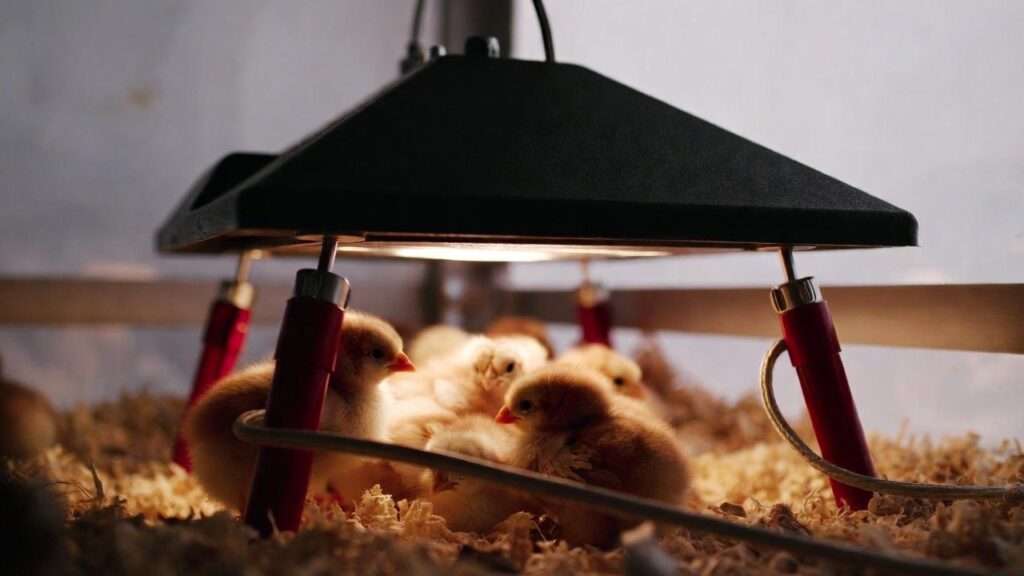
- Heat Source — Top recommendation for 2026: Radiant heat plates (e.g., Brinsea EcoGlow, RentACoop, Producer’s Pride). These mimic a broody hen’s warmth from above, allow self-regulation, use less energy (10% of a lamp), and eliminate fire risks—no exposed bulbs near bedding. Alternative: Secure red heat lamp (250W) with clamp/chain, thermostat, and shatterproof bulb—but plates are safer indoors.
- Bedding: Large-flake pine shavings, aspen, or hemp (best for odor control in humid areas; avoid cedar—toxic). Puppy training pads for first week ease cleaning.
- Feeders/Waterers: Chick-specific (narrow lips prevent drowning/wetting); 1 quart each for small groups.
- Monitoring: Digital thermometer + hygrometer at chick level (aim 50–70% humidity).
- Extras: Draft guards, hardware cloth lid, small fan for ventilation, cleaning scoop.
Step-by-Step: How to Set Up Your Indoor Chick Brooder (Day Before Arrival)
Step 1 — Choose and Prepare the Location Select a quiet, draft-free spot: garage corner, spare bedroom, or well-ventilated basement. Avoid high-traffic areas. Ensure ambient room temp stays above 50–60°F (critical for heat plates). Add a small oscillating fan on low for air movement without chilling. In humid climates, position near a window for fresh air exchange.
Step 2 — Select and Assemble the Enclosure For 10 chicks: Start with a 40–50 gallon plastic tote or 4×4 ft playpen. Secure lid with hardware cloth for ventilation and escape-proofing. Add zip ties or clips for stability. Expand later by moving to a larger pen.
Step 3 — Add Safe Bedding and Create Zones Sprinkle lime or odor-neutralizer on bottom, then 2–4 inches absorbent bedding. Create a warm zone under heat and cooler exploration area.
Step 4 — Install and Test the Heat Source Position heat plate on one side, legs adjusted to chick back height (they should walk under easily). Preheat to create gradient: 95°F directly under → 85°F on cool side. Use thermometer at floor level. Temperature Schedule (standard from extension services):
- Week 1: 95°F
- Week 2: 90°F
- Week 3: 85°F
- Week 4: 80°F
- Week 5: 75°F
- Week 6+: Room temp (70°F+) if feathered
Decrease by 5°F weekly or based on behavior.
Step 5 — Position Feeders, Waterers, and Accessories Place on opposite side from heat to encourage movement. Elevate slightly to keep dry. Fill water with electrolytes for first day.
Bringing Chicks Home: The Critical First 24–48 Hours
Dip beaks in water upon arrival. Place near warmth and water—don’t force feed. Observe: Even spread and active peeping = perfect. Huddling/piling = too cold (lower heat plate or add lamp temporarily). Panting/spreading out = too hot (raise plate). Quiet contentment is your goal.
Expert insight: Chicks communicate everything through behavior and sound—listen closely.
Daily and Weekly Brooder Management for Healthy Growth
Consistent daily checks and weekly adjustments are what separate thriving broods from struggling ones. In humid subtropical climates like Barishal’s, where high moisture can accelerate ammonia buildup and bacterial growth, proactive management is essential.
Temperature and Behavior Monitoring Monitor twice daily—morning and evening—using a digital thermometer at chick level. Watch behavior as your primary indicator:
- Ideal: Chicks evenly dispersed, some eating/drinking, soft peeps, active exploration.
- Too cold: Huddling under heat, loud cheeping, piling in corners → lower heat plate slightly or add supplemental warmth temporarily.
- Too hot: Panting, wings spread, avoiding heat zone → raise plate height or increase cool-zone space.
Troubleshooting Temperature Chart
| Sign | Likely Cause | Fix |
|---|---|---|
| Huddling/piling | Too cold | Lower heat plate, check drafts |
| Panting/spreading out | Too hot | Raise plate, improve ventilation |
| Lethargic, eyes closed | Overheat or sick | Cool area, check for pasty butt |
| Even spread, content | Perfect | Maintain current setup |
Adjust gradually—never more than 5°F per day. By week 3–4 in humid conditions, prioritize behavior over strict numbers once chicks are partially feathered.
Cleaning and Hygiene Indoors Ammonia from droppings can irritate eyes/respiratory systems and promote coccidiosis—worse in high-humidity areas.
- Spot-clean daily: Remove wet/soiled bedding, droppings around waterers.
- Full change: Every 7–10 days (or sooner if odor noticeable); replace with fresh absorbent material.
- Odor control in humid climates: Use hemp bedding (superior moisture absorption), add zeolite or lime under bedding layer, run small fan on low for air exchange (aim for 50–65% relative humidity via hygrometer). Avoid sealing the room completely—crack a window or use exhaust fan to pull moist air out.
- Pro tip: Puppy pads under initial bedding make early cleanups quick; switch to shavings after week 1.
Feeding and Watering Schedule
- Week 1–2: Chick starter crumble (18–20% protein, medicated if coccidiosis risk high in damp areas). Scatter on paper towels first day to encourage pecking.
- Week 3+: Transition to grower feed; introduce chick grit (fine) for digestion.
- Water: Always clean, add electrolytes/vitamins first 3–5 days for stress reduction. Elevate to prevent tipping.
- Daily intake: Chicks eat ~10–15g/day initially—ensure constant access.
Health Checks and Common Early Issues Inspect each chick daily:
- Pasty butt (common in overheated or dehydrated chicks): Gently clean vent with warm water; prevent with proper temp/hydration.
- Coccidiosis signs (bloody droppings, lethargy): Use medicated feed or Corid in water; keep bedding dry.
- Spraddle leg (from slippery floors): Use towels first 2–3 days; correct with vet wrap if needed.
- Vet threshold: Persistent huddling, high mortality (>5%), or respiratory issues—consult local poultry vet or extension service.
Upgrading and Expanding as Chicks Grow (Weeks 3–8)
Chicks grow fast—by week 3, they’re feathering out and need more space/activity to prevent boredom/stress.
- Signs ready: Full feathering on body/wings, less reliance on heat (comfortable at 75–80°F), increased jumping/exploration.
- Expansion steps: Move to larger pen (e.g., puppy playpen or framed wire enclosure) around week 4; add low perches (1–2 inches high) for roosting practice.
- Multi-stage example: Start in 50-gallon tote → transition to 6×4 ft playpen in garage → outdoor coop acclimation by week 6–8 (if temps >65°F daytime).
- In humid Barishal conditions, ensure expanded area has good airflow to avoid moldy bedding.
Safety First: Avoiding Common Indoor Brooding Dangers
Beginners often overlook risks that cause fires, escapes, or health issues.
- Fire prevention: Radiant plates (e.g., Brinsea EcoGlow, Chickcozy, or Producer’s Pride models popular in 2026) are far safer than heat lamps—no exposed bulbs, low fire risk, energy-efficient. If using lamps, secure firmly, use red bulbs, thermostat, and never on extension cords.
- Dust/allergens: Use low-dust bedding (hemp/aspen); ventilate to protect household air quality.
- Escape/predator proofing: Hardware cloth tops/lids (not chicken wire—too weak); secure against cats/dogs/rats common in garages.
- Electricity/humidity tips: Use GFCI outlets; avoid overloading circuits. In tropical humidity, monitor for condensation—prevent with ventilation to stop bacterial growth.
Real-Life Examples and Pro Tips from Experienced Keepers
Example 1: Garage Setup in Humid Climate A Barishal-area keeper started 15 chicks in a large plastic stock tank with Brinsea EcoGlow plate. Added small exhaust fan + hemp bedding; spot-cleaned daily. Result: Zero pasty butt, minimal odor, 100% survival to week 6. Key: Fan on timer (15 min/hour) kept humidity ~60%.
Example 2: Apartment Balcony Transition Urban beginner used puppy playpen in spare room; switched to heat plate after lamp scare. Added grit early, perches week 4. Chicks ready for balcony grow-out pen by week 7.
Bonus Pro Tips
- Puppy pads + hemp combo: Low-odor, easy clean first 10 days.
- Integrate early perches: Builds strong legs/roosting habits.
- Track progress: Daily photos/behavior notes help spot issues fast.
Frequently Asked Questions (FAQs)
- Can I use a heat lamp indoors safely? Possible with precautions (secure clamp, red bulb, thermostat), but radiant heat plates are strongly recommended for lower fire risk and better chick comfort.
- How do I control smells in a small home? Use absorbent hemp bedding, spot-clean daily, add small fan for ventilation, and zeolite under layer. Keep humidity 50–65%.
- What’s the best bedding for beginners? Large-flake pine shavings or hemp—absorbent, low-dust. Avoid cedar (toxic) or newspaper (slippery).
- When can chicks go outside? Fully feathered, 6–8 weeks old, outdoor daytime temps consistently >65°F (with shelter). Harden off gradually.
- Is medicated feed necessary? Helpful in humid/wet areas for coccidiosis prevention; non-medicated fine if excellent hygiene.
- How much space per chick? 0.5–1 sq ft week 1; 2 sq ft by week 4–6.
- What if chicks are piling at night? Too cold—adjust heat plate lower or check drafts.
- Can I brood in an apartment? Yes, with good ventilation, odor control, and quiet location.
- How long until chicks are independent? Heat usually off by week 6–8; fully outdoor-ready around 8–10 weeks.
- Best heat plate brands 2026? Brinsea EcoGlow, Chickcozy, Producer’s Pride, RentACoop—adjustable, safe, energy-efficient.
Conclusion
A successful beginner chick brooder setup for indoors boils down to preparation, observation, and safe, consistent care. By following this guide—prioritizing radiant heat, dry bedding, ventilation, and daily checks—you’ll minimize risks, maximize health, and enjoy watching your chicks grow into robust layers or broilers. In humid regions like Barishal, mastering ammonia/humidity control early pays huge dividends.