Imagine stepping out your front door each morning to harvest sun-ripened tomatoes, vibrant Swiss chard, and fragrant basil—all while your neighbors compliment the lush, colorful display that has replaced your old, water-thirsty lawn. This isn’t a fantasy. It’s the reality for growing numbers of homeowners who are embracing front-yard veggie beds as a smart, sustainable way to grow their own food without sacrificing curb appeal.
Many people dream of homegrown produce for better health, lower grocery bills, and environmental benefits, but hesitate because the front yard is so visible. Concerns about looking “messy,” violating HOA rules, or drawing disapproving glances often keep edible gardens hidden in the backyard—if they happen at all. The good news? With thoughtful design, strategic plant choices, and simple maintenance, front-yard veggie beds can be stunning, productive, and even increase your home’s attractiveness.
In this comprehensive guide, I’ll draw on years of experience in edible landscaping, urban gardening, and sustainable agriculture to show you exactly how to create beautiful front-yard veggie beds. You’ll discover proven designs, the best crops for aesthetics and yield, step-by-step building instructions, and practical tips to overcome common challenges. Whether you’re a beginner or seasoned gardener, this article will help you transform your front yard into a functional, eye-catching edible landscape that feeds your family and inspires your community.
Why Choose Front-Yard Veggie Beds? Benefits and Real-World Advantages
Front-yard veggie beds offer advantages that backyard plots often can’t match. First, front yards typically receive more consistent sunlight—crucial for vegetables needing 6–8+ hours daily—because they’re less shaded by trees or structures. This prime exposure often leads to higher yields compared to shadier backyards.
Environmentally, replacing turfgrass with edible plants reduces resource demands. Traditional lawns require frequent mowing, watering, and chemical inputs. Edible landscaping cuts water usage (especially with mulch and drought-tolerant varieties), sequesters carbon, and supports pollinators like bees and butterflies. Studies show home gardens use far less water than industrial agriculture for the same output, and they eliminate “food miles”—the distance produce travels, which contributes to emissions.
On a personal level, the benefits are immediate and rewarding. You’ll enjoy fresher, more nutritious produce harvested at peak ripeness, often with higher vitamin content than store-bought items picked under-ripe. Gardening provides mental health perks—stress reduction, physical activity, and a sense of accomplishment. Economically, even a modest setup can offset grocery costs on high-value items like herbs, greens, and berries.
Socially, front-yard veggie beds spark connection. Neighbors stop to chat, kids learn about food origins, and the garden becomes a conversation starter that builds community goodwill. When designed well, it enhances rather than detracts from curb appeal, potentially increasing property value through attractive, low-maintenance landscaping.
Planning Your Front-Yard Veggie Beds: Essential First Steps
Success starts with careful planning. Begin by mapping your site’s sunlight—track where shadows fall throughout the day over a week. Most vegetables thrive in full sun, but partial-sun spots can work for leafy greens.
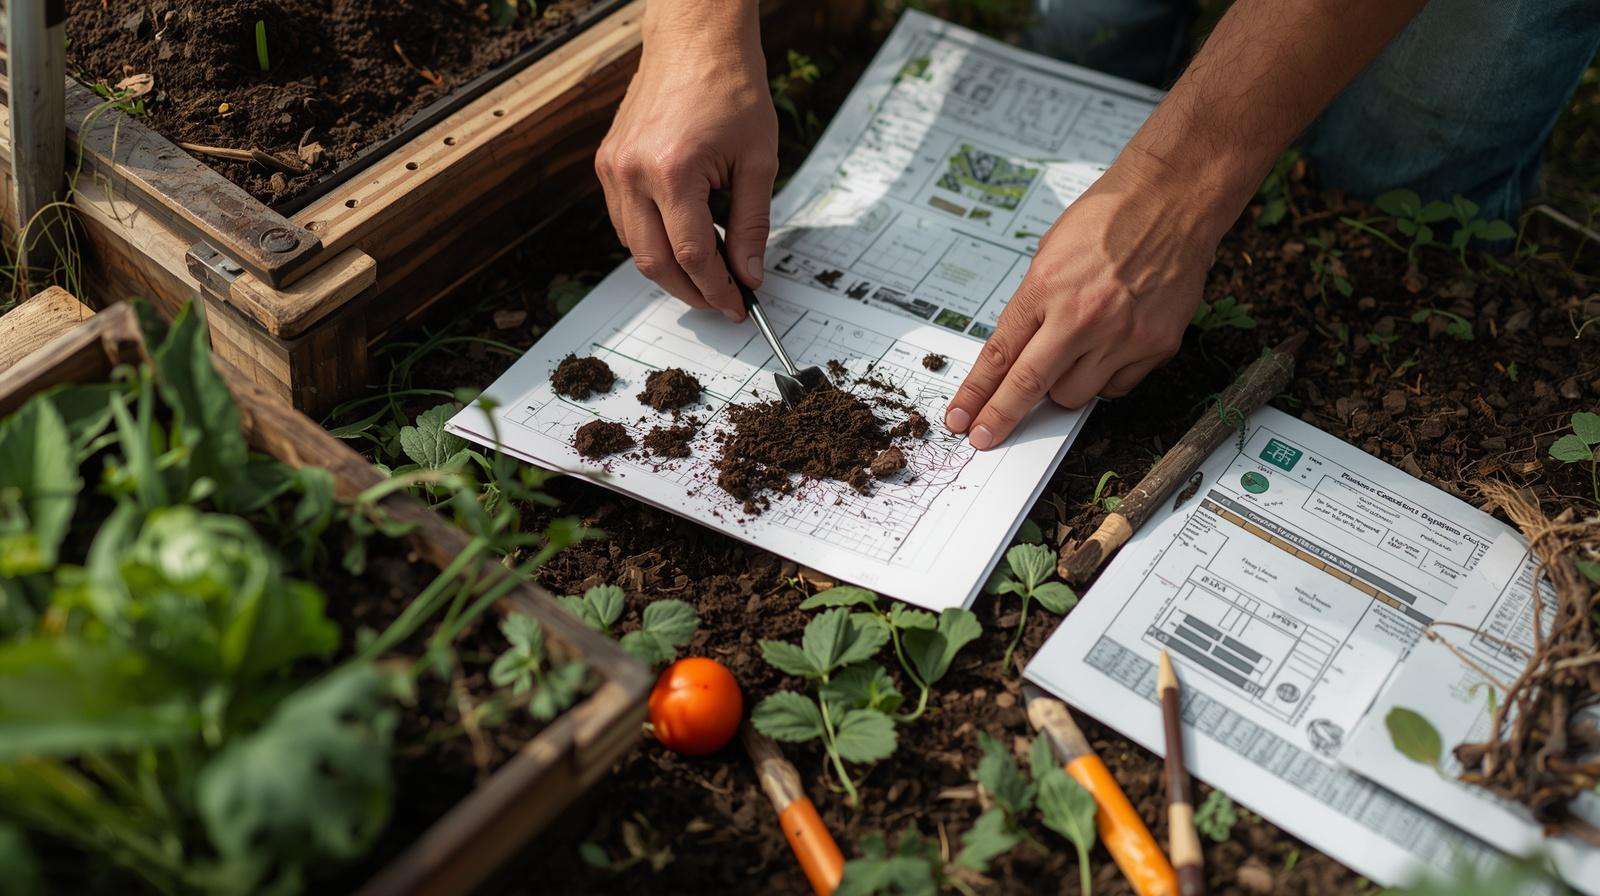
Next, test your soil. Urban or suburban front yards may have compacted, nutrient-poor, or contaminated soil from past runoff. Use a home test kit for pH (aim for 6.0–7.0) and drainage. If needed, amend heavily or opt for raised beds to bypass poor native soil.
Check local regulations. Review HOA covenants, municipal zoning, or ordinances—some restrict front-yard vegetables, but many allow them if tidy and landscaped. Start small if rules are strict, or communicate benefits (pollinator support, sustainability) to build support.
Consider scale and budget. For beginners, start with 1–2 raised beds (4×8 feet is ideal—easy to reach across). Budget $100–$500 per bed depending on materials. Factor in ongoing costs like compost, mulch, and seeds.
Design for curb appeal from day one: Use symmetry for balance, layer heights (tall plants at back, short at front), incorporate color contrasts, and add focal points like a birdbath or ornamental grass. Pathways keep it accessible and neat.
Choosing the Right Bed Style and Materials for Beauty + Function
Raised beds dominate front-yard designs for good reason—they improve drainage, warm soil faster, reduce bending, and define spaces elegantly.
Popular materials include:
- Cedar or redwood — Naturally rot-resistant, warm aesthetic, lasts 10–15 years.
- Galvanized steel or Corten — Modern, sleek look; extremely durable (20+ years), no leaching concerns with food-grade liners if worried.
- Brick, stone, or concrete blocks — Permanent, elegant borders; excellent for sloped yards.
- Recycled options — Stock tanks, upcycled wood, or pallets for eco-friendly budgets.
For in-ground beds, define edges with mulch, gravel, or low borders to keep it polished.
Creative layouts boost appeal: Keyhole gardens (central compost access), mandala circles, or tiered beds on slopes. Add clean pathways (gravel, stepping stones, mulch) for tidy access and visual flow.
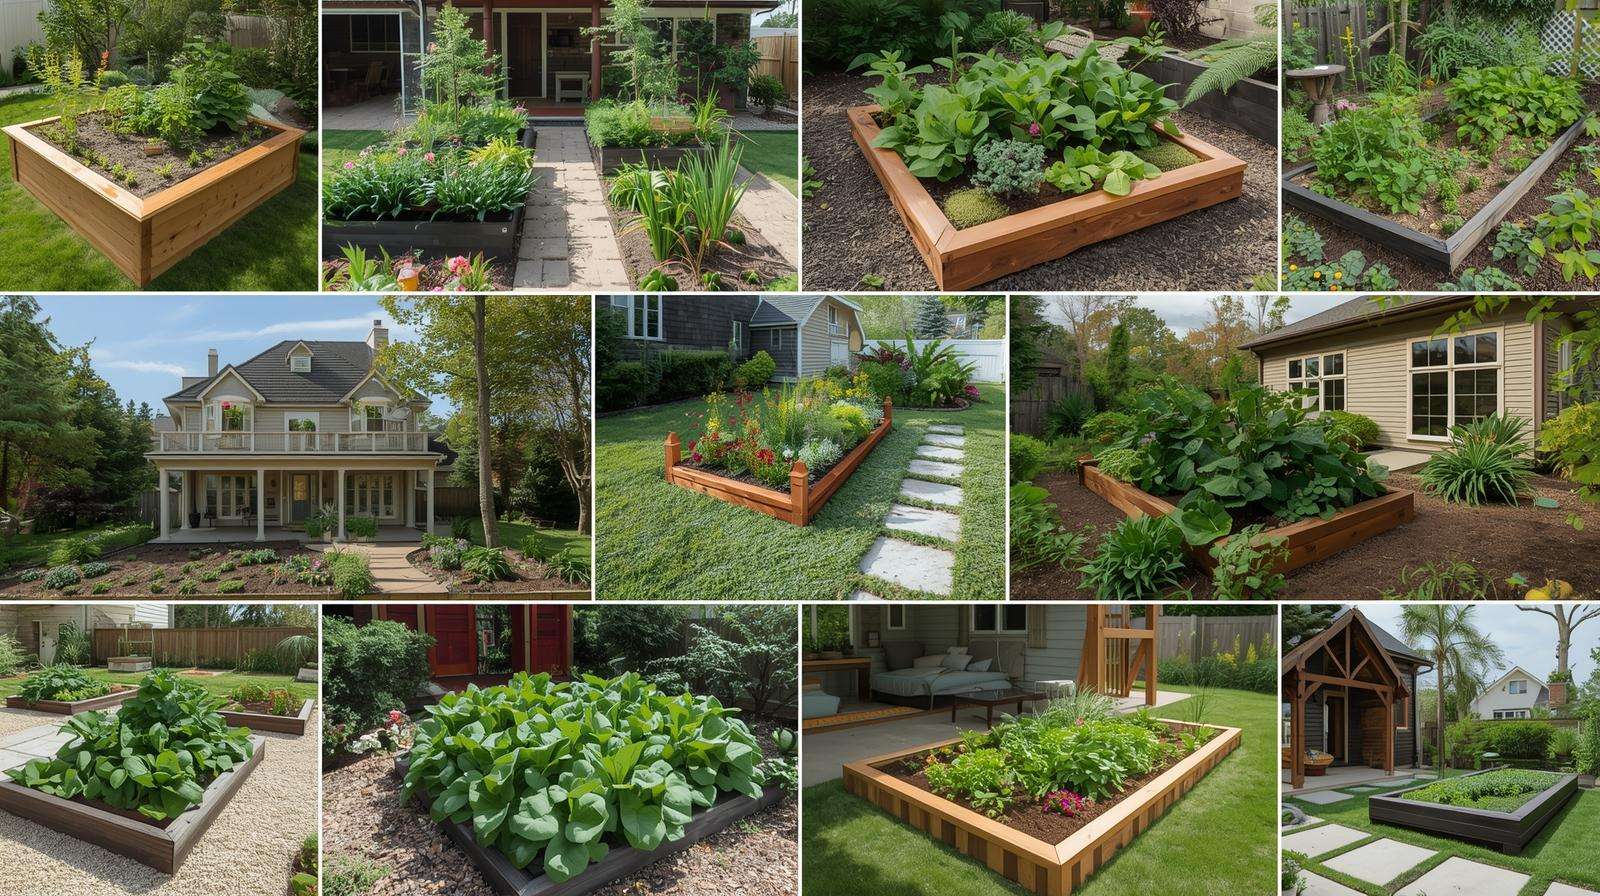
10 Stunning Front-Yard Veggie Bed Designs to Inspire You
Here are 10 practical, beautiful designs that balance productivity and aesthetics:
- Classic Four-Bed Symmetrical Layout Four 4×4 or 4×8 beds arranged in a square or rectangle, framed by gravel paths. Plant in blocks for order. Adds timeless balance.
- Cottage-Style Mixed Border Blend edibles with flowers along the house foundation or sidewalk. Kale, rainbow chard, and nasturtiums mix with marigolds for color and pest control.
- Modern Geometric Raised Beds Use metal or concrete beds in hexagons or triangles. Clean lines suit contemporary homes; fill with compact varieties.
- Pollinator-Friendly Edible Landscape Incorporate herbs (lavender, rosemary), berries, and native flowers. Attracts butterflies while producing food.
- Vertical + Hanging Elements Trellises for pole beans/cucumbers, wall pockets for strawberries/herbs. Maximizes small spaces without clutter.
- Layered Perennial-Annual Mix Perennials (strawberries, rhubarb, chives) for structure, annuals rotated seasonally for fresh interest year-round.
- Corner Focal Point Beds Curve beds around a front corner with a central ornamental feature. Ideal for awkward spaces.
- Rustic Farmhouse Style Weathered wood beds with gravel paths and simple stakes. Warm, inviting feel.
- Low-Maintenance Drought-Tolerant Edibles Artichokes, peppers, succulents, and Mediterranean herbs. Suits dry climates or water-conscious gardeners.
- Family-Friendly Gathering Space Include built-in seating on wide bed edges, surrounded by easy-harvest crops like bush beans and cherry tomatoes.
Each design emphasizes tidy appearance, companion planting, and succession for continuous appeal.
Best Vegetables, Herbs, and Edibles for Front-Yard Beauty
Choose plants that look good while producing well:
- Colorful stems/leaves — Rainbow Swiss chard, purple kale, red-veined sorrel.
- Textured foliage — Curly kale, frilly lettuces, artichokes (dramatic silver leaves).
- Bright fruits — Cherry tomatoes, bell peppers (red/yellow), bush beans.
- Edible flowers — Nasturtiums, marigolds, borage (pollinator magnets).
- Perennials — Strawberries (ground cover), rosemary/chives (evergreen structure), rhubarb.
Rotate annuals seasonally and interplant for continuous color and yield.
Step-by-Step: How to Build and Plant Your Front-Yard Veggie Beds
Building beautiful, long-lasting front-yard veggie beds is straightforward when you follow a logical sequence. Here’s a detailed, beginner-friendly process based on best practices used by professional edible landscapers.
1. Gather Materials and Tools
- Raised bed frames (pre-made kits or lumber/metal panels cut to size)
- Landscape fabric or cardboard (to suppress weeds)
- High-quality garden soil or topsoil/compost blend (avoid cheap “fill dirt”)
- Organic compost (aged manure, worm castings, mushroom compost)
- Mulch (straw, wood chips, or shredded bark)
- Basic tools: shovel, rake, wheelbarrow, drill/driver (if assembling), measuring tape, level, gloves
2. Prepare the Site
- Mark bed outlines with string or spray paint.
- Remove existing sod/grass: Either cut and roll it up (sod cutter rental ~$50–$100/day) or smother it with cardboard + 4–6 inches of mulch/soil for 4–6 weeks (no-dig method).
- Loosen compacted soil underneath with a garden fork if planting in-ground or hybrid style.
- Test and amend soil if not using raised beds (add lime if too acidic, sulfur if too alkaline, compost for structure).
3. Build the Beds
- Level the ground beneath the bed frames so they sit stable.
- Assemble or place frames (screw cedar corners together; stack concrete blocks without mortar for flexibility).
- Line the bottom with cardboard or landscape fabric if concerned about weeds or grass regrowth.
- Fill with soil mix: Aim for 50–60% high-quality topsoil, 30–40% compost, 10% aeration material (perlite, vermiculite, or coarse sand).
- Water thoroughly to settle the soil (expect 10–20% settling). Top up as needed.
4. Planting Your Beds
- Follow the “tall in back, short in front” rule for visual balance.
- Use companion planting to boost health and beauty:
- Marigolds + tomatoes (repel nematodes)
- Basil + peppers/tomatoes (flavor enhancement + pest deterrence)
- Nasturtiums as trap crops near brassicas
- Space plants according to seed packet or plant tag guidelines—overcrowding reduces airflow and increases disease risk.
- Install supports early: tomato cages, trellises for beans/cucumbers, stakes for peppers.
- Mulch 2–3 inches thick around plants (keep mulch 1–2 inches away from stems to prevent rot).
- Water deeply after planting to eliminate air pockets.
5. First 2–4 Weeks Care
- Keep soil consistently moist (not soggy) while roots establish.
- Hand-water or use soaker hoses/drip irrigation until plants are established.
- Monitor for slugs/snails (especially after rain) and hand-pick or use iron phosphate baits if needed.
Maintenance Tips to Keep It Looking Gorgeous Year-Round
A well-maintained front-yard veggie garden looks intentional and polished, not overgrown. Follow these expert-level routines:
- Watering — Install drip irrigation or soaker hoses on timers for efficiency and even moisture. Water early morning to reduce evaporation and fungal issues. Aim for 1 inch per week (more in hot/dry periods).
- Feeding — Apply balanced organic fertilizer (e.g., fish emulsion, kelp meal, or compost tea) every 3–4 weeks during active growth. Side-dress with compost mid-season.
- Pruning & Shaping — Regularly pinch herbs, remove suckers from tomatoes, stake/pepper plants early. Trim leggy growth to maintain tidy appearance.
- Pest & Disease Management — Inspect weekly. Use row covers for brassicas, neem oil or insecticidal soap for aphids, hand-pick larger pests. Promote biodiversity to encourage beneficial insects.
- Seasonal Transitions — Succession plant every 2–3 weeks for continuous harvest. Replace spent summer crops with cool-season greens, garlic, or cover crops in fall. Mulch heavily in winter to protect soil.
- Clean Appearance — Edge beds monthly, remove spent foliage promptly, sweep paths, refresh mulch annually.
Overcoming Common Challenges and Myths
Myth: “Front-yard veggie gardens look messy and lower property value.” Reality: Poorly maintained gardens look messy—beautifully designed ones increase curb appeal. Real estate studies show well-landscaped properties (including edible elements) sell faster and for higher prices in many markets.
Challenge: Limited sunlight Solution: Choose shade-tolerant crops (lettuce, spinach, arugula, mint, chives) or use reflective surfaces (white fences, light-colored gravel) to bounce light.
Challenge: Poor soil or contamination concerns Solution: Use raised beds with imported clean soil/compost mix. Test urban soil if planting in-ground.
Challenge: Critters (rabbits, deer, squirrels) Solution: Install 3–4 ft fencing or netting, use motion-activated sprinklers, plant strong-scented repellents (garlic, marigolds, mint).
Challenge: HOA or neighbor pushback Solution: Start small and neat. Document benefits (pollinators, reduced water use, food security). Many HOAs relax rules when shown attractive examples.
FAQs: Front-Yard Veggie Beds
Q: Will front-yard vegetables really improve my home’s curb appeal? A: Yes—when designed with structure, color, and tidiness in mind. They often look more interesting than plain lawn.
Q: What are the easiest beginner crops for front-yard beds? A: Cherry tomatoes, bush beans, zucchini, lettuce mixes, radishes, basil, and Swiss chard—all forgiving and visually appealing.
Q: How much food can I realistically grow in a small front yard? A: A 4×8 ft raised bed can produce 50–100+ lbs of vegetables per year with good care—enough to significantly supplement a family’s fresh produce needs.
Q: Is it hard to keep front-yard beds looking good in winter? A: Not if you plant cool-season crops, use evergreen herbs/perennials, and mulch heavily. Clean beds look intentional even when dormant.
Q: Can I grow vegetables in front-yard beds without chemicals? A: Absolutely. Organic methods—compost, mulch, companion planting, beneficial insects—work very well in small-scale gardens.
Q: How do I prevent weeds without constant work? A: Heavy mulching, landscape fabric under paths, dense planting, and prompt removal of weeds while small keep weed pressure very low.
Q: Are metal raised beds safe for growing food? A: Yes—modern galvanized steel and Corten are food-safe. If concerned, line with heavy plastic or landscape fabric.
Front-yard veggie beds are more than a gardening trend—they represent a powerful shift toward self-sufficiency, beauty, and sustainability right at your doorstep. By replacing underused lawn with thoughtfully designed, productive beds, you gain fresh food, lower bills, environmental benefits, and a yard that stands out for all the right reasons.
Start small if you’re nervous: one beautiful raised bed can be the perfect pilot project. Watch it thrive, gather compliments, and expand from there. Gardening in plain view builds confidence, connects you with neighbors, and proves that growing your own food can be both practical and gorgeous.
Ready to get started? Grab a tape measure, sketch your front yard, and begin planning your first front-yard veggie bed today. Your future harvests—and your admiring neighbors—will thank you.