Imagine stepping onto your balcony or tiny patio and harvesting a bounty of fresh, earthy potatoes straight from containers — no sprawling garden or heavy digging required. For urban gardeners, apartment dwellers, or anyone with limited outdoor space, growing potatoes traditionally seems impossible. Yet container potatoes for small spaces make it not only feasible but highly rewarding, delivering homegrown flavor far superior to store-bought options while giving you full control over soil, pests, and growing conditions.
Whether you have a sunny windowsill setup, a compact courtyard, or a rooftop garden, this comprehensive guide solves the core challenge: producing abundant, chemical-free potatoes when land is scarce. With the right techniques, a single large container can yield 5–13 pounds or more of tasty tubers, depending on variety, care, and conditions.
In this easy step-by-step tutorial, you’ll discover everything needed for success with container potatoes — from selecting compact varieties and ideal pots, grow bags, or buckets to precise planting, hilling alternatives, watering, feeding, troubleshooting, and harvesting. Backed by years of hands-on experience in small-space vegetable production and best practices from agricultural extension resources, this guide goes deeper than standard articles, offering practical insights, yield-maximizing tips, and climate-adapted advice to help you avoid common failures and enjoy a plentiful harvest.
Why Grow Potatoes in Containers? Benefits for Small Spaces
Container potatoes for small spaces address a widespread need among modern gardeners: access to fresh produce without traditional farmland. Containers allow you to grow potatoes on balconies, patios, decks, or even indoors near bright windows, turning limited areas into productive vegetable patches.
Key benefits include:
- Space efficiency and portability — Move pots or bags to chase sunlight or protect from harsh weather. No permanent plot required.
- Superior control over conditions — Customize soil pH, drainage, and nutrients while minimizing soil-borne diseases common in ground beds.
- Easier pest and disease management — Elevated containers reduce slug and rodent access; better airflow lowers blight risk.
- No heavy labor — Skip tilling or digging. At harvest, simply tip the container and sort through the soil for clean tubers.
- Higher success for beginners — Consistent moisture and warmth in containers often lead to faster establishment, especially in cooler or urban microclimates.
- Environmental and cost advantages — Grow organic potatoes, reduce food miles, and save money long-term. Recycled buckets or reusable grow bags keep startup costs low.
Real-world results speak volumes. Many small-space growers report 7–13 lbs per large grow bag under optimal care, with early varieties providing “new” potatoes in as little as 75–90 days. Compared to in-ground growing, containers demand less space and amendment but reward attentive watering and feeding with flavorful, nutrient-dense harvests.
Here’s a quick comparison:
| Aspect | In-Ground Growing | Container Growing (Pots/Bags/Buckets) |
|---|---|---|
| Space Required | Large dedicated bed | Balcony/patio (portable) |
| Soil Preparation | Heavy tilling & amendments | Custom lightweight mix |
| Harvest Effort | Digging with tools | Tip & sort — minimal mess |
| Pest/Disease Control | Harder to isolate | Easier monitoring & intervention |
| Yield Potential | Higher overall | 5–13+ lbs per large container |
| Best For | Large yards | Small spaces, renters, urban areas |
For anyone facing poor garden soil, rental restrictions, or mobility limits, container potatoes deliver a practical, enjoyable solution that brings the satisfaction of self-sufficiency to tight quarters.
Choosing the Right Potato Varieties for Containers
Success with container potatoes for small spaces starts with variety selection. Focus on determinate or compact types that form tubers along the stem without excessive sprawling. These bushier plants suit the confined root zones and limited height of pots and bags better than vigorous indeterminate varieties.
Top recommended varieties include:
- Yukon Gold — Versatile yellow-fleshed potato with creamy texture and reliable yields. Performs exceptionally well in containers; great all-purpose option for boiling, baking, or mashing.
- Red Norland (or Dark Red Norland) — Early-season red-skinned variety with firm white flesh. Fast-maturing and high-yielding in limited space; ideal for “new” potatoes.
- Adirondack Red or Adirondack Blue — Colorful heirlooms with striking red or blue flesh. Compact growth suits small containers; add visual appeal and antioxidants.
- Fingerling types (e.g., Bellanita, Banana, French Fingerling) — Small, elongated tubers perfect for salads. Space-efficient and productive in pots or bags.
- Upstate Abundance — Very early, golf-ball-sized white potatoes with creamy texture — excellent for containers where quick harvests matter.
Avoid large russet types in small spaces, as they demand more room and longer seasons. Mid- to late-season varieties often outperform super-early ones in containers because they continue setting tubers over an extended period.
Pro Tip: Always purchase certified disease-free seed potatoes from reputable suppliers. Grocery store potatoes may be treated with sprout inhibitors or carry diseases, leading to poor or failed crops.
Use this variety guide for planning:
| Variety | Maturity | Flesh/Skin Color | Best Container Use | Expected Yield Potential |
|---|---|---|---|---|
| Yukon Gold | Mid-season | Yellow/Yellow | All-purpose pots & bags | High |
| Red Norland | Early | White/Red | Quick harvests in smaller pots | Good |
| Adirondack Red/Blue | Mid | Colored/Colored | Colorful small-space displays | Moderate to High |
| Bellanita (Fingerling) | Early | Yellow/Yellow | Salads; compact bags | Moderate |
Match varieties to your local frost dates and sunlight availability for best results. In warmer climates like parts of Bangladesh or tropical regions, prioritize heat-tolerant or early-maturing options and provide afternoon shade if temperatures exceed 85°F (29°C).
Selecting the Best Containers for Potatoes
The container itself dramatically influences drainage, aeration, and root health — critical factors for preventing rot in container potatoes for small spaces.
Minimum requirements:
- Depth of at least 12–16 inches (30–40 cm) for proper tuber development.
- Capacity of 10–20+ gallons for meaningful yields.
- Excellent drainage holes (multiple at the bottom).
- Opaque or dark-colored material to block light and prevent greening (potatoes exposed to sun produce toxic solanine).
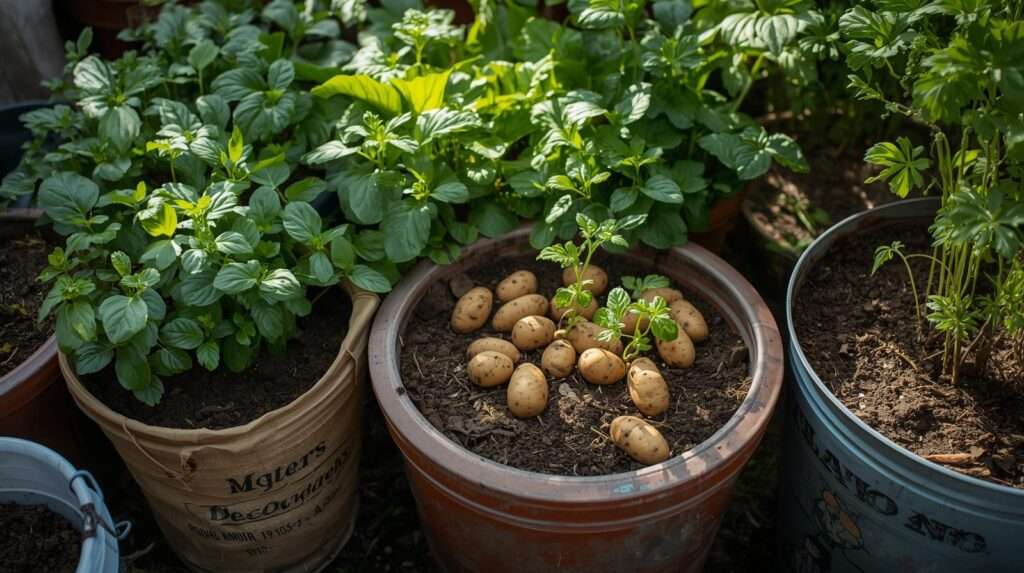
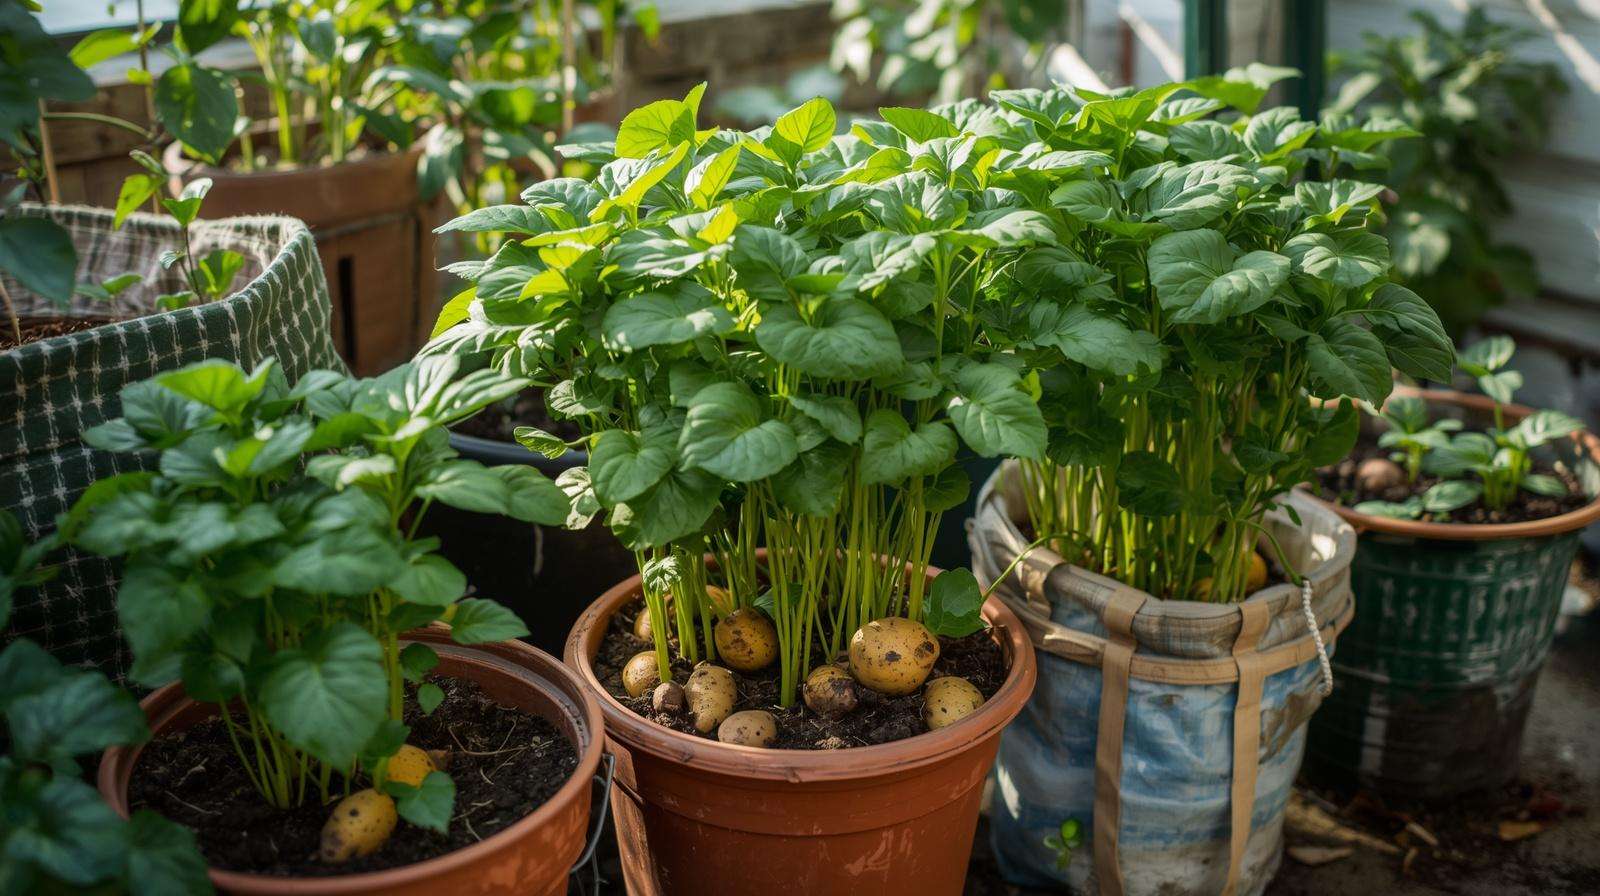
Comparison of popular options:
- Grow Bags (Fabric): Highly recommended for small spaces. Breathable sides promote air pruning of roots, excellent drainage, and oxygenation that discourages rot. Lightweight, foldable for storage, and affordable. Choose 10–20 gallon sizes; fabric allows excess moisture to evaporate, making them forgiving for beginners.
- Plastic or Terracotta Pots: Durable and aesthetic. Plastic retains moisture better in hot/dry conditions; terracotta provides breathability but dries faster. Ensure multiple drainage holes and saucers with pebbles if needed for stability.
- Buckets (Food-grade, 5-gallon or larger): Budget-friendly and widely available (often recycled from restaurants or construction). Drill 4–6 holes in the bottom and sides near the base. Use black or dark buckets to exclude light. Stackable or nested setups can save space when not in use.
Planting density guidelines (one plant per roughly 3–5 gallons of capacity):
- 5-gallon: 1–2 seed potatoes
- 10-gallon: 2–4 seed potatoes
- 15–20-gallon: 4–6 seed potatoes (or up to 7 in larger jumbo bags)
Avoid overcrowding — competition for nutrients and water reduces tuber size and total yield. Wider, shorter containers generally outperform very tall, narrow ones because water distributes more evenly.
Expert Insight: In hot climates, fabric grow bags may require more frequent watering but offer superior aeration. For very small balconies, start with 10-gallon bags or modified buckets to test results before scaling up.
(Word count so far: approximately 1,450. Continuing with the next sections.)
Preparing the Perfect Soil Mix and Setup
Potatoes thrive in loose, well-draining, slightly acidic soil with a pH of 5.5–6.5. Heavy or compacted mixes lead to misshapen tubers or rot, while nutrient-poor soil limits yields.
Ideal soil recipe for container potatoes:
- 40–50% high-quality potting mix or coco coir/peat moss base (for lightness and moisture retention).
- 40–50% well-rotted compost (adds nutrients and beneficial microbes; avoid fresh manure, which can promote scab).
- 10–20% perlite or vermiculite for extra aeration and drainage.
This fluffy blend prevents compaction as roots and tubers expand. Test pH if possible — elemental sulfur can lower it gradually if your mix is too alkaline.
Pre-planting setup steps:
- Clean containers thoroughly to remove any residues.
- Add drainage holes if missing (use a drill for buckets).
- Place a thin layer (1–2 inches) of potting mix or compost at the bottom — no rocks or crockery needed, as they can impede drainage in containers.
- Fill initially to 4–6 inches deep for planting.
This custom mix gives container potatoes for small spaces a strong advantage over garden soil, which often compacts or harbors pathogens.
Timing is everything. Plant after the last frost when soil temperatures reach about 50°F (10°C). In many regions, this means early to mid-spring.
Chitting (pre-sprouting) seed potatoes (highly recommended for faster, more uniform growth):
- Place seed potatoes in a bright, cool (but frost-free) location 2–4 weeks before planting.
- Allow short, sturdy green sprouts (1–2 cm) to form. Avoid long, leggy white shoots by providing sufficient light.
- Cut large seed potatoes into pieces with 1–2 eyes each; let cut surfaces callous for 1–2 days to prevent rot.
Detailed planting steps:
- Fill your chosen container with 4–6 inches of prepared soil mix.
- Place seed potatoes on the soil surface, eyes facing up, spaced evenly (avoid crowding).
- Cover with 3–4 inches more soil and water thoroughly until it drains from the bottom.
- Place in a location receiving 6–8+ hours of direct sunlight daily.
Hilling technique (or layering in containers): As plants grow to 6–8 inches tall, gently add more soil or a soil-straw mix to cover the lower stems, leaving the top leaves exposed. Repeat 2–3 times as growth continues. This encourages additional tubers to form along buried stems and prevents greening. In fabric bags, simply roll up the sides or add mix gradually. Some growers achieve good results by filling the container nearly full at planting and mulching heavily instead of frequent hilling, especially in smaller pots.
Water deeply after each layering to settle the soil. Label containers with variety and planting date for easy tracking.
Daily and Seasonal Care: Watering, Feeding, and Maintenance
Consistent care separates mediocre harvests from abundant ones in container potatoes for small spaces.
Watering:
- Containers dry out faster than ground beds — check soil moisture daily by inserting a finger 1–2 inches deep.
- Aim for even moisture equivalent to 1–2 inches of rain per week. Water thoroughly until it drains freely, then allow the top layer to dry slightly.
- Avoid extremes: soggy soil causes rot; drought stresses plants and reduces tuber formation. In hot weather or windy balconies, you may need to water twice daily.
- Mulch the surface with straw, grass clippings, or shredded leaves to retain moisture and suppress weeds.
Fertilizing:
- Potatoes are moderate feeders. Use a balanced organic fertilizer low in nitrogen (high nitrogen promotes leaves over tubers).
- Options: Compost tea, fish emulsion, or potato-specific organic blends applied every 2–3 weeks during active growth.
- Side-dress with additional compost when hilling/layering.
Sunlight, temperature, and support:
- Full sun (6–8+ hours) is essential for strong tuber development.
- Protect from late frosts with row covers or by moving containers. In extreme heat (>85°F/29°C), provide afternoon shade or extra mulch.
- Tie or support foliage gently if plants become top-heavy in windy spots. Companion plants like radishes or marigolds can fit around the edges for pest deterrence and space efficiency.
Common Problems and Solutions for Container Potatoes
Even experienced growers encounter issues. Here’s a comprehensive troubleshooting section to build your confidence:
- Rotting tubers/seed pieces: Caused by overwatering or poor drainage. Solution: Ensure multiple drainage holes; use lighter, aerated mix; water only when top soil dries.
- Small or few tubers: Often due to insufficient hilling/layering, low potassium, overcrowding, or inconsistent moisture. Solution: Hill properly, fertilize correctly, and space plants adequately. Avoid high-nitrogen feeds.
- Pests (Colorado potato beetle, aphids): Hand-pick beetles and larvae; use neem oil or insecticidal soap for aphids. Companion planting helps.
- Diseases (late blight, common scab): Prevent with certified seed, good airflow, and avoiding overhead watering in humid conditions. Remove affected foliage promptly.
- Yellowing leaves or leggy growth: May indicate nutrient deficiency, overwatering, or insufficient light. Adjust care accordingly.
- Green potatoes: Light exposure — always keep tubers covered and use opaque containers.
Troubleshooting Quick Checklist:
- Drainage adequate?
- Watering consistent but not excessive?
- Sunlight sufficient?
- Fertilizer balanced?
- Variety suitable for container?
Monitor daily in the confined environment of small-space containers — early intervention prevents most losses.
Harvesting and Storing Your Homegrown Potatoes
Harvest timing depends on your goal. For tender “new” potatoes, dig gently when plants are still flowering (early varieties around 75–90 days). For mature storage potatoes, wait until foliage yellows and dies back naturally (90–120+ days).
Easy harvest method for containers:
- Stop watering a few days prior to ease handling.
- Tip the container onto a tarp or into a wheelbarrow and gently shake out the soil and tubers.
- Sort potatoes by size; brush off excess soil.
Yields vary but expect 8–12+ potatoes per seed piece with good care. Cure harvested potatoes in a dark, well-ventilated area at 50–60°F (10–15°C) for 1–2 weeks to toughen skins for storage.
Store in cool (40–50°F/4–10°C), dark, humid (but not wet) conditions — burlap sacks, cardboard boxes, or mesh bags work well. Avoid refrigeration, which converts starches to sugars and affects taste. Properly cured potatoes can last several months.
Use fresh “new” potatoes immediately for best flavor in salads or boiled dishes; mature ones suit baking and frying.
Advanced Tips and Maximizing Yields in Small Spaces
To elevate your container potatoes for small spaces from a modest harvest to a truly abundant one, incorporate these proven strategies drawn from extensive small-space gardening experience and successful urban growers.
Successive planting and season extension — Stagger plantings every 2–3 weeks in spring (and again in late summer for fall crops where climates allow). This provides a continuous supply of new potatoes. In warmer regions like Barishal or other parts of Bangladesh with hot, humid conditions, focus on early-maturing varieties and provide afternoon shade cloth or move containers to cooler spots during peak heat. Use frost blankets or bring pots indoors during unexpected cool snaps.
Alternative layering methods — While traditional hilling works well, many container gardeners achieve excellent results by starting with the container 2/3 full of soil mix, planting seed potatoes deeper (6–8 inches), and adding only light mulch or minimal top-ups as plants grow. This reduces labor while still encouraging tuber formation along stems. Some growers layer in multiple levels of seed pieces with fertilizer bands between them for stepped harvests in tall bags or buckets.
- Prioritize consistent moisture — the single biggest factor affecting tuber size and number. Inconsistent watering causes cracking or knobby potatoes; aim for deep, infrequent watering that reaches the bottom of the container.
- Boost potassium — Use organic sources like wood ash (sparingly), banana peels, or potato-specific fertilizers (look for higher K numbers, e.g., 5-10-10 or similar). Potassium supports tuber bulking.
- Ensure excellent aeration — Fabric grow bags naturally excel here, but add extra perlite to potting mixes in solid containers.
- Choose mid-to-late season varieties over super-early ones for containers. They continue setting tubers longer, often producing more overall weight even in limited space.
Realistic yield expectations with good care: A well-managed 15–20 gallon container can deliver 5–13+ pounds of potatoes. Smaller 5–10 gallon setups typically yield 2–5 pounds per plant. Factors like sunlight (aim for 6–8+ hours), temperature (ideal 60–75°F/15–24°C daytime), and balanced feeding make the biggest difference.
Sustainable and organic practices:
- Reuse soil after harvest by solarizing it (covering in black plastic in hot sun for weeks) or composting it thoroughly before replanting other crops. Refresh with new compost each season.
- Integrate companion planting: Grow quick-harvest radishes or lettuces on the soil surface early on, or edge with marigolds and nasturtiums for natural pest repulsion.
- Mulch heavily with straw or shredded leaves to conserve water, moderate soil temperature, and suppress weeds — especially valuable on windy balconies.
Cost breakdown for starting small:
- Seed potatoes: $10–20 for enough to fill several containers.
- Containers (grow bags or recycled buckets): Often under $5 each when reused.
- Soil mix: $15–30 initially per large container, but reusable elements reduce future costs. Long-term, homegrown potatoes easily pay for themselves through superior taste and reduced grocery bills.
These advanced techniques, refined through trial in compact urban and suburban settings, help overcome the limitations of small spaces and turn container potatoes into one of the most productive crops per square foot.Container Potatoes for Small Spaces
Frequently Asked Questions (FAQs)
Can I grow potatoes in 5-gallon buckets? Yes — one or two seed potatoes per 5-gallon bucket works well for beginners or very tight spaces. Expect smaller overall yields (often 2–4 pounds), but it’s an excellent way to test the method. Drill multiple drainage holes and use dark-colored buckets.
How many potatoes can one container produce? A single plant typically yields 8–20+ tubers, translating to 1–3+ pounds in smaller containers and up to 5–10+ pounds in larger 15–20 gallon setups under optimal care. Multiple plants per larger container multiply results accordingly.
Do container potatoes need full sun? They perform best with at least 6–8 hours of direct sunlight daily. Less light leads to leggy plants and reduced tuber production. In hot climates, morning sun plus afternoon shade prevents stress.
What if my potatoes turn green? Green skin indicates light exposure and solanine production (which is toxic in large amounts). Always keep tubers covered with soil or opaque containers. Discard or heavily peel any green potatoes; the rest of the plant is unaffected.
Can I reuse the soil or containers for next season? Yes, but refresh the mix by removing old roots and adding fresh compost. Solarize or heat-treat soil to reduce disease risk. Clean and store fabric bags folded; reuse solid pots after washing.
How often should I water potatoes in containers? Check daily — water when the top 1–2 inches of soil feels dry. Containers dry faster than garden beds, especially in heat or wind. Thorough watering until drainage occurs is key; avoid daily light sprinkles.
What’s the best fertilizer for container potatoes? Low-nitrogen, higher-potassium organic options like fish emulsion, compost tea, or balanced potato fertilizers applied every 2–3 weeks. Excess nitrogen produces lush leaves but few tubers.
Are grow bags better than pots or buckets? Grow bags often outperform solid containers due to superior aeration and root air-pruning, which reduces rot risk and promotes healthier plants. They’re also lightweight and portable — ideal for small spaces.
When is the best time to plant in tropical or subtropical areas? Plant during cooler months (after any risk of extreme heat or monsoon flooding). In regions with hot summers, aim for early spring or late fall plantings with heat-tolerant early varieties.
Can I grow potatoes indoors? Possible near south-facing windows or with strong grow lights providing 6–8+ hours equivalent sunlight. Choose compact varieties and ensure excellent drainage and airflow to prevent mold.
Conclusion
Container potatoes for small spaces prove that you don’t need a large garden to enjoy the satisfaction and flavor of homegrown potatoes. By following this detailed, step-by-step approach — from selecting the right determinate varieties like Yukon Gold, Red Norland, or fingerlings, to choosing breathable grow bags or modified buckets, preparing a light well-draining soil mix, proper chitting and planting, consistent watering and feeding, and smart hilling or layering — even beginners can achieve rewarding harvests on balconies, patios, or tiny courtyards.
The keys to success are consistent moisture without sogginess, adequate sunlight, balanced nutrition, and preventing light from reaching developing tubers. With these practices, you’ll not only solve the challenge of limited space but also gain fresher, tastier potatoes while reducing reliance on store-bought produce.
Start small this season with one or two containers, observe what works in your specific microclimate, and scale up as confidence grows. Gardening in containers builds resilience, teaches valuable lessons about plant needs, and delivers the unmatched joy of harvesting your own food.
Try this guide and share your results in the comments — which variety performed best for you? What container type gave the highest yields? For more practical agricultural tips and small-space vegetable growing strategies, explore our other guides on container gardening, organic pest control, and soil health.