You’ve spent weeks carefully sowing seeds, tending to tiny sprouts under grow lights, and watching your future garden take shape in those delicate seed trays. Then one gusty afternoon — or an unexpected downpour, curious pet, or scavenging bird — turns your careful work into scattered soil, toppled trays, and stressed or broken seedlings.Protecting Seed Trays from Wind and Other Chaos
Protecting seed trays from wind and other chaos is one of the most overlooked yet critical steps in successful seed starting. Wind doesn’t just annoy; it rapidly dries out soil, physically damages tender stems, disrupts developing roots, and creates major setbacks that force you to restart. Combined with heavy rain, animals, pets, or temperature swings, this “chaos” can destroy germination rates and leave you with weak transplants that struggle in the garden.
As an agricultural expert with years of hands-on experience helping home gardeners, small-scale farmers, and seedling enthusiasts across varying climates, I’ve seen countless successes — and avoidable failures — at this vulnerable stage. Proper protection creates a stable microclimate that retains moisture, reduces mechanical stress, and promotes sturdy growth, leading to healthier plants with better root systems and higher survival rates once transplanted.
In this comprehensive guide, you’ll discover practical, field-tested strategies to shield your seed trays from wind and other common disruptions. Whether you’re starting tomatoes on a windy balcony, vegetables on a porch, or flowers in an exposed backyard, these methods will help you achieve stronger seedlings with less frustration and waste. We’ll cover the science behind the threats, site assessment, DIY and commercial solutions, hardening-off techniques that actually work, and troubleshooting tips. By the end, you’ll have the knowledge and confidence to protect your investment and enjoy a more productive growing season.
Why Protecting Seed Trays Matters: The Science and Impact of Wind and Chaos
Wind is a silent killer for young seedlings. Even moderate breezes (above 10-15 mph) increase transpiration — the loss of water through leaves and soil surfaces — causing rapid drying that stresses or kills delicate sprouts. Stronger gusts cause “wind rocking,” where constant movement loosens soil around roots, damages fine root hairs, and weakens stem development. In extreme cases, wind can blast soil particles, abrading tender tissues or burying seedlings entirely.
Studies and practical observations show that unprotected seedlings often develop thinner, leggier stems because they don’t receive the gentle mechanical stimulation that builds strength. However, excessive wind skips the beneficial stage and goes straight to damage: cuticular abrasion, increased disease susceptibility (like damping-off), and reduced photosynthesis from soil loss or leaf damage.
Other forms of “chaos” compound these issues:
- Heavy rain: Washes seeds out of cells, compacts soil, or causes waterlogging that promotes fungal problems.
- Animals and birds: Scratch or peck at trays, dislodging seeds or eating sprouts.
- Pets and children: Accidental tipping or trampling.
- Temperature swings: Wind amplifies cold or heat stress during the transition from indoors to outdoors.
The result? Lower germination rates, delayed planting schedules, wasted seeds and time, and ultimately poorer harvests. On the positive side, effective seed tray protection builds resilience. Protected seedlings develop thicker stems, better root-to-shoot ratios, and improved ability to handle outdoor conditions. This leads to stronger transplants that establish faster in the garden, resist pests and diseases better, and produce higher yields.
From my experience working with growers in windy regions (including coastal and open plain areas), investing just a little effort in protection can boost seedling success by 30-50% or more, depending on local conditions. It’s not about coddling plants — it’s about giving them the stable start they need to thrive.
Assessing Your Setup: Common Vulnerabilities and Site Selection
Before implementing any protection, evaluate your current setup. Many failures stem from poor initial placement rather than lack of covers.
Key risk factors include:
- Exposed locations like open porches, balconies, or south-facing areas without barriers.
- High-wind zones (check average wind speeds in your area; anything consistently over 10 mph during spring is problematic).
- Uneven or slippery surfaces that allow trays to slide or tip.
- Proximity to pets, children, wildlife, or traffic.
- Lack of natural windbreaks or drainage issues that lead to standing water.
Best practices for site selection:
- Choose a sheltered spot: Against a south- or east-facing wall, fence, or building that blocks prevailing winds while allowing morning sun.
- Use natural barriers when possible: Position near hedges, dense shrubs, or existing structures. Permeable barriers (like lattice or slatted fences) are often better than solid walls because they reduce turbulence rather than creating eddies.
- Elevate wisely: Use sturdy benches or tables, but ensure they’re stable and allow good airflow underneath to prevent mold.
- Consider microclimates: In hot climates, add afternoon shade; in cooler areas, maximize light while minimizing wind.
Quick Location Audit Checklist:
- Observe wind patterns over a few days — note direction and strength at seedling height.
- Check for drainage: Trays should never sit in puddles.
- Assess accessibility: Can you easily monitor and adjust protection daily?
- Evaluate light: Seedlings need 12-16 hours of good light; protection shouldn’t block too much.
- Factor in wildlife: Are birds, cats, dogs, or rodents active nearby?
If your space is highly exposed (common on balconies or in open rural yards), plan for more robust, multi-layered protection from the start. In my work with urban gardeners, simply moving trays to a more sheltered corner often halves wind-related losses before any covers are added.
Essential Tools and Materials for Seed Tray Protection
You don’t need expensive equipment to protect seed trays effectively. Many solutions use recycled or low-cost household items, while others involve affordable garden supplies.
Basic Must-Haves:
- Weighted bases or trays (to prevent tipping).
- Anchoring materials: Bricks, rocks, sandbags, or bungee cords.
- Covers: Clear plastic humidity domes (for early stages), floating row covers, garden fleece, or shade cloth (30-70% density).
- Barriers: Cardboard, milk jugs, plastic storage bins, hardware cloth, or netting.
- Stakes and frames: Bamboo, tomato cages, or PVC for building mini structures.
- Mulch or bottom-watering trays to maintain soil moisture without surface disturbance.
Budget vs. Premium Options (Pros/Cons Table):
| Option | Cost Level | Pros | Cons | Best For |
|---|---|---|---|---|
| Recycled cardboard boxes/milk jugs | Very Low | Free, easy, good light transmission | Temporary, can degrade in rain | Short-term porch use |
| Floating row cover/fleece | Low | Lightweight, breathable, multi-threat protection | Needs securing; can reduce light slightly | Wind + light frost |
| Clear plastic cloches or bins | Low-Medium | Excellent wind/rain block, reusable | Risk of overheating; needs ventilation | Early hardening off |
| Shade cloth on frames | Medium | Adjustable light/wind control, durable | Requires setup | Balconies or exposed areas |
| Mini hoop house/cold frame | Medium-High | Semi-permanent, excellent control | Higher initial cost, space needed | Serious growers |
| Commercial weighted seed tray kits | High | Designed specifically, very stable | More expensive | Convenience seekers |
Choose materials based on your climate and scale. For example, in rainy or monsoon-prone areas (relevant for many regions including parts of South Asia), prioritize breathable yet water-resistant options to avoid mold while blocking downpours.
Proven Methods to Protect Seed Trays from Wind and Chaos
This is the heart of effective seed tray protection. Here are detailed, step-by-step approaches proven through real-world gardening and extension service recommendations.
Temporary DIY Windbreaks and Shields
Simple and effective for most home setups:
- Cardboard Box Method: Place seed trays inside open-top cardboard boxes (cut flaps for light/air). Position the box opening away from prevailing wind. Weight the bottom with bricks. This creates a sheltered “room” while allowing sun. Close partially at night or during storms. Many gardeners report excellent results on windy porches using this free technique.
- Milk Jug or Plastic Bottle Cloches: Cut the bottom off clean 1- or 2-liter bottles. Place over individual cells or small groups (push a stake through the lid for stability if needed). Great for single trays or targeted protection. Ventilate by removing caps on warm days.
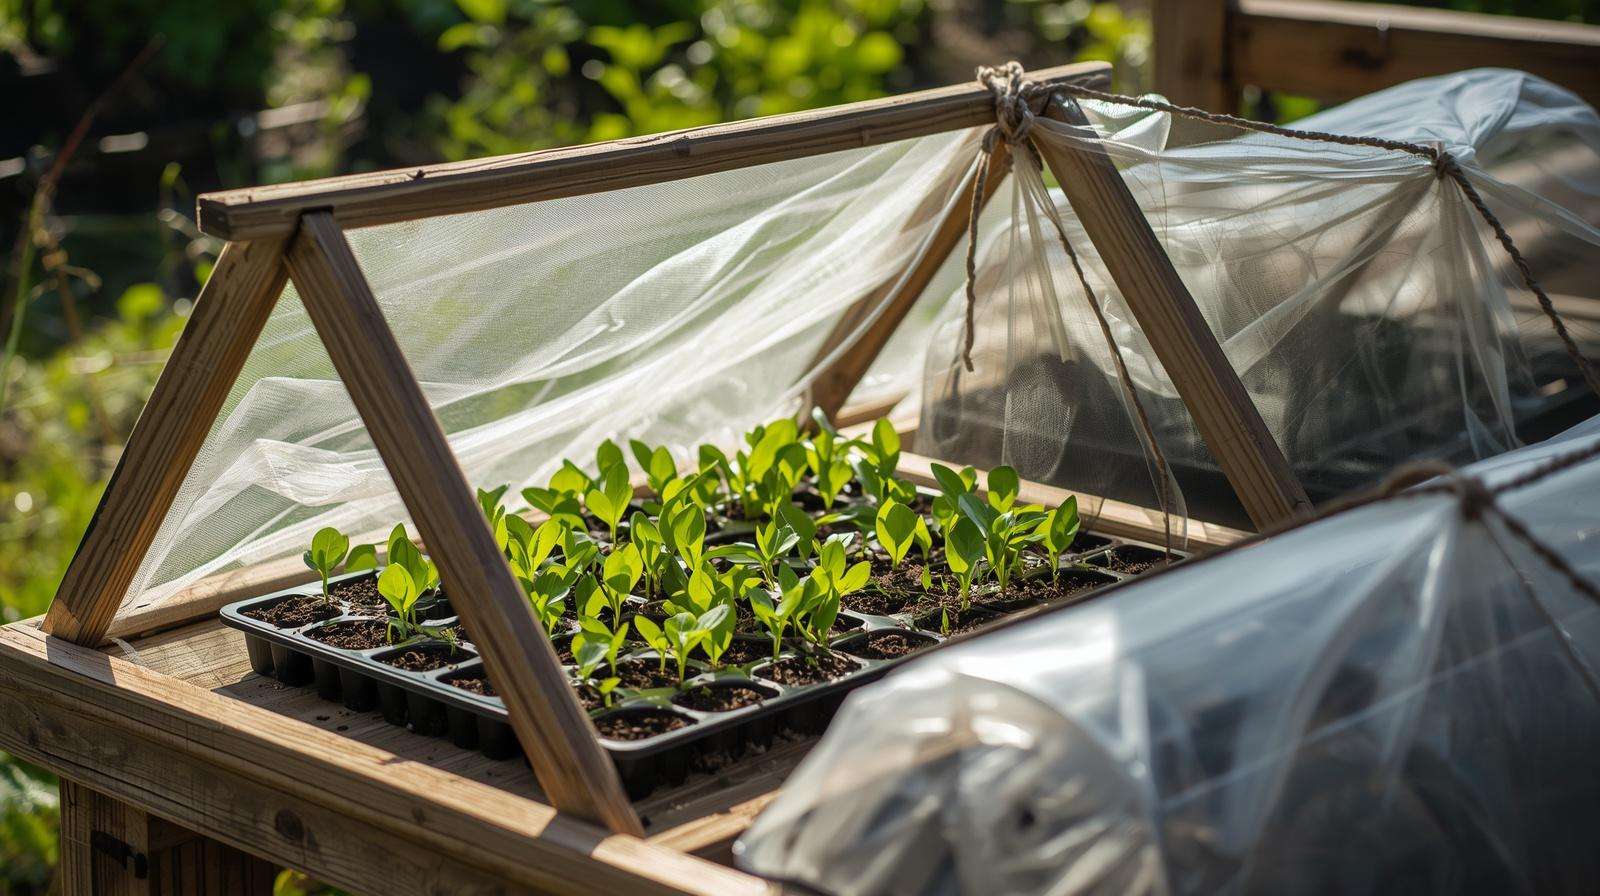
- Stake-and-Fabric Windbreaks: Drive bamboo or rebar stakes around your tray area. Wrap with burlap, shade cloth, or even old bedsheets. Secure with zip ties or bungee cords. Permeable fabrics work best to diffuse wind without creating strong downdrafts.
- Weighted Anchoring: Place trays inside a larger, heavier plastic storage bin or laundry basket filled with a layer of sand or gravel at the base. Group multiple trays together — mass adds stability.
These DIY options are highly cost-effective and can be assembled in minutes.
Covers and Cloches for Multi-Threat Protection
For combined wind, rain, and pest defense:
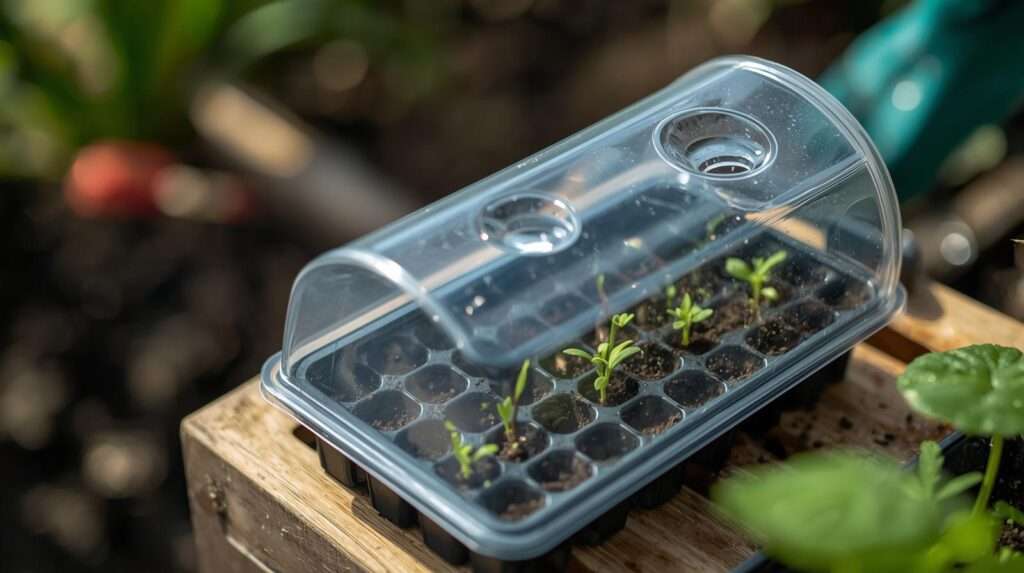
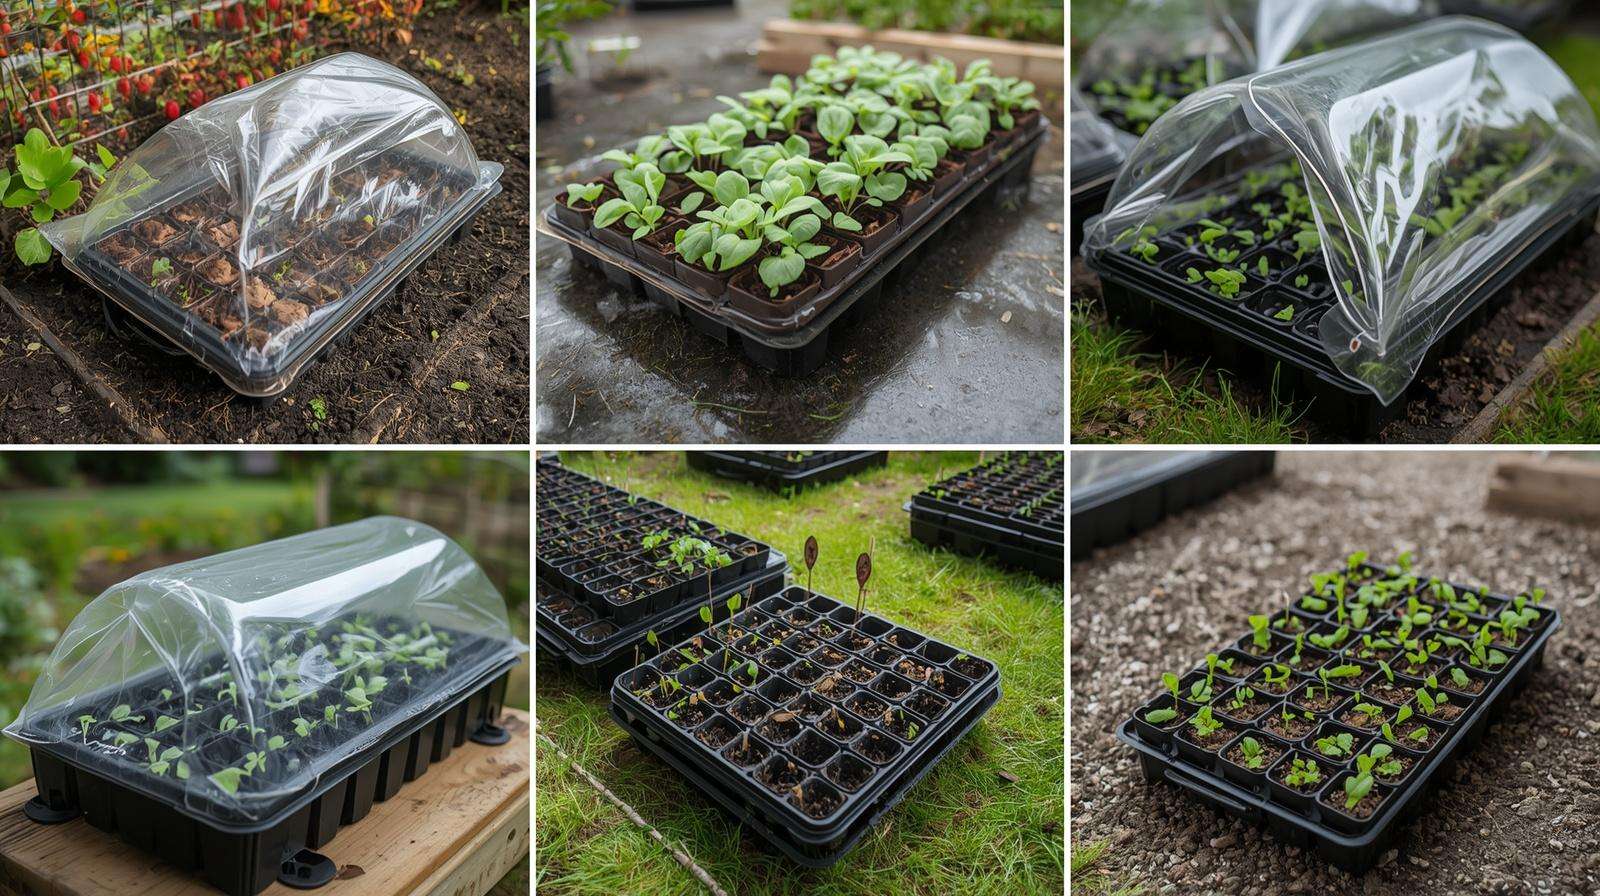
- Humidity Domes: Use the clear plastic lids that come with many seed trays initially for germination. Remove once sprouts emerge to prevent mold, then replace with lighter covers as needed.
- Floating Row Covers or Garden Fleece: Drape loosely over trays and secure edges with weights or pins. These allow light and air while blocking wind and some insects. Ideal during hardening off.
- Hardware Cloth or Netting: For bird/animal protection, place a frame over trays and cover with 1/4-inch hardware cloth. This also helps with light rain.
- Custom Frames with Plastic: Build a simple rectangle from PVC or wood, cover with clear plastic sheeting. Ventilate sides on sunny days to avoid cooking your seedlings.
Always monitor temperatures under covers — aim to keep below 85°F (29°C) to prevent stress or bolting in crops like lettuce or brassicas.
Strategic Placement and Anchoring Techniques
- Group trays tightly and place against a solid barrier (wall or fence) on the windward side.
- Use under-bed storage containers or crates turned on their sides for added walls.
- Elevate on stable surfaces but add non-slip mats or weights.
- Apply a thin layer of mulch or vermiculite on soil surfaces to reduce erosion from any residual wind or watering splash.
Bottom watering (placing trays in a shallow water-filled pan) is highly recommended — it keeps soil surface drier and less prone to blowout while encouraging deeper roots.
Advanced or Semi-Permanent Solutions
For dedicated growers:
- Mini Hoop Houses or Low Tunnels: Bend PVC pipes over trays and cover with row cover or plastic. These scale well for multiple trays and offer excellent wind/rain protection.
- Portable Cold Frames: Repurpose old windows or build simple wooden frames with hinged lids. Perfect for consistent hardening off in variable spring weather.
- Long-Term Windbreaks: Plant dense, low hedges (e.g., arborvitae or native shrubs) or install slatted fencing upwind of your starting area. These create protected zones for years.
In windy climates, combining a permanent barrier with temporary covers gives the best results.
Hardening Off Seedlings While Protecting Them
Hardening off — gradually exposing seedlings to outdoor conditions — is essential but risky without wind protection. Gentle breezes strengthen stems via auxin hormone response, but strong winds can snap them.
Recommended 7-14 Day Schedule (adjust for your weather):
- Days 1-2: 1-2 hours in a fully protected, shady spot on a calm day.
- Days 3-5: Increase to 3-5 hours, introducing dappled light with light windbreaks.
- Days 6-8: Full morning sun with protection from afternoon gusts; use row cover if windy.
- Days 9+: Gradually remove protection while monitoring for wilting or burning.
Always bring trays indoors or fully cover during forecasts of strong winds, heavy rain, or frost. Combine protection with monitoring: Water well before exposure and check soil moisture frequently. Shade cloth (starting at 70% and reducing) helps transition light levels safely.
Common mistake: Rushing hardening off on windy days. Better to wait for calmer weather or use robust covers.
Protecting Against Other Common Chaos Factors
Wind rarely acts alone. Integrated strategies address multiple threats:
- Heavy Rain and Flooding: Use raised benches, sloped covers, or storage bins with drainage holes. Row covers or cloches divert water effectively.
- Pests, Birds, and Animals: Hardware cloth, netting, or stacked trays (bottom inverted as a “roof”) deter digging and pecking.
- Pets and Children: Elevated locations or enclosed mini-greenhouses work best. Teach family members or use physical barriers.
- Temperature Extremes: Wind amplifies cold desiccation in winter/spring or heat stress in summer. Fleece adds insulation; shade cloth reduces heat.
Many wind-protection methods (like cloches or row covers) naturally handle these overlapping issues, making your setup more efficient.
Maintenance, Monitoring, and When to Remove Protection
Daily checks are crucial during the seedling stage:
- Feel soil moisture — water from the bottom if dry.
- Ensure ventilation to prevent fungal growth or overheating.
- Look for signs of stress: Wilting, yellowing, or legginess.
- Adjust covers based on weather forecasts.
Remove protection gradually once seedlings have 2-4 true leaves and stems feel sturdy (they should resist gentle finger pressure without flopping). Full outdoor readiness usually takes 7-14 days of hardening off. Signs they’re ready: Thick stems, vibrant color, and ability to stand upright in light breeze.
Expert Tips and Common Mistakes to Avoid
Pro Tips:
- Prefer permeable barriers over solid ones to minimize turbulence.
- Combine bottom watering with surface mulch for erosion control.
- Use weather apps to plan protection — don’t rely on memory.
- Label trays clearly and keep records of varieties and dates for better future planning.
- In very windy areas, start extra seeds as insurance.
Top Mistakes:
- Over-protecting: Constant full enclosure leads to weak, spindly plants susceptible to disease.
- Poor anchoring: Trays tip despite covers.
- Ignoring ventilation: Causes damping-off or heat damage.
- Starting hardening off on a windy day without backup protection.
- Using non-breathable materials too long.
- Placing trays in low spots where water pools.
Avoid these, and your success rate will improve dramatically.
Frequently Asked Questions (FAQs)
How strong does wind need to be before protecting seed trays? Any consistent breeze over 10 mph, or gusts that visibly move trays/soil, warrants protection. Err on the side of caution with young seedlings.
Can I use plastic wrap or bags to shield trays from wind? Temporarily yes, but ventilate well and remove quickly to avoid overheating and condensation issues. Better alternatives like row covers exist for longer use.
What’s the best way to protect seed trays on a windy balcony or porch? Use the cardboard box or storage bin method combined with weighted bases and row cover. Position against the building wall for natural shelter.
How do I prevent animals from disturbing covered trays? Add hardware cloth or netting over covers. Elevate trays or use enclosed frames.
Should I bring trays indoors during strong winds? Yes, if winds exceed 20-25 mph or if other protection isn’t sufficient. Consistency matters more than perfect outdoor exposure early on.
What materials work best for reusable wind protection? Shade cloth, garden fleece, and clear plastic on reusable frames offer durability and versatility.
How does wind protection affect hardening off? It allows controlled exposure. Use it to introduce gentle movement while blocking damaging gusts, resulting in stronger plants overall.
Additional FAQs can cover regional concerns, specific crops (e.g., tomatoes vs. lettuce), or cost-saving ideas.
Grow with Confidence
Protecting seed trays from wind and other chaos doesn’t have to be complicated or expensive. With the right assessment, simple DIY methods, strategic covers, and mindful hardening off, you can turn vulnerability into strength — producing robust seedlings ready for a successful garden.
The key is proactive planning and daily observation. Small investments in protection pay off with healthier plants, fewer restarts, and greater satisfaction from your efforts.
This season, implement at least one or two techniques from this guide. Track what works in your specific conditions, and you’ll refine your process year after year.
If you have questions or success stories with these methods, feel free to share in the comments below. For more agricultural tips and guidelines, explore our other articles on seed starting mixes, common seedling problems, and transplanting best practices. Subscribe for regular updates tailored to practical growing in real-world conditions.
Happy seeding — may your trays stay stable and your seedlings thrive!