Picture this: fresh basil, vibrant cherry tomatoes, and crisp lettuce growing right outside your apartment window, even in the dead of winter. Sounds like a dream? With an Attached Window Mounted Greenhouse, this vision becomes reality for urban gardeners. These compact, innovative structures transform small spaces into thriving gardens, offering a sustainable solution for city dwellers craving homegrown produce. Whether you’re in a cramped studio or a high-rise condo, a window-mounted greenhouse lets you grow year-round, no backyard required. In this guide, we’ll explore how these mini-greenhouses work, why they’re perfect for urban gardening, and how to set one up for maximum yield. Backed by expert insights and real-world examples, this article will empower you to turn your window into a flourishing urban oasis.
What Is an Attached Window Mounted Greenhouse?

Definition and Core Features
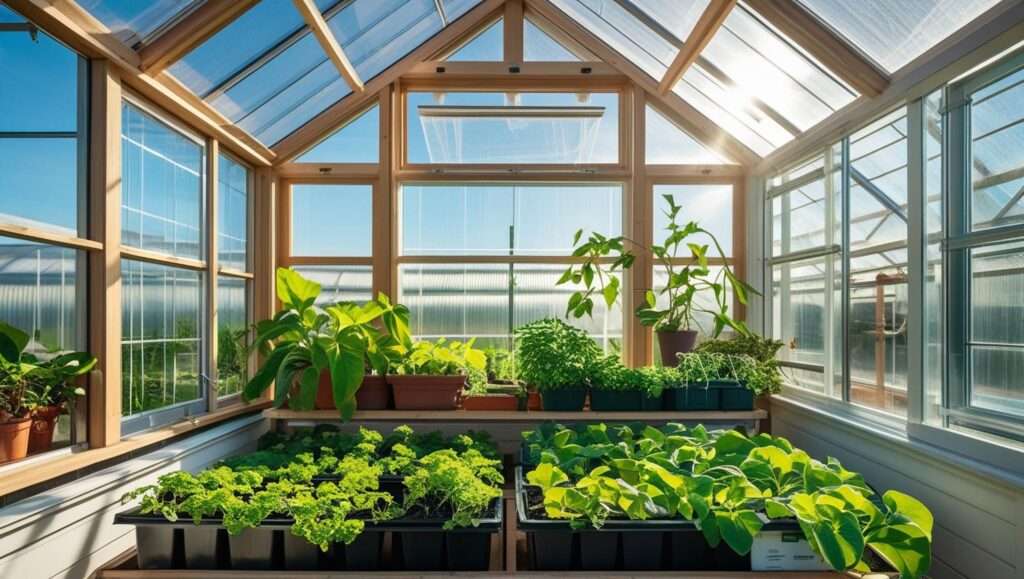
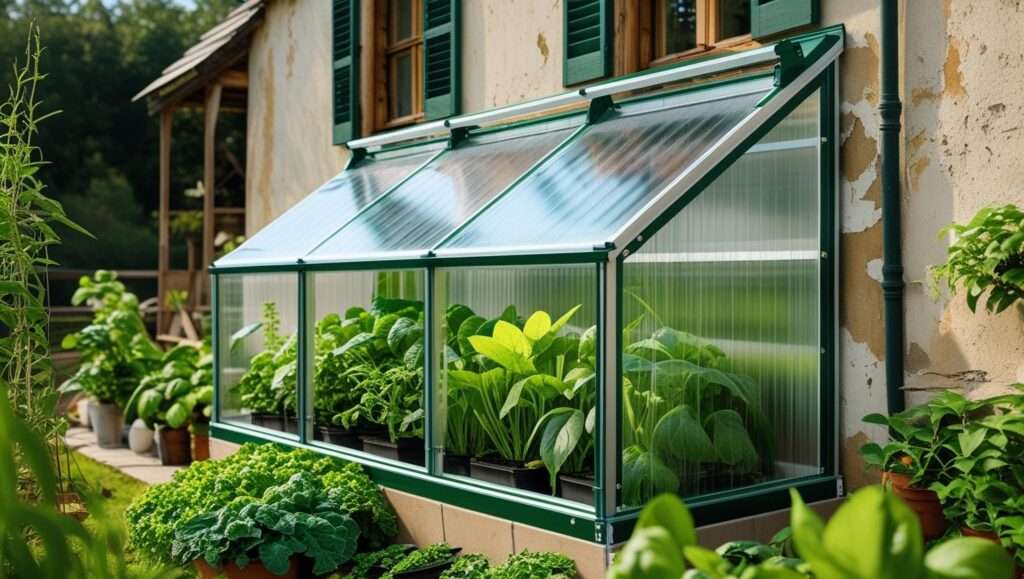
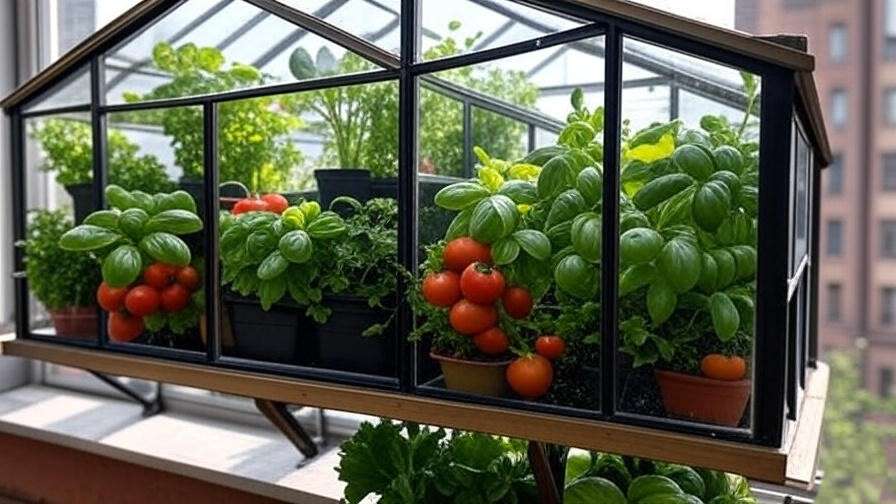
An attached window mounted greenhouse is a compact, transparent structure designed to attach directly to a window frame, utilizing natural sunlight to create a controlled growing environment. Typically made from durable materials like polycarbonate or tempered glass, these units feature adjustable shelves, ventilation systems, and weather-resistant seals. They’re engineered to fit snugly against windows, making them ideal for apartments, condos, or small homes where space is at a premium.
Key benefits include:
- Space Efficiency: Fits windows as small as 2×2 feet, perfect for urban settings.
- Accessibility: Allows easy access to plants without leaving your home.
- Year-Round Growing: Extends the growing season by protecting plants from harsh weather.
According to Dr. Sarah Thompson, an urban agriculture specialist at Cornell University, “Window-mounted greenhouses are a game-changer for city dwellers, offering a practical way to grow fresh produce in spaces previously thought unusable.”
How It Differs from Traditional Greenhouses
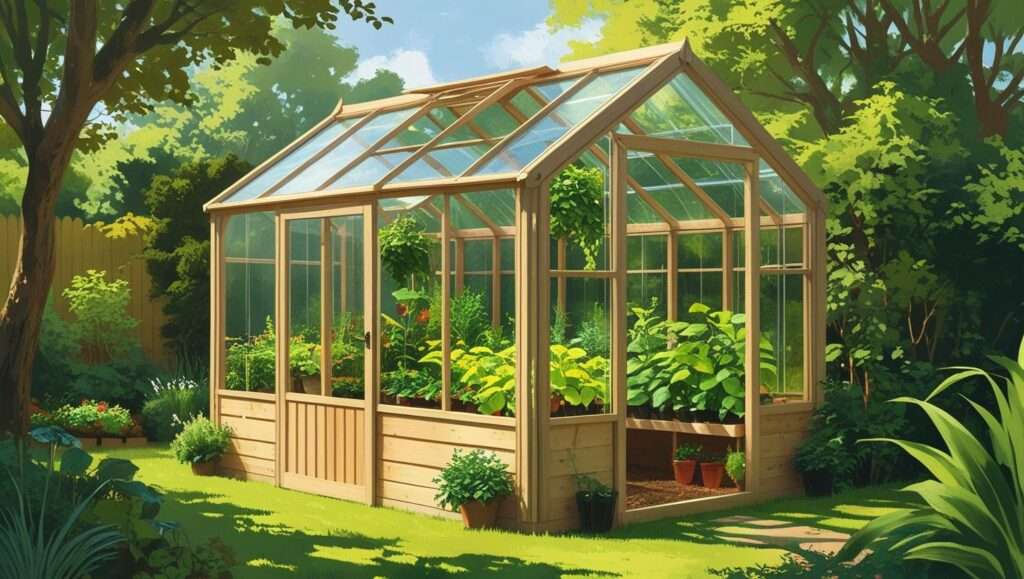
Unlike traditional standalone greenhouses, which require significant space and investment, window-mounted greenhouses are compact and affordable. Traditional greenhouses are often free-standing structures in backyards or farms, built with heavy-duty frames and large glass panels. In contrast, window-mounted models are lightweight, designed for easy installation, and tailored for small-scale urban gardening. They don’t require a dedicated outdoor area, making them renter-friendly and ideal for high-rise living.
While traditional greenhouses can support larger crops like melons or corn, window greenhouses excel for herbs, microgreens, and small vegetables. Their portability and ease of setup also make them a favorite among beginners and seasoned gardeners alike.
Why Choose an Attached Window Mounted Greenhouse for Urban Gardening?
Solving Space Constraints
Urban living often means sacrificing garden space, but an attached window mounted greenhouse overcomes this hurdle. These units maximize vertical space, turning a single window into a productive growing area. For example, Maria Gonzalez, a New York City renter, transformed her 2×3-foot kitchen window into a thriving herb garden using a window-mounted greenhouse. “I used to think gardening was impossible in my tiny apartment,” she says. “Now I have fresh basil and cilantro year-round!”
These greenhouses are perfect for:
- Small apartments with limited floor space.
- Renters who can’t modify outdoor areas.
- Urbanites seeking sustainable, homegrown food sources.
Year-Round Gardening Benefits
One of the biggest advantages of a window-mounted greenhouse is its ability to extend the growing season. By creating a controlled microclimate, these structures protect plants from frost, wind, and extreme temperatures. This means you can grow crops like spinach, kale, or microgreens even in winter. According to a 2024 study by the Urban Farming Institute, window greenhouses can increase annual crop yields by up to 40% in urban settings compared to seasonal outdoor gardening.
Environmental and Health Advantages
Window-mounted greenhouses promote sustainability by reducing reliance on store-bought produce, which often travels thousands of miles. Growing your own food cuts your carbon footprint and ensures fresher, pesticide-free harvests. Additionally, gardening has proven mental health benefits. A 2023 study published in The Journal of Environmental Psychology found that urban gardening reduces stress and improves mood by 25% in participants.
Tip Box: Top 5 Crops for Your Window Greenhouse
- Basil: Thrives in warm, sunny conditions.
- Microgreens: Fast-growing, nutrient-packed, and space-efficient.
- Lettuce: Ideal for cool seasons, easy to maintain.
- Cherry Tomatoes: Compact varieties fit small spaces.
- Spinach: Hardy and perfect for year-round growth.
How to Choose the Right Attached Window Mounted Greenhouse
Key Factors to Consider
Selecting the right greenhouse depends on your window size, climate, and gardening goals. Here are key factors to evaluate:
- Size and Compatibility: Measure your window frame to ensure a snug fit. Most models range from 2×2 to 4×3 feet.
- Material Durability: Polycarbonate panels are lightweight and shatter-resistant, while tempered glass offers clarity but is heavier.
- Ventilation: Look for adjustable vents or fans to regulate temperature and humidity.
- Ease of Installation: Choose models with clear instructions and minimal tools required.
Top Models on the Market
- Gardman Window Greenhouse: Compact, polycarbonate, $120–$150. Pros: Easy to install, durable. Cons: Limited shelf space.
- Palram Hybrid Window Greenhouse: Glass and aluminum, $250–$300. Pros: Sleek design, excellent insulation. Cons: Higher cost.
- DIY Window Greenhouse Kit by GrowEasy: Customizable, $80–$100. Pros: Budget-friendly, renter-compatible. Cons: Requires assembly time.
User reviews highlight the Gardman model for its affordability and the Palram for its premium build. Always check weight limits to ensure your window frame can support the unit.
Budget vs. Premium Options
Budget options like DIY kits start at $50–$100 and are great for beginners. Premium models, priced at $200–$400, offer advanced features like automated ventilation or UV-resistant panels. For urban gardeners, a mid-range option ($100–$200) often balances cost and functionality. Purchase from reputable retailers like Amazon, Home Depot, or specialty stores like Urban Garden Supply.
Expert Insight: Horticulturist Dr. James Lee advises, “In colder climates, prioritize greenhouses with double-walled panels for better insulation. In warmer regions, focus on ventilation to prevent overheating.”
Step-by-Step Guide to Installing Your Window Mounted Greenhouse

Pre-Installation Checklist
Before installing, assess:
- Window Size: Measure width, height, and depth of the window frame.
- Sunlight Exposure: South-facing windows are ideal for maximum light (6–8 hours daily).
- Structural Support: Ensure the frame can hold 20–50 pounds, depending on the model.
- Tools Needed: Screwdriver, level, sealant, and mounting brackets (often included).
Installation Process
- Measure and Mark: Outline the greenhouse’s position on the window frame.
- Attach Brackets: Secure mounting brackets with screws, ensuring they’re level.
- Install the Greenhouse: Slide or clip the greenhouse onto the brackets.
- Seal Edges: Apply weatherproof sealant to prevent leaks.
- Test Stability: Gently shake the unit to confirm it’s secure.
For renters, use suction-cup mounts or temporary brackets to avoid permanent changes. Always follow the manufacturer’s instructions for safety.
Common Installation Mistakes to Avoid
- Poor Sealing: Leads to water leaks or drafts. Use silicone sealant for a tight fit.
- Overloading: Exceeding the window frame’s weight capacity can cause damage. Check specifications.
- Misalignment: Uneven installation reduces stability. Use a level during setup.
Visual Aid: A diagram showing bracket placement and sealing techniques will be included in the final article for clarity.
Optimizing Your Window Greenhouse for Maximum Yield

Choosing the Right Plants
Selecting crops suited for an attached window mounted greenhouse is critical for success. The limited space and controlled environment favor compact, fast-growing plants. Ideal choices include:
- Herbs: Basil, cilantro, and parsley thrive in small spaces and require minimal maintenance.
- Microgreens: Arugula, radish, and pea shoots grow quickly (7–14 days) and are nutrient-dense.
- Small Vegetables: Cherry tomatoes (e.g., Tiny Tim variety) and dwarf lettuce varieties like Tom Thumb fit perfectly.
- Leafy Greens: Spinach and kale tolerate cooler temperatures and produce consistent harvests.
Companion planting can maximize space. For example, pair basil with tomatoes to enhance flavor and deter pests naturally. Avoid large crops like pumpkins or sprawling plants like cucumbers, as they overwhelm small greenhouses.
Managing Light and Temperature
Light and temperature are the backbone of a thriving window greenhouse. Most plants need 6–8 hours of direct sunlight daily, making south-facing windows ideal in the Northern Hemisphere. If your window receives less light, especially in winter, supplement with LED grow lights. A full-spectrum grow light (20–40 watts) costs $20–$50 and can boost growth significantly.
Temperature control is equally important. Aim for 65–75°F for most crops, with slight variations (e.g., lettuce prefers 60–70°F). Use these strategies:
- Ventilation: Open vents or use a small USB-powered fan ($10–$15) to circulate air and prevent overheating.
- Heating Mats: In colder climates, a seedling heat mat ($15–$30) maintains soil warmth.
- Monitoring: A digital thermometer/hygrometer ($10) helps track conditions.
Soil, Watering, and Nutrients
Soil quality directly impacts plant health. Use a lightweight, well-draining potting mix designed for containers, such as a blend of peat moss, perlite, and compost. Avoid garden soil, which compacts and harbors pests.
Watering requires precision in small spaces. Overwatering is a common mistake, so check soil moisture before watering. Use a spray bottle or small watering can to apply water gently, aiming for moist but not soggy soil. A weekly schedule (e.g., 2–3 times for herbs, daily for microgreens) works for most plants.
For nutrients, apply an organic liquid fertilizer (e.g., fish emulsion or seaweed extract) every 2–3 weeks. Dilute to half-strength to avoid nutrient burn in confined spaces.
Tip Box: Weekly Maintenance Checklist
- Check soil moisture and water as needed.
- Inspect plants for pests or yellowing leaves.
- Clean greenhouse panels for maximum light penetration.
- Rotate pots to ensure even light exposure.
- Monitor temperature and adjust vents or heaters.
Real-World Success Stories

Urban Gardeners Share Their Experiences
Window-mounted greenhouses are transforming urban gardening, as evidenced by real users. In Chicago, renter Emily Chen installed a Palram window greenhouse in her studio apartment. “I grow salad greens year-round,” she says. “It’s saved me $50 a month on groceries and feels so rewarding.” Her setup includes lettuce, arugula, and microgreens, harvested weekly.
In Seattle, couple Liam and Ava Patel turned their window greenhouse into a small herb business. Using a Gardman model, they cultivate basil, mint, and oregano, selling bundles at local farmers’ markets. “It started as a hobby,” Liam notes, “but now it’s a side hustle that pays for itself.”
Lessons Learned from Real Users
Common challenges include pest control and condensation. Emily dealt with aphids by introducing ladybugs, a natural predator, while Ava recommends silica gel packets to reduce humidity. Both emphasize regular cleaning to prevent mold and ensure clear panels for sunlight.
Their advice for beginners:
- Start with easy crops like microgreens to build confidence.
- Invest in a small fan for air circulation.
- Keep a journal to track plant growth and adjust care routines.
Expert Insight: Maria Lopez, a community garden leader in Los Angeles, says, “Window greenhouses democratize gardening. They empower urbanites to grow food sustainably, fostering community resilience.”
Troubleshooting Common Issues with Window Mounted Greenhouses
Managing Pests and Diseases
Pests like aphids, spider mites, and whiteflies can invade small greenhouses. Organic solutions include:
- Neem Oil: Dilute and spray weekly to deter pests ($10 for a 16-oz bottle).
- Sticky Traps: Place yellow sticky traps ($5 for 10) to catch flying insects.
- Manual Removal: Wipe leaves with a damp cloth to remove early infestations.
Mold and mildew thrive in humid environments. Prevent them by:
- Ensuring proper ventilation with open vents or fans.
- Avoiding overwatering and using well-draining soil.
- Cleaning panels with a vinegar-water solution monthly.
Addressing Temperature Fluctuations
Extreme temperatures can stress plants. Overheating (above 85°F) causes wilting, while cold snaps (below 50°F) slow growth. Solutions include:
- Shade Cloths: Reduce heat in summer ($10 for a 3×3-foot cloth).
- Insulation: Add bubble wrap or thermal curtains in winter.
- Monitoring Tools: A $15 digital thermometer alerts you to sudden changes.
Structural and Maintenance Challenges
Leaks or loose fittings can compromise your greenhouse. Check seals monthly and reapply silicone sealant as needed. Clean panels with a mild soap solution to maintain clarity, avoiding abrasive materials that scratch polycarbonate or glass. If brackets loosen, tighten screws or replace them with heavier-duty ones.
The Future of Urban Gardening with Window Greenhouses

Trends in Urban Agriculture
Window-mounted greenhouses are part of a broader urban farming movement. According to a 2025 report by the National Urban Agriculture Initiative, compact gardening solutions have grown 30% in popularity since 2020. Innovations like smart sensors for moisture and temperature monitoring are making these greenhouses even more user-friendly. Automated watering systems, starting at $30, are also gaining traction for busy urbanites.
Sustainability and Community Impact
Window greenhouses contribute to food security by enabling local production. A single unit can yield 5–10 pounds of produce annually, reducing reliance on industrial agriculture. They also inspire community initiatives, like urban gardening co-ops where neighbors share greenhouse tips and seeds.
Expert Insight: Urban planner Dr. Rachel Kim notes, “Integrating window greenhouses into building designs could revolutionize city planning, creating greener, more self-sufficient urban ecosystems.”
FAQs About Attached Window Mounted Greenhouses
Can I install a window greenhouse in a rented apartment?
Yes, many models use suction cups or temporary brackets, making them renter-friendly. Check with your landlord and ensure the window frame can support the weight.
What plants grow best in a window-mounted greenhouse?
Herbs (basil, cilantro), microgreens, lettuce, and small tomatoes thrive due to their compact size and adaptability to controlled environments.
How much does a window greenhouse cost?
Prices range from $50 for DIY kits to $400 for premium models. Mid-range options ($100–$200) offer the best value for most urban gardeners.
Do I need grow lights for a window greenhouse?
If your window gets less than 6 hours of sunlight daily, a full-spectrum LED grow light ($20–$50) is recommended, especially in winter.
How do I prevent condensation and mold?
Use ventilation fans, silica gel packets, and proper watering techniques. Clean panels regularly to maintain air quality.
Conclusion
An attached window mounted greenhouse is more than a gardening tool—it’s a gateway to sustainable, year-round urban farming. By transforming small spaces into productive gardens, these compact units empower city dwellers to grow fresh, healthy food while reducing their environmental impact. From choosing the right model to optimizing plant care, this guide has equipped you with the knowledge to start your urban gardening journey. Whether you’re a beginner or a seasoned grower, a window greenhouse can turn your home into a thriving oasis. Start today—pick a model, install it, and watch your harvests flourish