Picture this: It’s your first spring as a gardener. You dig into your backyard soil full of excitement, plant your seeds or seedlings, water diligently—and weeks later, you’re staring at stunted plants, drowned roots, or a jungle of weeds that took over faster than your crops could grow. Sound familiar? If you’re new to gardening, poor native soil, bad drainage, persistent weeds, and constant bending over can turn that dream of fresh home-grown vegetables into frustration.
The good news? Beginner raised beds are the perfect solution—and often the smartest way to start gardening. Raised garden beds give you complete control over your growing environment, leading to healthier plants, bigger harvests, and far less work. In fact, studies from university extension programs show that raised beds can produce up to four times more vegetables per square foot than traditional in-ground rows.
In this ultimate step-by-step guide, I’ll walk you through everything you need to know about beginner raised beds—from planning and building to filling, planting, and maintaining your first successful garden. Whether you have a spacious backyard or a small patio, this comprehensive resource will help you avoid common pitfalls and enjoy your first bountiful harvest.
Why Choose Raised Beds as a Beginner Gardener?
As someone who’s helped hundreds of new gardeners get started (and built more raised beds than I can count), I can confidently say that raised beds are the #1 recommendation for beginners—and for good reason.
Key Benefits of Raised Beds
- Superior Soil Control: You fill the bed with a perfect custom mix, bypassing rocky, clay-heavy, or nutrient-poor native soil.
- Excellent Drainage: Elevated beds prevent waterlogging, reducing root rot—one of the top killers of beginner gardens.
- Fewer Weeds: Starting with weed-free soil and adding mulch dramatically cuts down on weeding time.
- Reduced Pest Pressure: Higher beds make it harder for many ground-dwelling pests to reach your plants.
- Ergonomic Design: No more back-breaking bending. Standard 12-18 inch heights make gardening accessible and enjoyable.
- Extended Growing Season: Soil in raised beds warms faster in spring and stays warmer in fall, giving you weeks of extra growing time.
- Higher Yields: Intensive planting methods like square foot gardening thrive in raised beds, often yielding 2-4x more produce.
According to Cornell University and USDA research, raised bed gardening is particularly effective in urban and suburban settings where soil quality is often compromised. It’s also water-efficient—raised beds can use up to 50% less water than in-ground gardens when properly mulched.
For beginners, the structured nature of raised beds makes success feel achievable. You see progress quickly, mistakes are contained to one bed, and the neat appearance keeps you motivated.
Planning Your Beginner Raised Beds
Success starts long before you pick up a hammer. Proper planning ensures your raised beds fit your space, needs, and budget.
Assessing Your Space and Needs
First, evaluate how much sun your potential garden spot gets. Most vegetables need 6-8 hours of direct sunlight daily—track this over a few days if possible.
Consider:
- How much produce do you want? A single 4×8 bed can feed a family of four with salads all summer.
- Who will tend the garden? Higher beds (24-36 inches) are ideal for seniors or those with mobility issues.
- Do you have pets or young children? Fenced or elevated designs may be necessary.
Choosing the Right Location
Select a level spot close to your house (convenience encourages daily care) and a water source. Avoid areas under large trees due to root competition and shade.
Good practices:
- South-facing slopes get maximum sun.
- Wind-protected areas prevent plant damage.
- At least 2-3 feet of pathway space between beds for easy access.
Determining Size and Number of Beds
For beginners, I always recommend starting small to avoid overwhelm.
Popular starter sizes:
- 4×4 feet: Perfect for square foot gardening; easy reach from all sides.
- 4×8 feet: Most efficient size—provides ample space without being overwhelming.
- Height: 12 inches minimum for most crops; 18-24 inches for root vegetables or accessibility.
Leave 3-foot paths between beds for wheelbarrows and comfortable movement.
Start with 1-2 beds your first year. You can always add more as confidence grows.
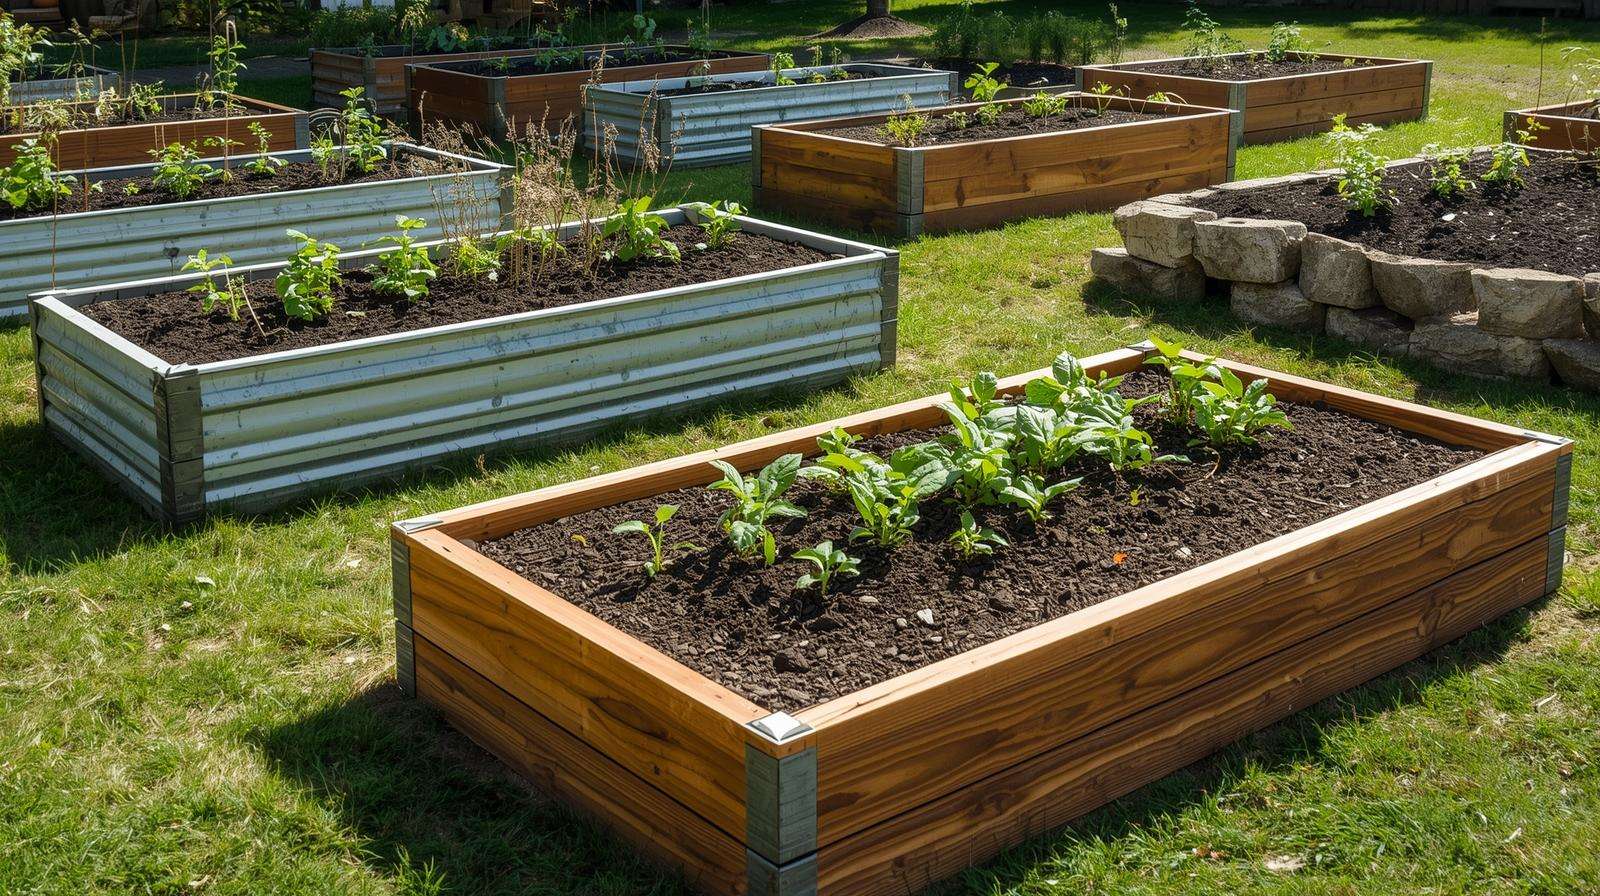
Materials for Beginner Raised Beds: Pros, Cons, and Recommendations
Choosing the right material affects cost, longevity, aesthetics, and safety.
Common Materials Compared
| Material | Pros | Cons | Lifespan | Cost (4×8 bed) |
|---|---|---|---|---|
| Cedar/Redwood | Naturally rot-resistant, beautiful | Expensive | 15-25 years | $300-500 |
| Galvanized Steel | Durable, modern look, quick assembly | Can heat soil in hot climates | 20+ years | $250-400 |
| Composite/Recycled Plastic | No rot, low maintenance | Higher upfront cost | 20+ years | $350-600 |
| Concrete Blocks | Very durable, good thermal mass | Heavy, permanent | 30+ years | $200-300 |
| Untreated Pine | Affordable | Rots faster | 5-10 years | $150-250 |
Safety Considerations
Never use pressure-treated lumber from before 2003 (contained arsenic). Modern ACQ-treated wood is considered safe by the EPA for vegetable gardens, but many organic gardeners prefer untreated options.
My top recommendation for beginners: Western red cedar or galvanized steel kits. They balance cost, longevity, and ease of assembly.
Cost Breakdown
A basic 4×8 cedar bed typically costs $200-400 in materials. Metal kits often include everything for similar prices with zero cutting required.
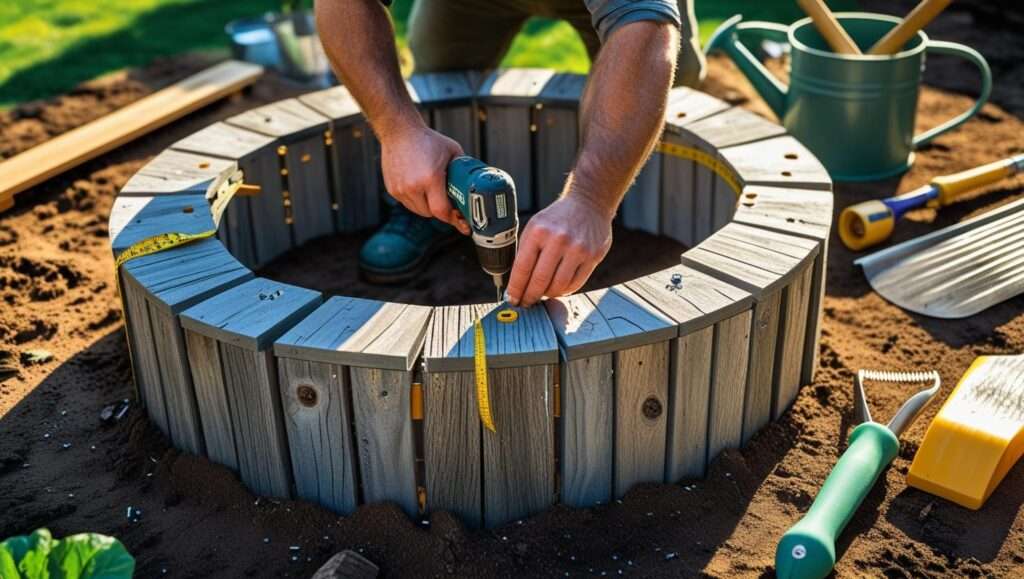
Step-by-Step: Building Your First Raised Bed
Let’s build a simple 4×8 cedar bed—the gold standard for beginners.
Tools and Materials Checklist
- 4 cedar 2×12 boards (two 8ft, two 4ft)
- 8 cedar 4×4 corner posts (18-24 inches tall)
- Galvanized deck screws (3-inch)
- Drill, level, square, shovel
- Cardboard or landscape fabric for bottom
Detailed Construction Guide
- Level the ground: Remove grass/sod and level the area.
- Lay out corners: Position 4×4 posts to form rectangle.
- Attach boards: Screw boards to posts, ensuring corners are square.
- Add bracing: Optional cross-braces for extra stability on longer beds.
- Line bottom: Cardboard suppresses weeds; landscape fabric allows drainage.
For metal beds: Most kits assemble in under 30 minutes with no tools beyond a screwdriver.

Common Beginner Mistakes to Avoid
- Not leveling properly (leads to uneven watering)
- Using thin boards (bow over time)
- Skipping corner posts (reduces stability)
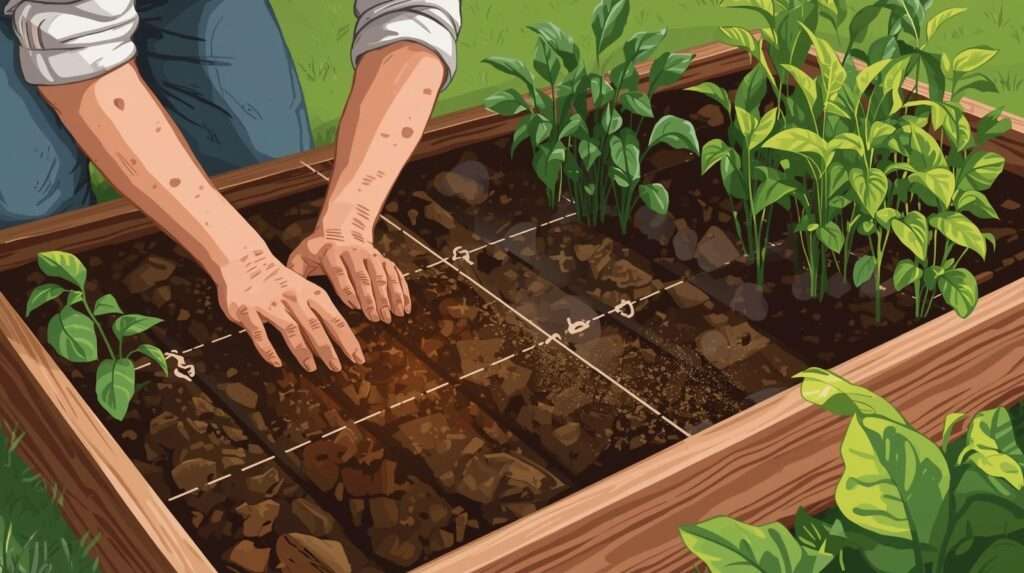
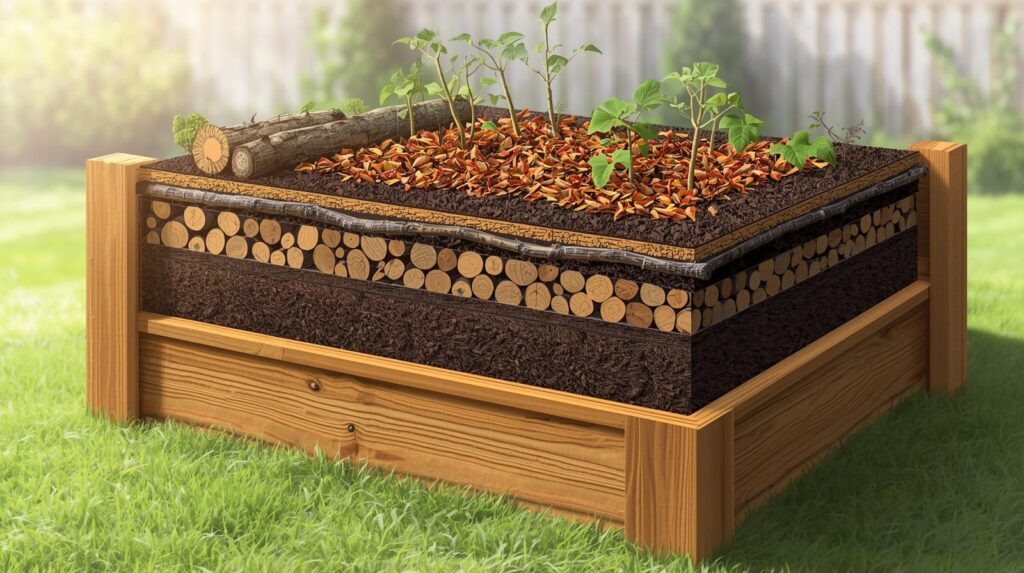
Soil Mix for Beginner Raised Beds: The Secret to Success
The single biggest factor determining your garden’s success is the soil you put in your raised beds. Native soil often has issues—too much clay, too sandy, compacted, or depleted of nutrients. In raised beds, you start fresh.
Why Custom Soil Matters
A tailored soil mix provides:
- Optimal drainage and aeration
- Balanced water retention
- Rich nutrients from the start
- Neutral pH (around 6.5-7.0) for most vegetables
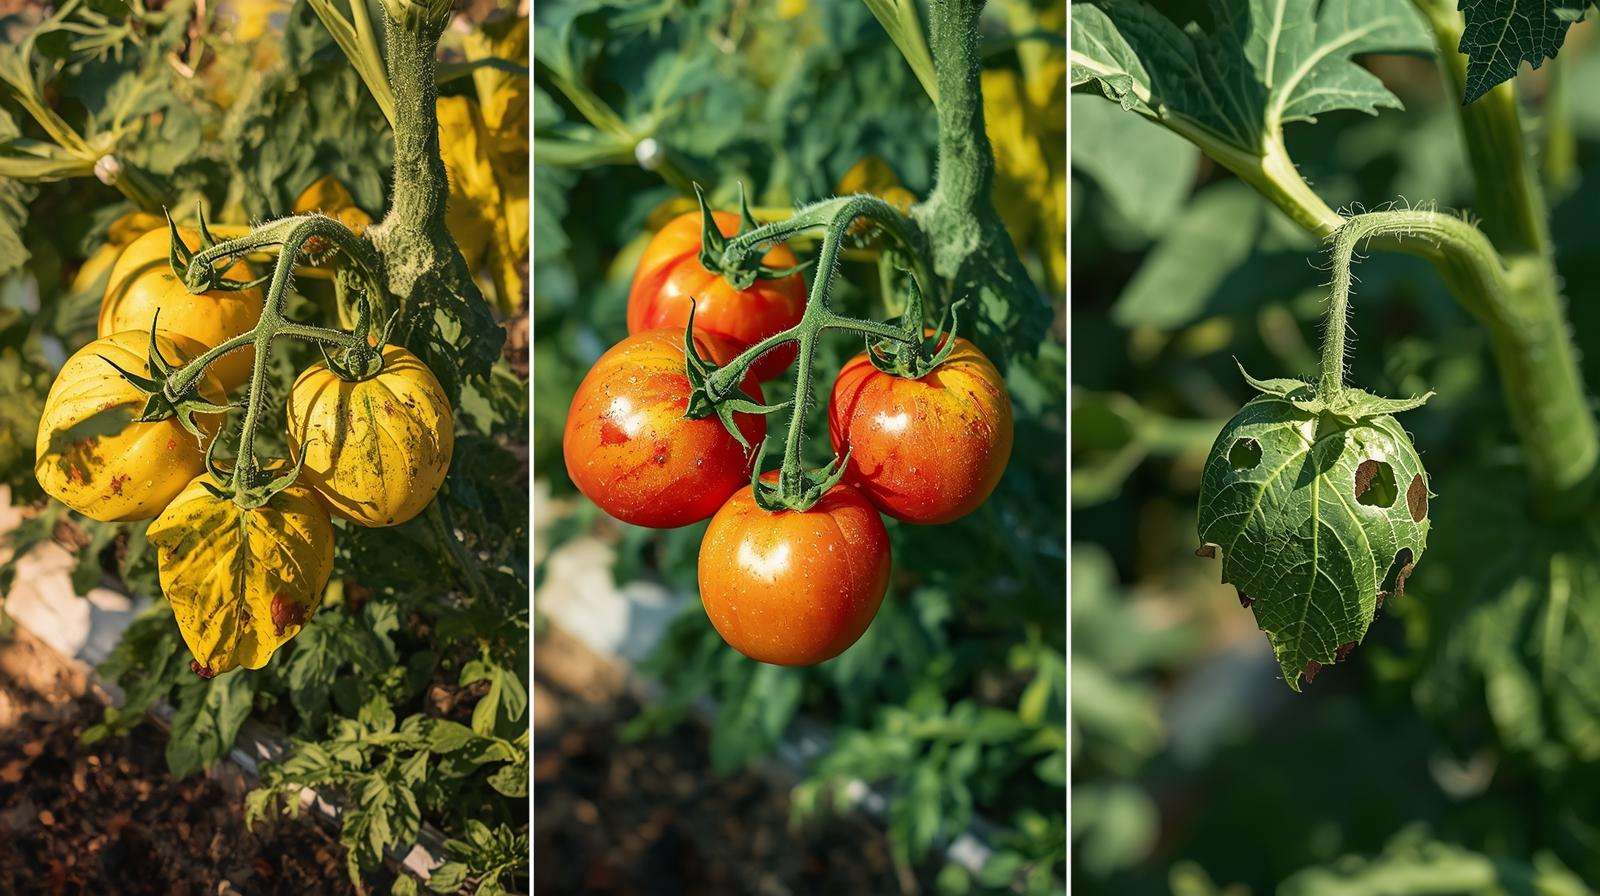
Poor soil leads to stunted growth, yellow leaves, and low yields. Investing in good soil upfront pays dividends for years.
The Ideal Soil Recipe
The classic “Mel’s Mix” from Square Foot Gardening is excellent for beginners, but here’s my refined version based on years of testing:
- 60% High-quality topsoil → Screened loam or garden soil (avoid cheap “fill dirt”).
- 30% Compost → Blend of mushroom compost, worm castings, and homemade or bagged organic compost for diversity.
- 10% Aeration material → Vermiculite or perlite to prevent compaction.
Optional additions:
- Coconut coir for water retention in dry climates
- Biochar for long-term nutrient holding
- Organic slow-release fertilizer (e.g., Espoma Garden-Tone)
Budget vs. Premium Options
- Budget blend — Bulk topsoil + bagged compost from big-box stores (~$150-250 for a 4×8 bed).
- Premium — Custom mix from local landscape supply (often cheaper per cubic yard and higher quality).
A 4x8x12-inch bed holds about 8 cubic feet (0.3 cubic yards) of soil—calculate accordingly.
Testing and Adjusting
Test your mix with a home soil kit (pH and NPK). Most veggies prefer slightly acidic to neutral. Add lime to raise pH or sulfur to lower it.
Pro Tip: Fill beds in layers—bottom with coarser compost, top with finer mix—for better drainage.
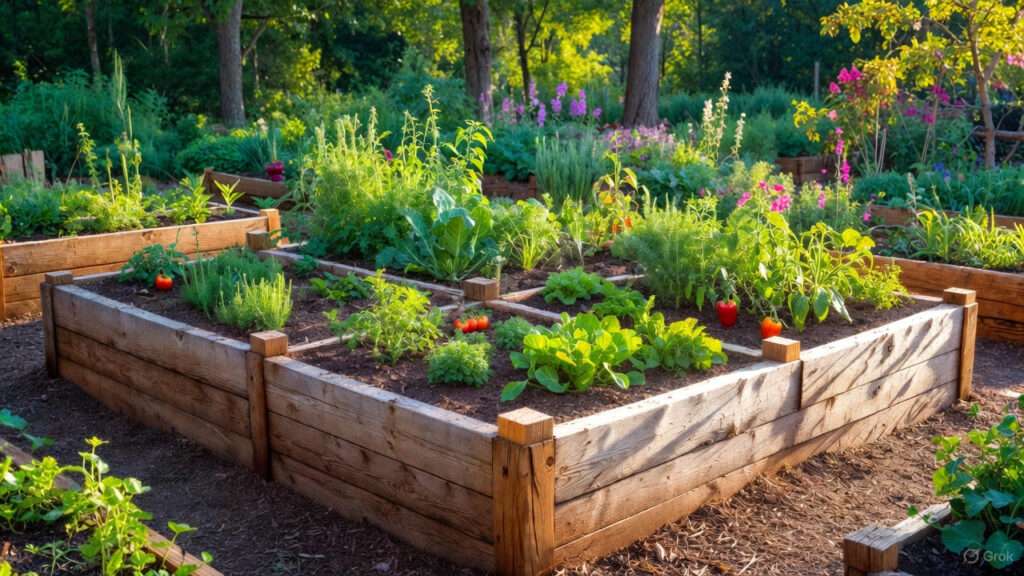
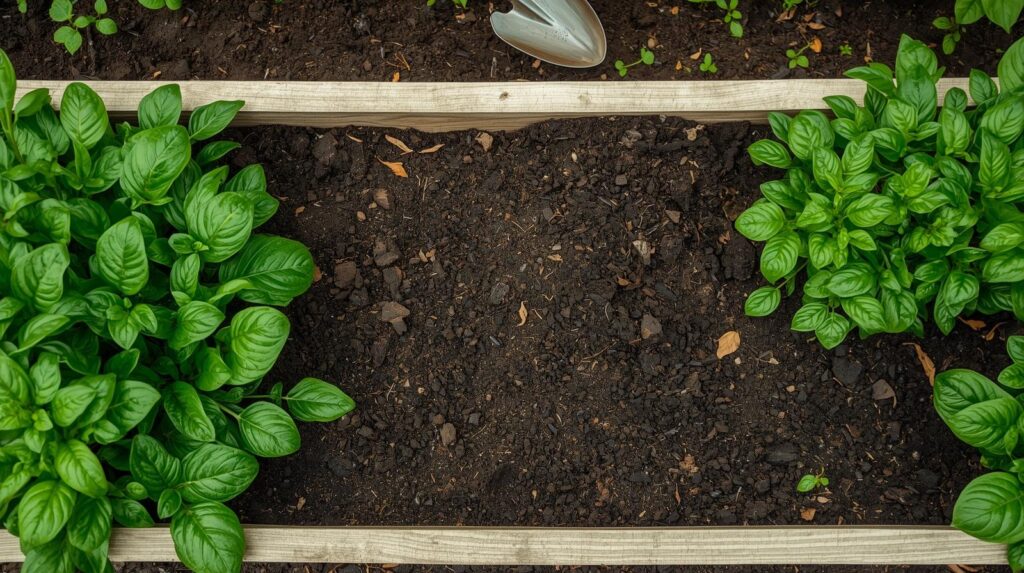
What to Plant in Beginner Raised Beds
Choosing the right crops builds confidence through quick wins.
Best Crops for First-Time Gardeners
Focus on easy, productive plants:
- Lettuce & Greens — Harvest in 30-45 days; cut-and-come-again varieties.
- Radishes — Ready in 25-30 days; perfect for instant gratification.
- Bush Beans — Heavy producers, no staking needed.
- Cherry Tomatoes — Indeterminate varieties in cages.
- Peppers — Sweet bells or hot varieties.
- Herbs — Basil, chives, parsley—forgiving and useful.
- Zucchini — One plant feeds a family (but watch for powdery mildew).
Avoid initially: Corn, pumpkins, or large vining plants—they need more space.
Companion Planting Basics
Pair beneficial plants:
- Tomatoes + basil (improves flavor, repels pests)
- Carrots + onions (deters carrot fly)
- Marigolds around borders (nematode control)
Seasonal Planting Guide
- Cool Season (spring/fall): Lettuce, spinach, kale, broccoli, peas.
- Warm Season (summer): Tomatoes, peppers, beans, cucumbers.
Use succession planting: Sow radishes every 2 weeks for continuous harvest.
Planting and Maintenance Guide
Seeding vs. Transplants
Start easy crops (beans, squash) from seed directly in the bed. Buy transplants for tomatoes, peppers, and broccoli to jumpstart the season.
Spacing: Follow square foot gardening guidelines—e.g., 1 tomato per 2 sq ft, 4 lettuce per sq ft.
Watering Best Practices
Water deeply but infrequently to encourage deep roots. Aim for 1-2 inches per week.
- Use soaker hoses or drip irrigation for efficiency.
- Mulch with straw, shredded leaves, or wood chips to retain moisture and suppress weeds.
- Water in the morning to reduce fungal issues.
Fertilizing Schedule
Raised beds leach nutrients faster, so feed regularly:
- At planting: Mix in balanced organic fertilizer.
- Mid-season: Side-dress with compost or fish emulsion.
- Heavy feeders (tomatoes): Monthly feeding.
Weed, Pest, and Disease Management
Prevention is key:
- Mulch heavily.
- Hand-pick pests daily.
- Use row covers for cabbage worms and squash bugs.
- Neem oil or insecticidal soap for outbreaks.
- Practice crop rotation yearly to prevent soil-borne diseases.
Seasonal Care and Year-Round Tips
Don’t let your beds sit idle.
- Fall → Plant garlic and cover crops (clover, rye) to improve soil.
- Winter → Add compost layer; cover with mulch or tarps.
- Spring → Turn in cover crops; warm soil with black plastic if needed.
Extend the season:
- Low hoops with row cover fabric for frost protection.
- Cold frames or mini-greenhouses over beds.
In mild climates, grow year-round with cool-season crops.
Troubleshooting Common Beginner Issues
Even with raised beds, issues arise. Here’s how to fix them:
- Yellow leaves → Nitrogen deficiency—add blood meal or compost.
- Blossom end rot (tomatoes) → Calcium issue from inconsistent watering—maintain even moisture.
- Powdery mildew → Improve air circulation; apply baking soda spray.
- Poor drainage → Drill holes in wood sides or add more perlite next season.
- Leggy seedlings → Not enough light—transplant on cloudy days.
Keep a garden journal to track what works.
Expert Tips for Maximum Success
From years in the field:
- Implement square foot gardening for maximum efficiency.
- Install trellises on the north side for vertical crops (cucumbers, pole beans).
- Use ollas or self-watering reservoirs in hot climates.
- Attract pollinators with flowers in/around beds.
- Test soil annually and replenish compost each spring.
FAQs: Beginner Raised Beds
How much do beginner raised beds cost to set up?
A basic 4×8 cedar bed with soil runs $400-800, depending on materials. Start smaller to reduce costs.
Can I build raised beds on concrete or a deck?
Yes! Use beds with bottoms or add a liner. Ensure deck weight rating (soil is heavy—about 100 lbs per cubic foot).
How deep should raised beds be for vegetables?
12 inches minimum; 18+ for root crops like carrots and potatoes.
Are raised beds better than containers for beginners?
Yes—larger volume means less frequent watering and more stable temperatures.
How long do raised beds last?
Cedar/metal: 15-20+ years with proper care.
What’s the easiest vegetable to grow in a raised bed?
Radishes or leaf lettuce—fast, forgiving, and rewarding.
Conclusion
Starting with beginner raised beds is one of the smartest moves you can make as a new gardener. You’ll bypass many common frustrations, enjoy healthier plants, and harvest fresh produce that tastes worlds better than store-bought.
Remember: Gardening is a journey. Your first season might not be perfect, but with the controlled environment of raised beds, success comes much faster. Plan your beds this winter, build in early spring, and you’ll be eating from your garden by summer.
You’ve got this—your first harvest is closer than you think. Happy gardening!