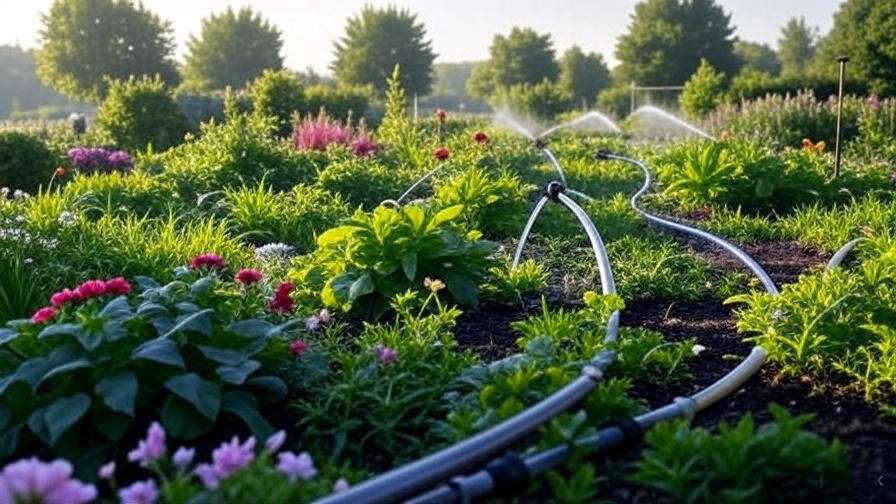
Imagine stepping into your small backyard vegetable plot after a long day, only to find wilting leaves, cracked soil, and uneven growth despite hours spent hauling water. In many regions, including areas like Barishal with its seasonal dry spells and variable rainfall, small veggie plots—whether raised beds, backyard patches, or compact urban gardens—often struggle with inefficient watering. Traditional methods like hand watering or sprinklers waste water through evaporation and runoff, promote foliar diseases, encourage weeds, and deliver inconsistent moisture to roots. The result? Lower yields, more labor, and frustration for gardeners who want fresh, homegrown vegetables without constant struggle.Designing Drip Layouts for Small Veggie Plots
Designing drip layouts for small veggie plots changes everything. By delivering water slowly and directly to the root zone, drip irrigation can save 50–70% or more on water usage compared to sprinklers while boosting vegetable yields by 20–50% or higher, depending on crops and management. It reduces disease pressure, minimizes weed growth between rows, and frees up your time for other garden tasks.
This comprehensive guide walks you through every aspect of planning, designing, and installing an effective drip system tailored specifically for small vegetable plots. Whether you have a single 4×8 ft raised bed or a collection of compact beds, you’ll learn practical layouts, plant-specific emitter recommendations, installation steps, and maintenance tips drawn from proven agricultural practices. By the end, you’ll have a clear, customizable plan to create a water-efficient, high-yielding drip system that fits your space and climate.
Why Drip Irrigation Is Ideal for Small Vegetable Plots
Small plots present unique challenges: limited space means every inch counts, soil can vary from sandy to clay-heavy, and water resources may be constrained during dry periods. Overhead sprinkling or flood watering often leads to wet foliage (increasing fungal risks like blight on tomatoes), significant evaporation losses (up to 35% or more), and uneven distribution that leaves some plants thirsty while others drown.
Drip irrigation solves these issues by applying water precisely at low pressure through emitters or tape placed near plant bases. Studies and field observations consistently show drip systems achieve water use efficiency of 90% or better, compared to 60–75% for traditional methods. In vegetable gardens, this translates to healthier root development, faster growth, and higher productivity with less effort.
Key benefits for small veggie plots include:
- Water conservation: Up to 70% savings versus sprinklers, crucial in water-scarce or tropical/subtropical areas.
- Reduced disease: Dry foliage lowers risks of powdery mildew, leaf spot, and other common vegetable issues.
- Weed suppression: Water targets crop roots only, leaving inter-row areas drier.
- Time savings: Automate with a timer and spend minutes instead of hours watering.
- Yield improvement: Consistent moisture supports better nutrient uptake and can increase harvests significantly.
- Adaptability: Works perfectly with raised beds, mulch, and mixed planting common in home vegetable gardens.
Here’s a quick comparison:
| Aspect | Traditional Watering (Sprinkler/Manual) | Drip Irrigation |
|---|---|---|
| Water Efficiency | 60–75% (high evaporation/runoff) | 90%+ (direct to roots) |
| Disease Risk | Higher (wet leaves) | Lower (dry foliage) |
| Labor | High | Low (set-and-forget) |
| Yield Potential | Baseline | 20–50%+ increase possible |
| Weed Growth | Promotes weeds | Suppresses inter-row weeds |
| Suitability for Small Plots | Poor (wastes space/water) | Excellent (precise & scalable) |
For gardeners in regions with monsoon patterns followed by drier months, drip layouts help bridge dry spells without over-relying on municipal or well water.
Understanding the Basics of Drip Irrigation Systems
Before designing your layout, familiarize yourself with core components and options. A basic drip system includes:
Key Components:
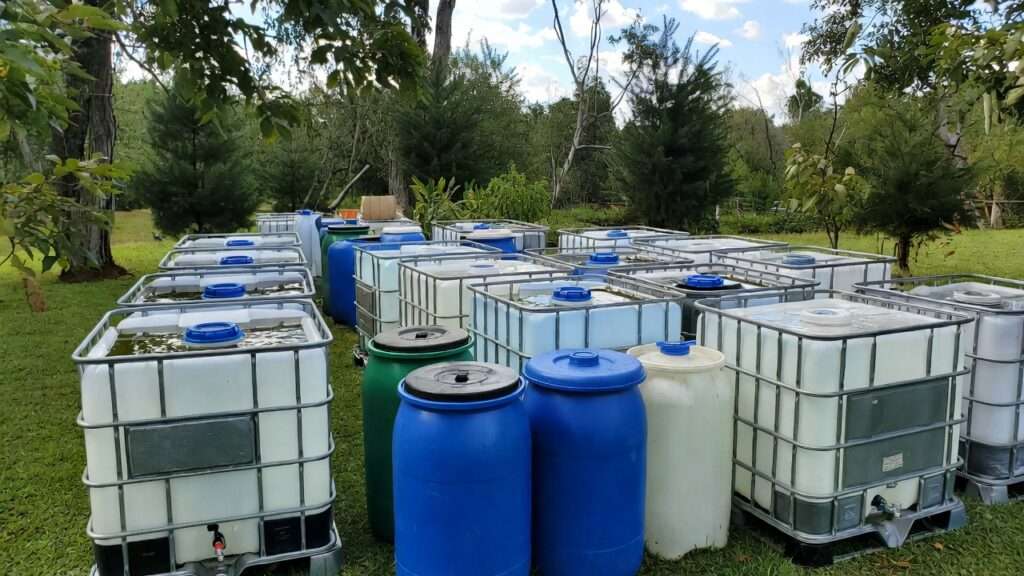
- Water source connection: Hose bib, rainwater barrel, or pump outlet.
- Pressure regulator: Reduces household pressure (often 40–60 PSI) to safe drip levels (10–30 PSI, commonly 12–25 PSI).
- Filter: Screen or disc filter prevents sediment and clogs—essential for longevity.
- Mainline tubing: ½-inch polyethylene (poly) tubing carries water from source to beds.
- Drip lines/tape/emitter tubing: Delivers water; includes ¼-inch tubing with inline emitters, drip tape for rows, or soaker hoses.
- Fittings and valves: Tees, elbows, couplers, shut-off valves, and end caps.
- Timer/controller: Mechanical or digital/smart timer for automation.
- Optional: Fertilizer injector for fertigation, rain sensor, or soil moisture monitor.
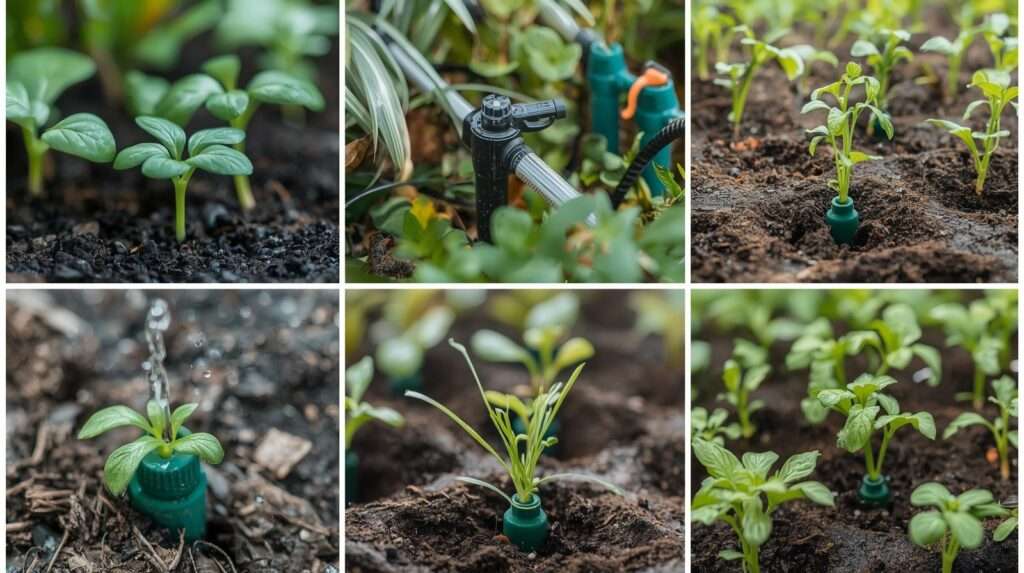
Types of Drip Emitters and Tubing Suitable for Small Plots:
- Drip tape: Thin-walled tubing with built-in emitters (often 6–12 inch spacing). Affordable and ideal for straight vegetable rows. Best for dense plantings like lettuce or carrots.
- Emitter tubing (inline): ¼-inch or ½-inch tubing with pre-spaced emitters (e.g., every 6″, 12″, or 18″). Reliable for raised beds.
- Individual button drippers or adjustable emitters: Punch into mainline or ¼-inch tubing; deliver 0.5–2 gallons per hour (GPH) per plant. Perfect for tomatoes, peppers, or widely spaced crops.
- Micro-sprayers or bubblers: Gentle low-volume sprays for broader coverage in dense beds or herbs (use sparingly to avoid wetting leaves).
- Soaker hoses: Porous hoses that “sweat” water along their length; good for borders but can clog more easily.
Choose based on your plot: Drip tape or emitter tubing for uniform rows; point-source emitters for mixed or vining crops. In small setups, start with ¼-inch emitter tubing for flexibility.
Flow Rates, Pressure, and Water Source Considerations: Most home systems run at 0.5–1 GPH per emitter. Calculate total flow to avoid pressure drop—long runs or too many emitters on one zone reduce output at the end. Use a pressure regulator and filter. Systems adapt well to hose bibs, rainwater harvesting (common and sustainable in many areas), or low-pressure wells. Always flush new systems to remove manufacturing debris.
Planning Your Small Veggie Plot Drip Layout (Step-by-Step)
Successful drip layouts for small veggie plots begin with thoughtful planning rather than guesswork.
Step 1: Assess Your Plot and Water Needs Measure your plot dimensions accurately (e.g., 4×8 ft raised bed, 10×20 ft backyard section). Note soil type—sandy soils need closer emitter spacing and more frequent short runs; clay soils retain moisture longer but risk waterlogging. Map sun exposure, slope (run lines across slope if possible), existing plants, and crop types. Estimate water needs: Most vegetables require 1–2 inches of water per week, adjusted for rainfall, temperature, and growth stage. In hot, dry conditions, increase frequency.
Step 2: Sketch Your Layout Use graph paper, a garden planning app, or simple digital tools. Position the mainline along one long edge or down the center for minimal tubing. Run laterals (drip lines) perpendicular or parallel to rows. Minimize connections and length to maintain even pressure. Mark zones if crops have different needs (e.g., thirsty tomatoes vs. drier herbs).
Step 3: Choose the Right Layout Style for Small Plots Common effective styles:
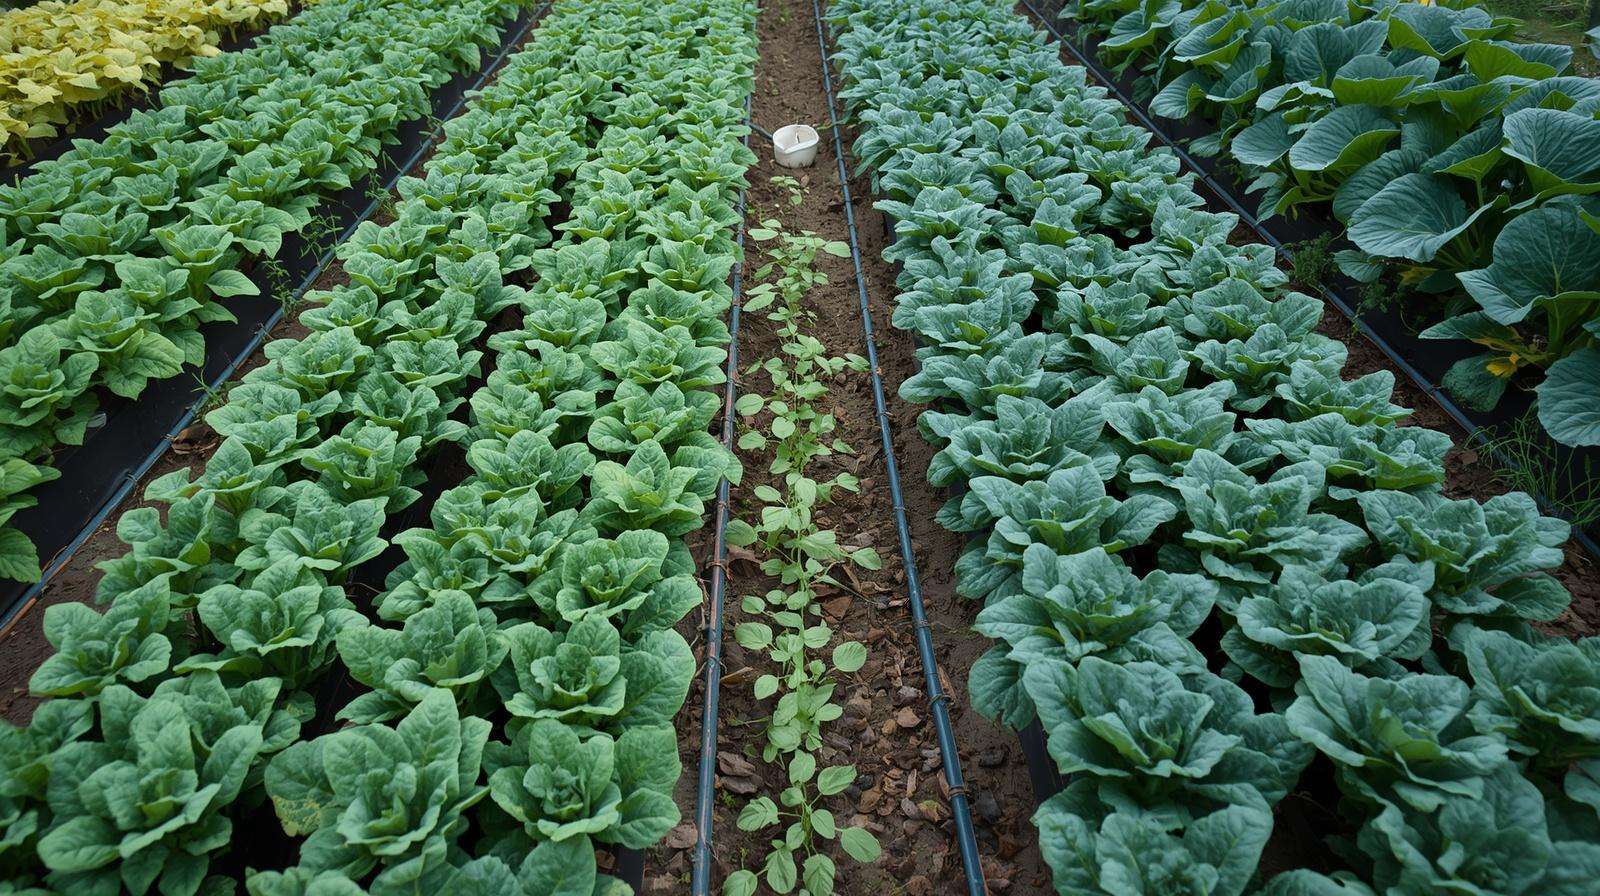
- Straight rows: Simple for traditional vegetable planting.
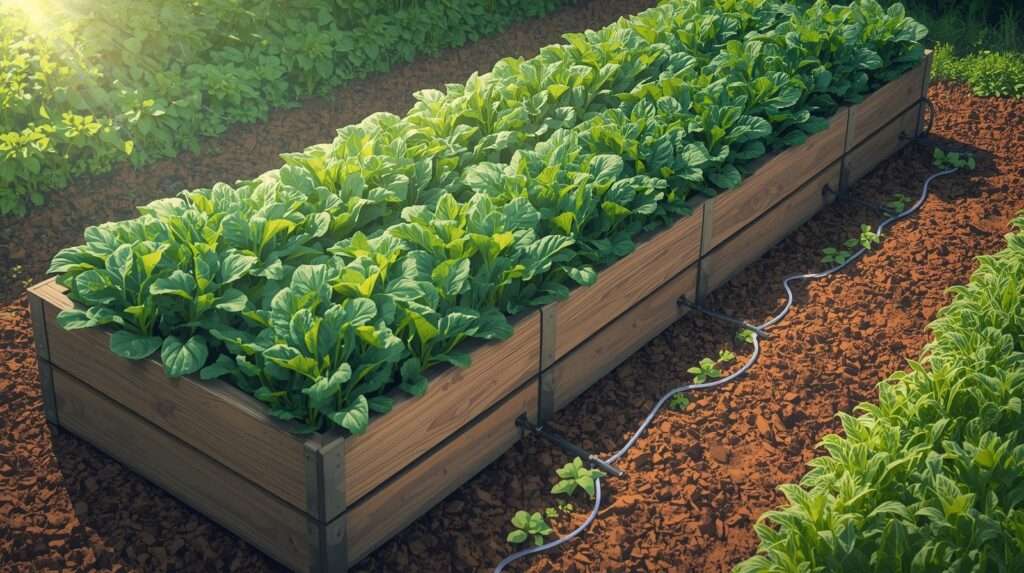
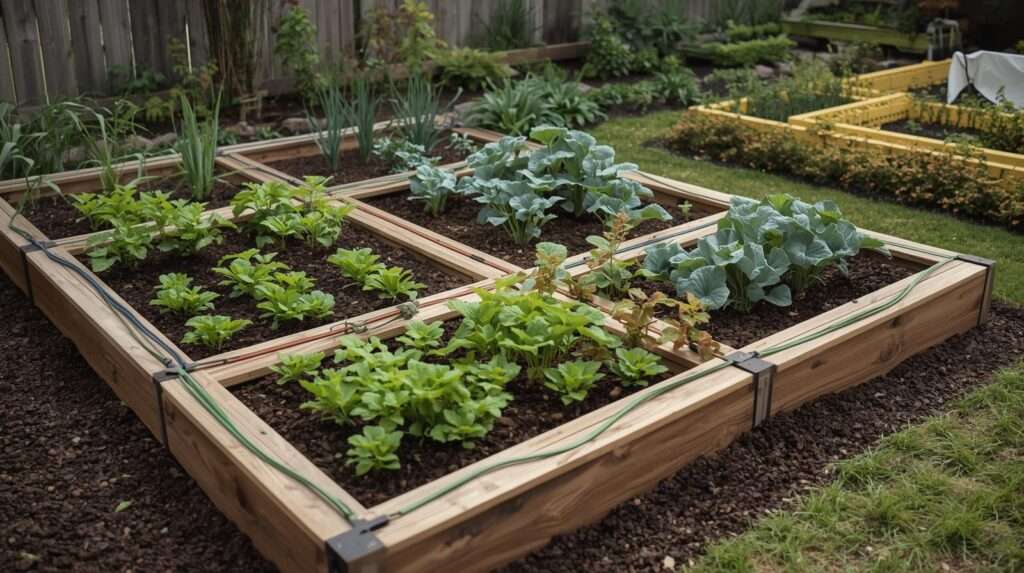
- Grid or parallel lines: Ideal for raised beds.
- Looping/snaking: For irregular or dense areas.
- Zoned systems: Separate valves for sections with varying water demands.
For a typical 4×8 ft bed, 2–4 parallel drip lines spaced 8–12 inches apart often provide excellent coverage.
Designing Effective Drip Layouts – Layout Options and Diagrams
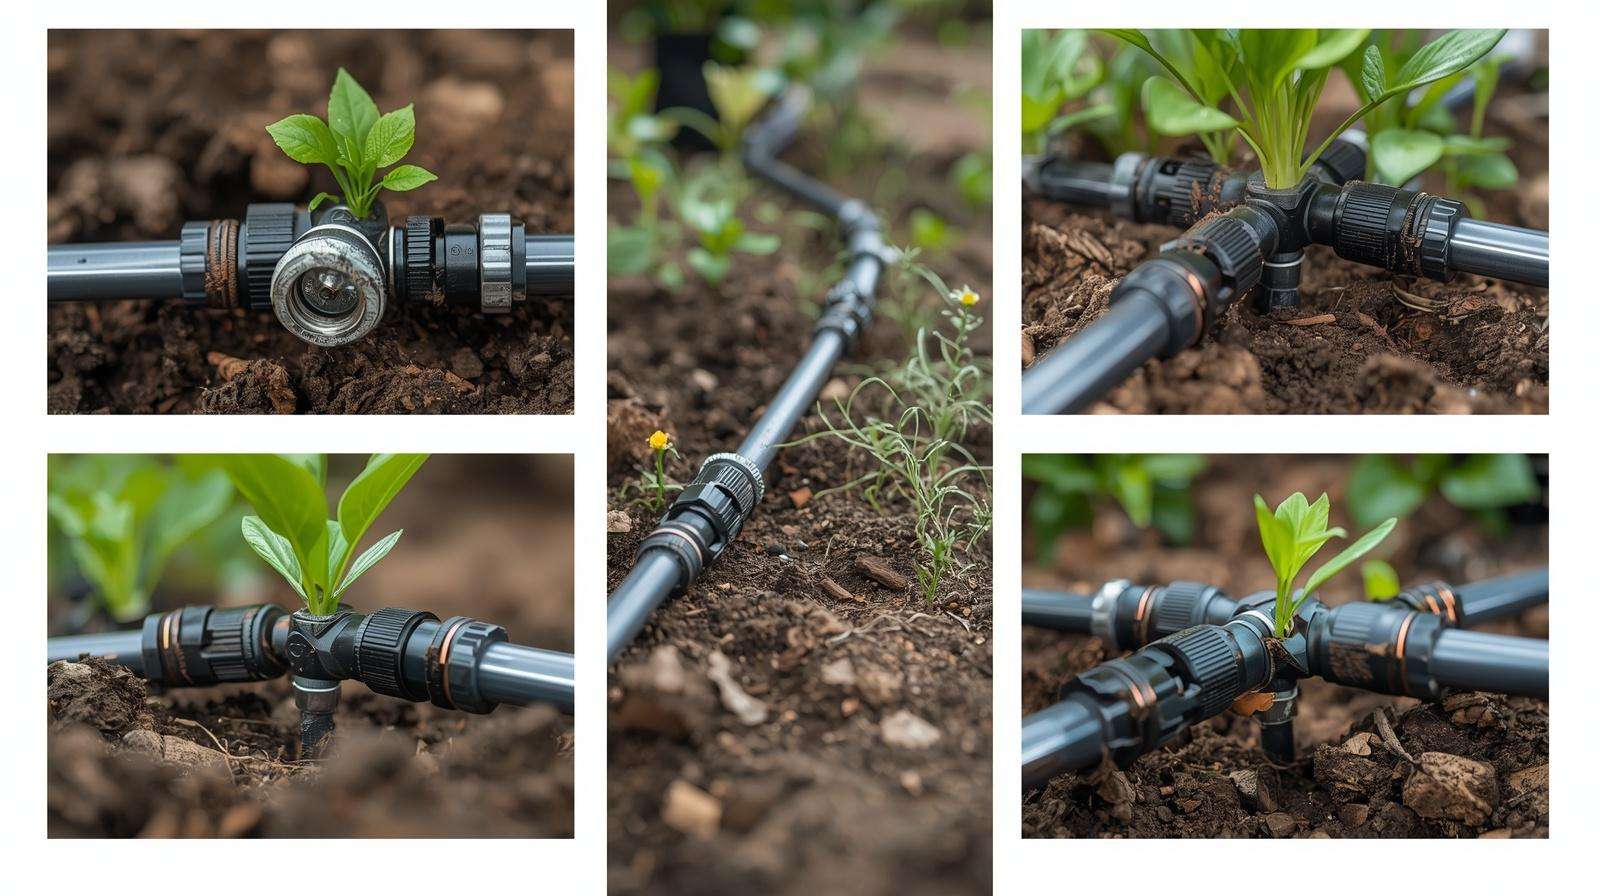
Here are proven layout options with practical details for small plots. (In the full published article, replace descriptions with clear diagrams or photos.)
Layout 1: Basic Row-Based Drip Tape System Best for straight rows of beans, carrots, onions, or lettuce. Lay one drip tape per row or every 6–12 inches across the bed. Emitter spacing: 6–12 inches. Pros: Uniform coverage, low cost. Cons: Less flexible for mixed planting. Material example for one 4×8 bed: 50–100 ft drip tape, fittings, end caps.
Layout 2: Raised Bed Emitter Tubing Grid Popular for mixed-crop 4×4 or 4×8 beds. Run ½-inch mainline along one side, then ¼-inch emitter tubing lines every 8–12 inches across the width (e.g., three lines in a 4-ft-wide bed). Use 12-inch emitter spacing for most veggies. This creates a grid that supports dense or rotated planting. Many gardeners report excellent results with lines spaced no wider than 12 inches.
Layout 3: Individual Plant Emitters Ideal for larger plants like tomatoes, peppers, eggplant, or cucumbers spaced 18–36 inches apart. Place 1–2 emitters (0.5–2 GPH) per plant base, or create small loops around vining crops. Pros: Precise water delivery, easy to adjust. Cons: More fittings required.
Layout 4: Mixed or Hybrid Layouts Combine drip tape for dense rows with point emitters for larger plants in the same bed. Great for polyculture or companion planting common in small veggie plots.
Layout 5: Container and Border Extensions Extend your system to pots or plot edges using ¼-inch tubing with adjustable drippers. Useful for urban or balcony extensions.
For each layout, prepare a simple materials list: mainline length + 10%, drip tubing based on coverage, 1–2 regulators/filters, timer, and stakes/clips to secure lines.
Emitter Spacing and Plant-Specific Recommendations
Correct emitter spacing ensures even moisture without waste or dry spots. General rule: Space lines 6–12 inches apart in beds (no wider than 12 inches for most vegetables). Emitters should wet 50–60% of the root zone.
Spacing Guidelines by Vegetable Type (adjust for soil and climate):
- Leafy greens (lettuce, spinach, kale, bok choy): 6–8 inch emitter or tape spacing. Dense planting benefits from closer coverage to maintain consistent surface moisture.
- Root crops (carrots, radishes, onions, beets): 6–12 inches. Shallower roots need even distribution; 6–8 inches preferred in sandy soils.
- Fruiting vegetables (tomatoes, peppers, eggplant): 12–18 inch emitter spacing or 1–2 emitters per plant (0.5–1 GPH each). Tomatoes often perform well with emitters near the stem, increasing as plants grow.
- Vining crops (cucumbers, squash, melons, beans): Use loops or multiple emitters per plant/hill. Space lines to follow vine spread.
- Herbs and compact crops: Adjustable micro-emitters or 12-inch spacing.
Sample Emitter Spacing Table (for average loamy soil, ~1 inch water/week target):
| Crop Type | Recommended Emitter/Tape Spacing | Flow Rate per Emitter | Notes |
|---|---|---|---|
| Leafy Greens | 6–8 inches | 0.5–1 GPH | Frequent short cycles |
| Root Vegetables | 6–12 inches | 0.5 GPH | Even moisture for bulb/ root development |
| Tomatoes/Peppers | 12 inches or 1–2 per plant | 0.5–2 GPH | Increase during fruiting |
| Cucumbers/Squash | 12–18 inches or loops | 1–2 GPH | Account for vine spread |
| Onions/Garlic | 6–8 inches | 0.5 GPH | Avoid overwatering |
Run times vary: In warm conditions, 30–90 minutes 2–3 times per week often suffices. Use soil moisture checks (finger test or cheap probe) rather than rigid schedules. In tropical climates with high humidity, reduce frequency to prevent fungal issues.
Crop rotation and seasonal changes require minor adjustments—plan flexible systems with extra fittings for future modifications.
Step-by-Step Installation Guide for Your Drip Layout
Installation is straightforward and can usually be completed in a weekend.
Tools and Materials Checklist:
- Tubing cutter or scissors
- Hole punch (for emitters)
- Goof plugs (for mistakes)
- Stakes or landscape pins
- Teflon tape for threaded connections
- Filter, pressure regulator, timer
Detailed Steps:
- Install the head assembly at the water source: Hose adapter → filter → pressure regulator → mainline valve/timer.
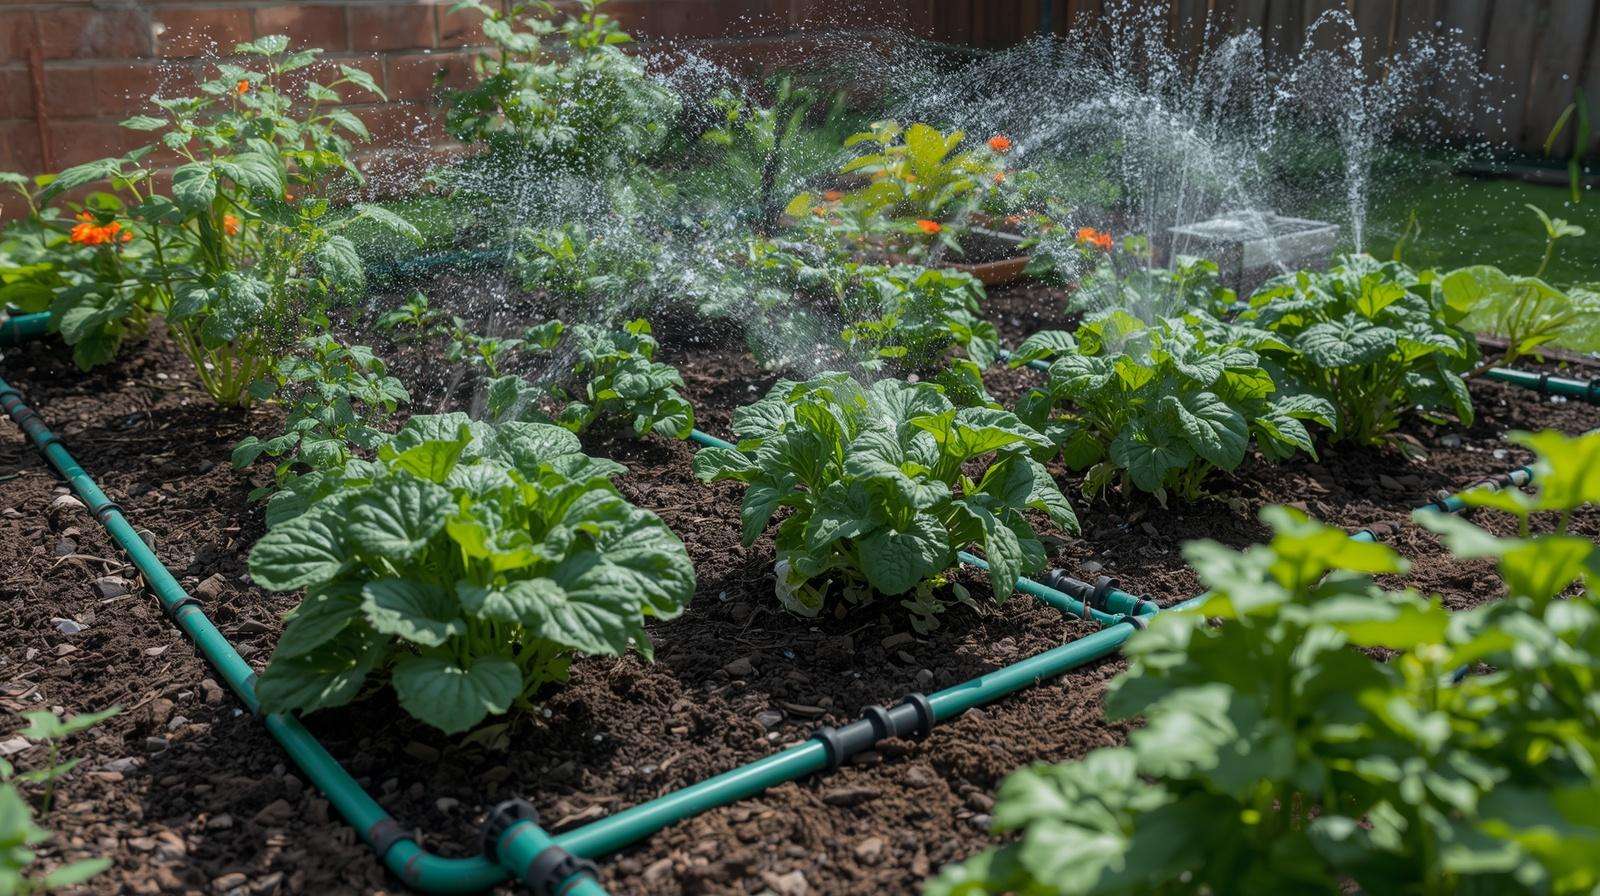
- Lay the ½-inch mainline along your planned path, securing with stakes. Cut and connect sections as needed.
- Attach laterals: Use tees or barbed connectors to run drip lines/tape perpendicular or as designed.
- For emitter tubing: Lay lines with emitters facing up or down per manufacturer; secure every 2–3 feet.
- For drip tape: Ensure emitters face upward; use tape fittings carefully to avoid tears.
- Cap ends and install flush valves or end caps.
- Cover lines with mulch (2–3 inches organic mulch) to reduce evaporation and protect tubing.
- Flush the entire system thoroughly before planting or connecting emitters.
- Test: Run for 15–30 minutes, check for even flow, leaks, and coverage. Adjust as needed.
- Plant or transplant near emitters (1–2 inches away for young plants).
Raised bed tips: Secure tubing to bed edges if needed. In sloped areas, start from the top. Bury mainlines slightly or cover well for aesthetics and protection.
Automation and Smart Features for Low-Maintenance Gardening
Once your drip layout is installed, automation transforms it from a helpful tool into a truly set-and-forget system—especially valuable for busy gardeners or those managing multiple small plots.Designing Drip Layouts for Small Veggie Plots
Basic Automation Options:
- Mechanical timers: Affordable (often under $15–25), battery-powered or water-powered. They offer simple interval settings (e.g., every other day for 30 minutes). Ideal for beginners.
- Digital/electronic timers: More precise with multiple programs, rain delay, and battery backup. Many allow separate scheduling for different zones.
Advanced Smart Features:
- Rain sensors: Automatically skip watering after rainfall—highly recommended in regions with unpredictable monsoon patterns.
- Soil moisture sensors: Insert probes in the root zone; connect to smart controllers that only water when moisture drops below a set threshold. This prevents both underwatering and overwatering.
- Smart Wi-Fi controllers: Apps like those from Orbit, Rain Bird, or affordable generic brands let you control your system remotely via smartphone. Integrate with weather data for automatic adjustments.
- Zoning: Install separate valves for different sections of your small plot. For example, one zone for thirsty fruiting vegetables (tomatoes, cucumbers) and another for more drought-tolerant herbs or onions.
For small veggie plots, a single-zone timer with a rain sensor is often sufficient and budget-friendly. Total added cost for basic automation: $20–60. In hot, dry periods common after monsoons, smart features can fine-tune run times to as little as 20–45 minutes, 2–3 times weekly, while maintaining optimal soil moisture.Designing Drip Layouts for Small Veggie Plots
Pro Tip: Start simple. Install a basic timer first, then upgrade as you gain confidence. Always test automation manually for the first week to ensure even coverage across your drip layout.
Common Mistakes to Avoid When Designing Drip Layouts for Small Plots
Even experienced gardeners make errors when first implementing drip irrigation. Avoiding these pitfalls will save time, money, and frustration:
- Incorrect Emitter Spacing or Layout Design Placing lines too far apart (over 12–15 inches in most beds) creates dry pockets. Conversely, overcrowding emitters wastes water and can lead to root rot in clay soils. Solution: Stick to 6–12 inch spacing for vegetables and always sketch first.
- Ignoring Pressure Loss Long runs of ¼-inch tubing or too many emitters on one line cause weak flow at the far end. Limit ¼-inch laterals to 30–50 feet max per zone. Use larger ½-inch mainline for distribution.Designing Drip Layouts for Small Veggie Plots
- Skipping the Filter and Pressure Regulator Sediment from hose water or rainwater quickly clogs emitters. High pressure bursts tubing or causes uneven spraying. Always install both at the head assembly.
- Using the Wrong Emitter Type for Your Crops and Soil Drip tape works great for rows but can be inflexible for mixed planting. Button drippers are better for individual tomato plants. In sandy soils, use closer spacing and lower flow rates.Designing Drip Layouts for Small Veggie Plots
- Poor Tubing Security and Mulch Management Loose lines shift when planting or weeding, misaligning emitters. Exposed tubing degrades faster in sunlight. Secure every 2–3 feet and apply 2–4 inches of organic mulch (straw, dried leaves, or wood chips) over the lines.
- Overwatering Due to Rigid Schedules Many new users run systems too long or too frequently. Always check soil moisture 4–6 inches deep before watering. Finger test: If soil feels cool and moist, delay the next cycle.
- Not Planning for Expansion or Crop Rotation Small plots often change crops seasonally. Design with extra fittings and modular connections so you can easily add or rearrange lines.
- Forgetting to Flush the System Debris left after installation clogs emitters within weeks. Flush thoroughly after assembly and periodically thereafter.
By addressing these common issues upfront, your drip layouts for small veggie plots will perform reliably season after season.
Maintenance, Troubleshooting, and Seasonal Care
Regular maintenance keeps your drip system efficient and long-lasting—typically 5–10 years with proper care.
Routine Maintenance:
- Monthly checks: Inspect for leaks, clogged emitters, or damaged tubing. Flush the entire system for 5–10 minutes.
- Filter cleaning: Rinse or replace the screen/disc filter every 2–4 weeks during active growing season, more often if using well or rainwater.
- Emitter inspection: Look for uneven flow. Clean clogged emitters by soaking in vinegar solution or replace as needed.
- Secure lines: Re-stake any shifted tubing after heavy rain or weeding.Designing Drip Layouts for Small Veggie Plots
- Mulch refresh: Top up mulch to maintain moisture retention and protect tubing from UV damage.
Troubleshooting Guide:
- Low or no flow: Check water source, pressure regulator, and filter for clogs. Ensure valves are open.
- Uneven watering: Pressure loss or partial clogs—shorten runs or clean emitters. Verify emitter orientation.
- Leaks at connections: Tighten fittings or replace damaged barbed connectors. Use goof plugs for accidental holes.
- Clogged emitters: Mineral buildup (hard water) or algae—install a finer filter or use periodic acid flushing (consult local agricultural guidelines).
- System won’t turn off: Faulty timer or valve—replace the component.
Seasonal Care:
- Peak growing season: Monitor closely during fruiting stages when water demand peaks.
- End of season: Flush thoroughly, disconnect and drain lines, store timers indoors. In mild climates, you can leave buried mainlines in place.
- Dry season preparation: Increase run frequency slightly but always based on soil checks rather than calendar.
- Rainy season: Rely more on rain sensors; consider raising mainlines slightly to avoid waterlogging.
With consistent care, your drip system becomes a reliable partner in sustainable vegetable production.
Expected Results and Real-World Success Tips
Gardeners who implement well-designed drip layouts consistently report impressive improvements. In small plots, water savings of 50–70% are common, while vegetable yields often increase by 20–50% or more due to consistent moisture and reduced stress.
Realistic Expectations:
- Tomatoes and peppers: Larger, more uniform fruit with fewer blossom-end rot issues.
- Leafy greens: Extended harvest periods and reduced bolting in hot weather.
- Root crops: Better shape and size with fewer splits from uneven watering.
- Overall plot health: Fewer fungal diseases, healthier soil biology (especially when combined with mulch and compost).
Expert Success Tips:
- Combine drip irrigation with thick organic mulch to further reduce evaporation and build soil health.
- Integrate fertigation (adding diluted liquid fertilizer through the system) for efficient nutrient delivery—start with low concentrations to avoid emitter clogging.
- Pair with rainwater harvesting: A simple barrel system provides soft, chlorine-free water ideal for drip.
- Monitor and adjust: Keep a garden journal noting run times, rainfall, and yields. Fine-tune seasonally.
- Start small: Test your first layout on one or two beds before expanding. This builds confidence and allows easy adjustments.
In regions with variable rainfall like many parts of Bangladesh and similar tropical areas, drip systems help bridge dry periods effectively, supporting food security and reducing dependency on erratic rains or expensive municipal water.
Frequently Asked Questions (FAQs)
How much does a basic drip system cost for a small veggie plot? A complete starter kit for one or two 4×8 ft raised beds typically costs $40–120, depending on quality and automation level. Basic components (tubing, emitters, filter, regulator) are very affordable, with long-term savings on water and time quickly offsetting the initial investment.
Can I use drip irrigation with well water or harvested rainwater? Yes. Rainwater is excellent as it is soft and free of chemicals. For well water, install a good filter to catch sediment and minerals. Flush lines regularly to prevent buildup.
What’s the best emitter spacing for tomatoes in raised beds? For tomatoes, use 12-inch spacing on emitter tubing or place 1–2 emitters (0.5–1 GPH) per plant near the base. Increase flow slightly during heavy fruiting.
How long should I run the drip system? It depends on soil, climate, and crop stage. In warm conditions, 30–60 minutes, 2–3 times per week is often sufficient. Always check soil moisture 4–6 inches deep rather than following a fixed schedule.
Is drip tape better than emitter tubing for small gardens? Drip tape is excellent for straight, dense rows and is more economical. Emitter tubing offers more flexibility for mixed planting and raised beds. Many gardeners use both in hybrid layouts.
How do I prevent clogs in my drip lines? Use a quality filter, flush the system regularly, and avoid high-mineral water without proper treatment. Periodic vinegar or citric acid soaks help dissolve deposits.
Can drip irrigation work in clay or sandy soil? Absolutely. In sandy soil, use closer emitter spacing and shorter, more frequent watering cycles. In clay soil, space emitters slightly wider and water less frequently to avoid saturation.
How do I expand my system later? Design with extra capacity in the mainline and use modular barbed fittings. Adding new zones or lines is straightforward with basic plumbing skills.
Conclusion
Designing drip layouts for small veggie plots is one of the smartest investments you can make for a productive, sustainable vegetable garden. By delivering water directly to the roots with precision, you conserve precious water, reduce disease and weed pressure, save valuable time, and significantly boost your harvests—all while working with the natural needs of your plants.
Whether you’re growing in a single raised bed or managing several compact plots, the step-by-step planning, layout options, emitter recommendations, and maintenance practices outlined here give you everything needed to succeed. Remember: success comes from thoughtful design, proper component selection, regular checks, and adjusting to your local climate and soil conditions.