Imagine waking up to another dry spell on your farm or homestead, watching your crops wilt or hauling expensive water for livestock while your well struggles or bills climb. In an era of unpredictable weather, rising water costs, and the drive for true self-sufficiency, many farmers and off-grid enthusiasts face a critical challenge: reliable, year-round water access without depending on municipal supplies or deep wells.Designing Off-Grid Rain Catchment
Designing off-grid rain catchment systems offers a practical, sustainable solution. By capturing and storing rainwater from rooftops and other surfaces, you can build a resilient water supply for irrigation, livestock, and non-potable household needs — often at a fraction of the long-term cost of traditional sources.
This comprehensive guide draws on proven principles of rainwater harvesting, real-world farm applications, and detailed calculations to help you design a robust system tailored to your land. Whether you manage a small garden homestead or a larger agricultural operation, you’ll learn how to assess needs, size components, install efficiently, maintain quality, and achieve water independence. A well-designed system can harvest thousands of gallons per rain event while supporting regenerative practices and reducing environmental impact.Designing Off-Grid Rain Catchment
Why Off-Grid Rain Catchment Systems Matter for Farmers and Homesteaders
Water scarcity poses one of the biggest threats to sustainable agriculture today. Droughts, erratic rainfall patterns, and over-reliance on groundwater strain wells and increase costs for irrigation and livestock. Off-grid rain catchment systems address these issues by turning a free, renewable resource — rainwater — into a dependable supply.

Key benefits include:
- Cost savings: Once installed, harvested rainwater is essentially free, cutting expenses on water delivery, pumping, or municipal fees.
- Resilience: Systems buffer against dry periods, providing stored water when rains are scarce.
- Environmental advantages: Reduced runoff prevents erosion and flooding while recharging soil moisture indirectly through smart distribution. Rainwater is often softer and lower in salts than well water, benefiting crop health and soil structure in regenerative farming.
- Sustainability alignment: These systems support permaculture, keyline design, and organic practices by enabling precise, gravity-fed irrigation that minimizes waste.
In many regions, rainwater harvesting also aligns with conservation incentives, though rules vary widely — always verify local regulations on collection, storage, and use (especially for potable applications). From small homesteads using rain barrels to larger farms with multi-tank cisterns, these setups have proven their value in building long-term food production resilience.Designing Off-Grid Rain Catchment
As an expert in agricultural water management, I’ve seen systems transform operations: one medium-scale homestead reduced irrigation costs by over 70% while improving vegetable yields through consistent moisture without chemical additives from treated water sources.
Step 1: Assessing Your Site and Water Needs
Successful off-grid rain catchment design begins with honest assessment. Oversizing or undersizing leads to overflow waste or shortages during critical growing seasons.
Calculating Your Water Demand
Start by estimating daily and seasonal needs across categories:
- Irrigation: A typical vegetable garden requires about 1 inch of water per week during peak season. For 300 sq ft of beds, that’s roughly 186 gallons per weekly watering (using the 0.62 gallons per sq ft per inch rule). Scale for your crops — orchards or field crops may need different rates based on evapotranspiration (ET) data.
- Livestock: A cow might drink 15–30 gallons daily; chickens or goats far less. Factor in cleaning and cooling.
- Household non-potable: Toilets, laundry, or garden washing add 20–50 gallons per person daily.Designing Off-Grid Rain Catchment
Create a monthly worksheet: Multiply daily totals by days in the month, then adjust for peak summer demand. For a small homestead with a 500 sq ft garden and a few animals, annual demand might reach 10,000–20,000+ gallons, with spikes in dry months. Use historical ET data from local weather stations for precision.
Evaluating Your Catchment Potential
The core formula for potential harvest is:
Gallons = Rainfall (inches) × Catchment Area (sq ft) × 0.623 × Collection Efficiency
- 0.623 converts inches over square feet to gallons.
- Efficiency typically ranges 75–95%: Metal roofs achieve ~90–95%, while asphalt shingles or tile may drop to 75–85% due to absorption or debris.
Measure your roof (or planned catchment surface) accurately — include eaves. For a 2,000 sq ft barn roof in an area averaging 40 inches annual rainfall with 85% efficiency:
Annual potential ≈ 40 × 2,000 × 0.623 × 0.85 ≈ 42,364 gallons.
Account for variability: Design for average years but plan storage for dry spells (e.g., 50–70% of average in drought). Sources like NOAA or local agricultural extensions provide reliable historical rainfall data, including monthly breakdowns and extremes.
Site-Specific Considerations
Evaluate topography for gravity flow (elevate tanks where possible), soil stability for tank foundations, and proximity to use points (gardens, barns). Prevailing winds, tree overhang (leaf debris), and sun exposure affect evaporation and algae risk. In humid areas, prioritize filtration; in arid zones, maximize catchment area with dedicated structures like sloped metal sheets on frames.Designing Off-Grid Rain Catchment
For small plots, start with existing buildings. Larger farms may combine multiple roofs or add standalone catchment.
Core Components of an Off-Grid Rain Catchment System
A reliable system integrates several elements, each optimized for durability, water quality, and minimal energy use.
Catchment Surfaces
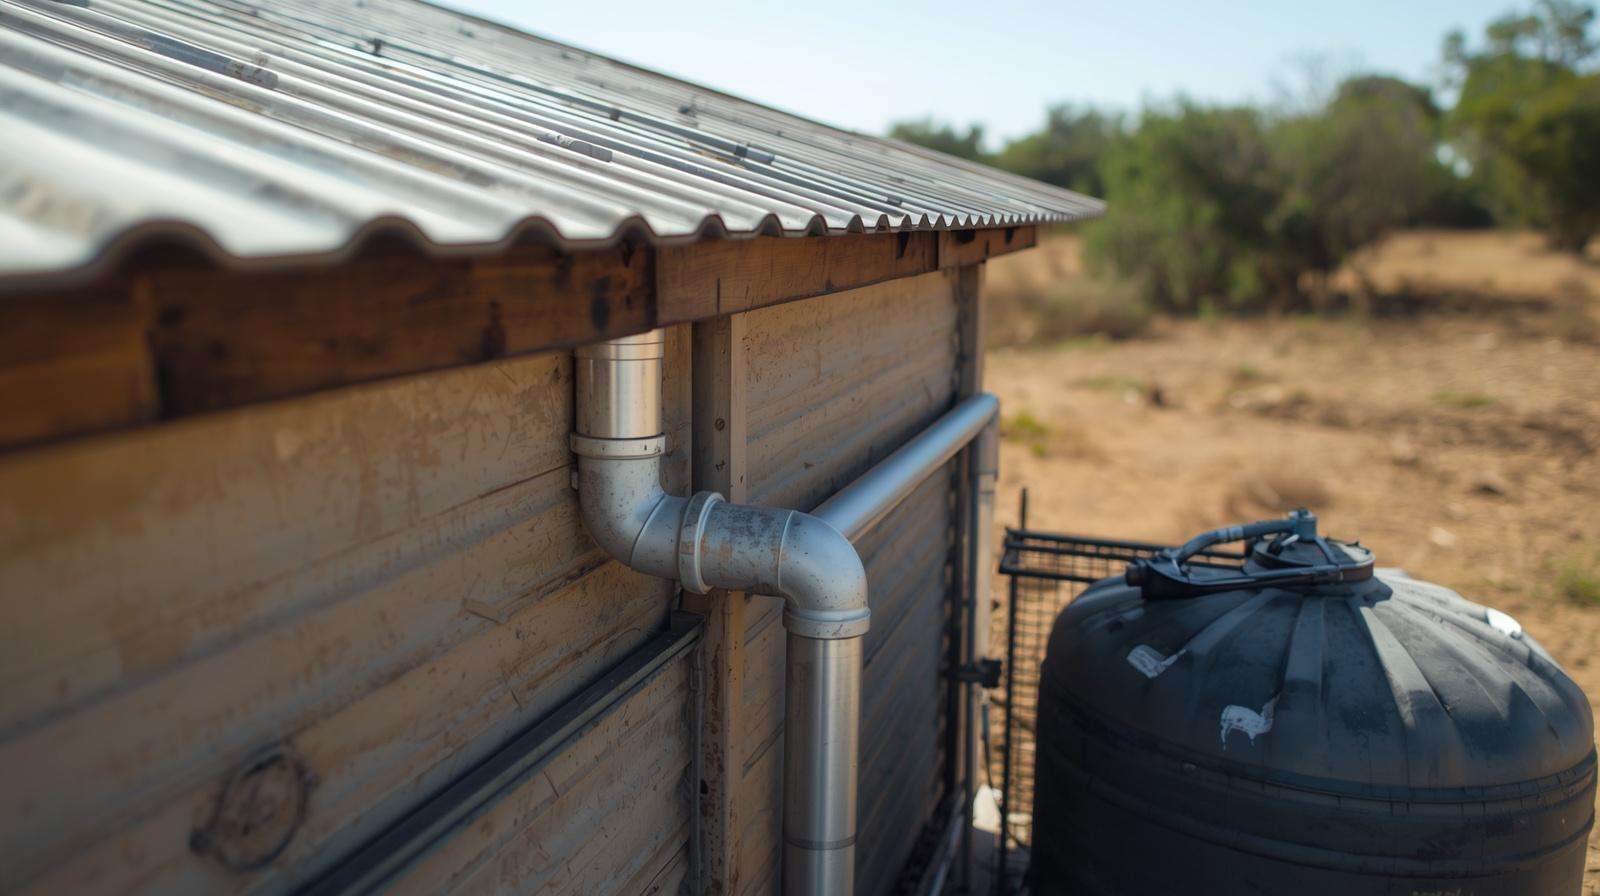
Metal roofs (corrugated steel, zincalume, or coated) are ideal — smooth, durable, high runoff efficiency, and long-lasting (50+ years). They shed water cleanly with minimal contamination compared to asphalt shingles, which can leach granules or chemicals, especially when new. Tile or concrete roofs work but collect less volume and may harbor algae. Avoid wood or untreated surfaces. For non-roof areas, build simple angled metal or plastic sheet structures.Designing Off-Grid Rain Catchment
Gutters, Downspouts, and Conveyance
Size gutters to handle peak rainfall intensity (check local storm data). Use PVC, aluminum, or seamless metal; install with proper slope (1/4 inch per 10 feet) and leaf screens/mesh guards to reduce debris. Downspouts should direct water efficiently without splashing.
Pre-Filtration and First-Flush Diverters
The “first flush” — the initial dirty runoff carrying dust, bird droppings, and pollutants — must be diverted. First-flush devices (standpipe or valve types) automatically discard the first 0.1–0.5 gallons per sq ft of roof, then route cleaner water onward. Combine with leaf screens and vortex filters or settling basins for better results. This step dramatically improves stored water quality and reduces maintenance.
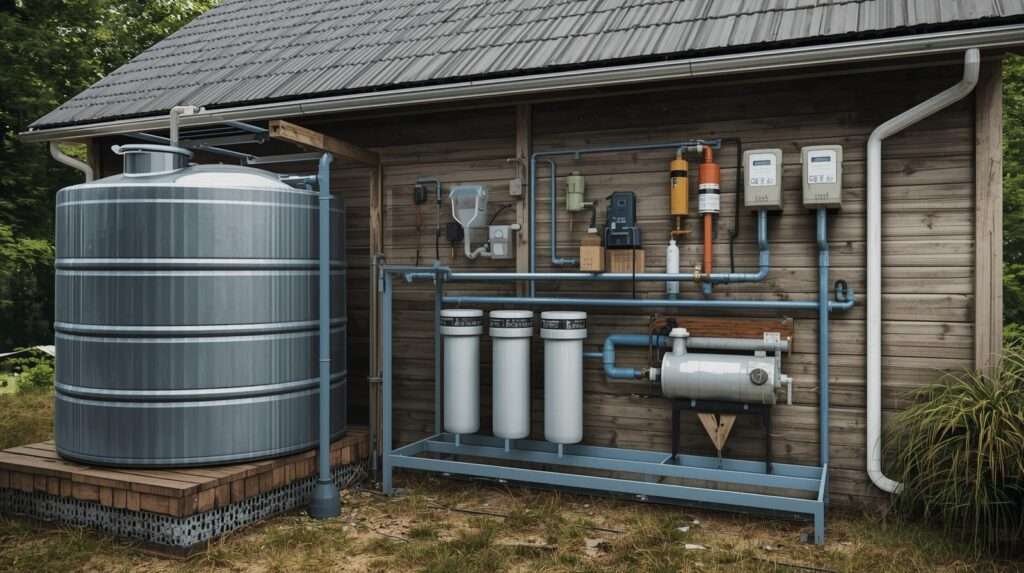
Storage Tanks and Cisterns
Choose food-grade materials:
- Polyethylene/Plastic (IBC totes or cisterns): Affordable, lightweight, UV-resistant options for above-ground.
- Fiberglass or Concrete: Durable for larger volumes; concrete offers thermal stability but is heavier.
- Stainless Steel: Premium for quality but costly.
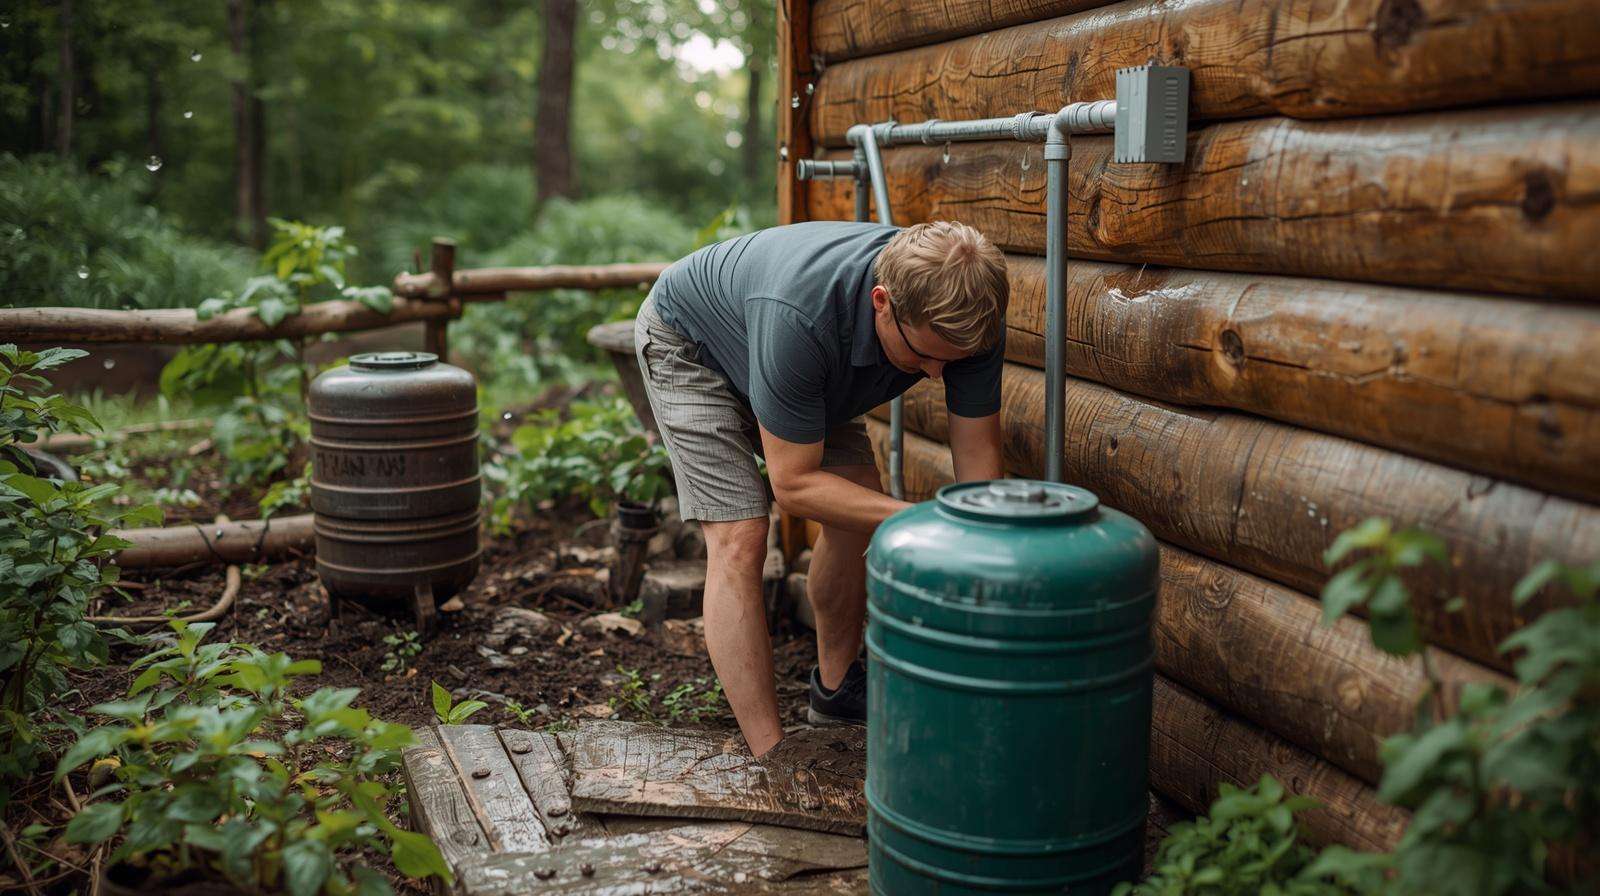
Above-ground tanks are easier to install and inspect but need freeze protection (insulation or burial partial). Below-ground saves space and stays cooler but requires excavation and structural care. Aim for 1–3 months of storage minimum. Examples: Multiple 275–330 gallon IBC totes connected in series for modularity; larger 1,000–5,000+ gallon cisterns for farms.
Pumps, Distribution, and Overflow Management
Off-grid setups favor gravity-fed systems where terrain allows, eliminating electricity needs. For pressurized distribution, use solar-powered pumps with float switches or battery backup. Include valves, filters post-tank, and safe overflow pipes directed to swales, rain gardens, or infiltration areas to prevent erosion.
Designing and Sizing Your System
The heart of any successful off-grid rain catchment system lies in precise design and sizing. A mismatched system either wastes potential harvest through overflow or leaves you short during critical dry periods, undermining your sustainable farming goals.
Follow this step-by-step process:
-
Determine monthly water demand — Break it down by irrigation, livestock, and other uses. For example, a 1,000 sq ft vegetable garden in peak season may need ~620 gallons per week (1 inch of water × 1,000 sq ft × 0.62 gallons per sq ft per inch). A small herd of 5 goats might require 5–10 gallons each daily, plus cleaning water.
-
Calculate catchment yield — Use the reliable formula: Gallons harvested = Rainfall (inches) × Catchment area (sq ft) × 0.623 × Efficiency (typically 0.75–0.95)
Example: A 1,500 sq ft barn roof in a region with 40 inches annual rainfall and 85% efficiency (metal roof with good filtration) yields approximately: 40 × 1,500 × 0.623 × 0.85 ≈ 31,773 gallons per year. Monthly distribution depends on local rainfall patterns — design storage to cover the driest 2–3 months.
-
Size storage for reliability — Aim for at least 1–3 months of supply, or more in arid or highly seasonal climates. Use tools like monthly rainfall data to model “firm yield” — the dependable amount your system can supply even in below-average years. For a homestead needing 15,000 gallons annually with peaks in summer, a 5,000–10,000 gallon total storage (multiple linked tanks) often provides strong resilience.
-
Account for losses and variability — Factor in first-flush diversion (10–20 gallons per 1,000 sq ft), evaporation, and inefficiencies. In drought years, yield may drop 30–50%, so oversize slightly or integrate backup strategies like swales for overflow infiltration.
Worked Example for a Medium Homestead/Farm:
- Catchment: 2,000 sq ft metal barn roof
- Annual rainfall: 45 inches (with dry season averaging 2 inches/month for 3 months)
- Demand: 12,000 gallons/year (garden irrigation + livestock)
- Efficiency: 90%
- Potential annual harvest: ~50,000+ gallons
- Recommended storage: 4,000–8,000 gallons (multiple 1,000–2,000 gallon cisterns) to bridge dry spells while allowing overflow to rain gardens.
Integrate with other off-grid systems for maximum efficiency: Pair with solar-powered pumps only where gravity feed isn’t feasible, and link overflow to permaculture swales or keyline designs to recharge soil moisture.
Common pitfalls include ignoring seasonal variability or undersizing gutters for intense storms. Always model for worst-case dry periods using local agricultural extension data.
Step-by-Step Implementation Guide
With your design in hand, implementation turns plans into a functional rainwater harvesting system for sustainable agriculture.
Planning and Permitting Checklist:
- Research local regulations (some areas encourage harvesting with incentives; others restrict potable use).
- Obtain necessary permits for larger cisterns or structural changes.
- Conduct a site survey for tank foundation stability and gravity flow potential.
Tools and Materials List (Approximate for a Mid-Sized System):
- Gutters, downspouts, leaf screens
- First-flush diverter and pre-filters
- Storage tanks (food-grade polyethylene or fiberglass)
- PVC piping, valves, float switches
- Solar pump (if needed) and basic tools (ladder, drill, level)
Budget Breakdown (2025–2026 Estimates):
- Basic DIY rain barrel setup (200–500 gallons): $100–500
- Mid-range homestead system (2,000–5,000 gallons with filtration): $2,000–$6,000
- Larger farm setup (10,000+ gallons, solar integration): $8,000–$15,000+ (tanks are the biggest expense; professional installation adds 20–40%)
Installation Phases:
- Site Preparation — Level and reinforce foundation (concrete pad or gravel base for above-ground tanks).
- Catchment and Conveyance — Install gutters with proper slope and screens; add first-flush diverter.
- Tank Placement and Plumbing — Position tanks for easy access and gravity distribution; connect inlet/outlet pipes with overflow directed safely away from structures.
- Filtration and Pumping — Add post-tank filters if needed; test gravity flow or install solar pump.
- Final Testing — Simulate rainfall, check for leaks, and calibrate water level monitoring.
Safety first: Ensure tanks are securely anchored against wind, and use non-toxic materials throughout.
Water Quality, Treatment, and Safe Use
Rainwater is naturally soft and low in minerals, making it excellent for irrigation and livestock, but it can pick up contaminants from roofs, debris, or atmospheric pollution.
Key Risks and Mitigation:
- Bird droppings, dust, and pollen — Addressed primarily by first-flush diverters and leaf screens.
- Algae or bacteria in storage — Prevent with covered tanks, shade, and occasional treatment.
- For irrigation/livestock: Basic systems often suffice with good pre-filtration. Test periodically for E. coli, especially if using near edible crops.
Treatment Levels:
- Non-potable (irrigation/livestock): Sediment filter + basic disinfection (e.g., occasional chlorine or UV if solar-powered).
- Higher quality needs: Add carbon filtration or advanced UV/RO for household use (note: potable use may require stricter local approval and professional testing).
Regular water testing (kits or lab services) builds confidence. For produce safety, avoid overhead irrigation with untreated water on leafy greens; drip systems are preferable.
Maintenance and Long-Term Management
A well-maintained off-grid rain catchment system can last decades with minimal effort.
Seasonal Checklist:
- Spring/Fall: Clean gutters and screens; inspect first-flush devices; test water quality.
- After Storms: Remove debris; check overflow paths.
- Winter (cold climates): Insulate exposed pipes or use tank heaters to prevent freezing.
- Ongoing: Monitor tank levels; control mosquitoes with tight screens or biological larvicides; clean tanks every 1–2 years by emptying and sanitizing.
Troubleshooting: Low yield? Check for clogs or inefficient catchment. Algae? Improve shading or add beneficial bacteria. Leaks? Inspect seals and connections promptly.
With consistent care, these systems deliver reliable performance while supporting regenerative agriculture by providing consistent moisture without over-pumping groundwater.
Real-World Examples and Case Studies
Small Homestead Example: A family with a 1,200 sq ft home roof and garden installed four 275-gallon IBC totes connected in series (~1,100 gallons total). Using first-flush and basic screens, the system supplies most summer irrigation needs in a 35-inch rainfall area, cutting municipal water use by 60% and supporting a productive vegetable plot.
Medium Farm Setup: A 5-acre operation with a 3,000 sq ft barn roof harvests into two 5,000-gallon fiberglass cisterns. Gravity-fed distribution to orchards and livestock reduced pumping costs dramatically. During a recent dry spell, stored water maintained yields while neighbors struggled.
Larger Off-Grid Integration: A permaculture farm combined multiple building roofs with solar-powered pumps and linked the overflow to swales. The system provides year-round water for diverse crops and animals, demonstrating how rainwater catchment enhances whole-system resilience.
These examples show scalable success: Start modest, monitor performance, and expand as needs grow.
Costs, ROI, and Scaling Your System
Initial investment pays off through water savings and resilience. A typical mid-sized system might cost $3,000–$8,000 but can save hundreds annually on water bills or deliveries while protecting against drought losses.
ROI Calculation Example: A $5,000 system harvesting 20,000 gallons/year (valued at $0.01–$0.05/gallon depending on your alternative source) can recoup costs in 3–7 years, with ongoing “free” water thereafter. Factor in increased crop yields from reliable irrigation.
Scaling tips: Begin with one building and rain barrels, then add tanks or catchment area. Look for agricultural grants or conservation programs that offset costs in some regions.
Expert Tips and Best Practices for Success
- Prioritize metal roofs for highest efficiency and easiest maintenance.
- Design for modularity — linked tanks allow easy expansion.
- Integrate with permaculture: Use overflow to feed rain gardens or contour swales for passive soil recharge.
- Climate adaptations: In arid areas, maximize catchment and storage; in humid zones, focus on superior filtration to handle frequent rains.
- Monitor with simple gauges or low-cost sensors for data-driven tweaks.
- Combine with other sustainable practices like mulch and drip irrigation to stretch every gallon further.
These strategies, drawn from extensive agricultural water management experience, help turn rainwater into a cornerstone of resilient farming.
Frequently Asked Questions (FAQs)
Is rainwater safe for irrigating vegetables? Generally yes for most crops with proper filtration and drip application, but test for contaminants and avoid direct contact on edibles if quality is uncertain.
How big should my tank be for a small farm? Aim for storage covering your driest 1–3 months. For a garden + livestock needing 5,000 gallons seasonally, start with 2,000–5,000 gallons total capacity.
What are the best roof materials for catchment? Smooth metal roofs (steel, zincalume) offer the highest efficiency (90%+) and lowest contamination risk compared to asphalt or tile.
Can I use this system in freezing climates? Yes, with insulation, partial burial, or tank heaters. Design overflow to prevent ice damage.
How much maintenance is required? Minimal — seasonal gutter cleaning and annual inspections typically suffice for years of reliable service.
What permits do I need? Varies by location; check local building or environmental departments, especially for larger systems or potable intent.
Final Word
Designing off-grid rain catchment systems empowers farmers and homesteaders to achieve true water self-sufficiency amid climate challenges and rising costs. By carefully assessing needs, selecting quality components, sizing appropriately, and maintaining the system, you create a resilient resource that supports sustainable agriculture, reduces expenses, and enhances environmental stewardship.