
Are you struggling to keep your Dipladenia plant healthy and blooming?  If you’re tired of watching your once-vibrant flowers wilt or fail to bloom, you’re not alone. Many gardeners face similar challenges, but the good news is—it’s not too late to bring your Dipladenia plant back to life!
Whether you’re a seasoned gardener or just starting out, knowing how to properly care for your Dipladenia plant is key to enjoying its beautiful, vibrant blooms and lush green leaves year-round. In this guide, we’ll walk you through the expert tips and tricks to keep your plant thriving. From light and watering to pruning and repotting, we’ll cover everything you need to ensure your Dipladenia stays healthy and gorgeous.
By the end of this article, you’ll feel confident in your ability to nurture your Dipladenia plant to perfection. Ready to give your plant the care it deserves? Let’s dive in! 
1. Understanding Dipladenia Plants
If you’re new to the world of gardening, the Dipladenia plant is a great choice for adding a touch of tropical beauty to your space.  But what exactly is a Dipladenia, and why should you care about it? Let’s break it down!

What Is a Dipladenia Plant?
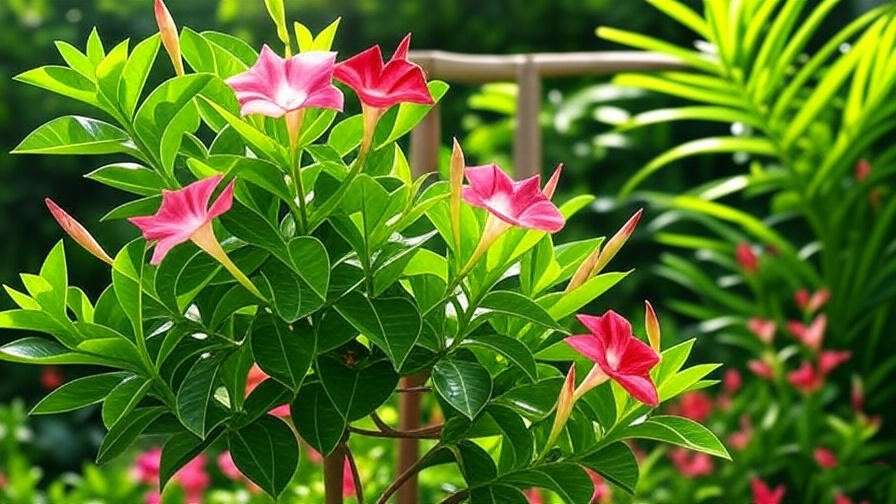
Dipladenia is a stunning flowering plant that belongs to the Mandevilla family. It’s known for its vibrant, trumpet-shaped flowers in shades of pink, red, and white, and its glossy, dark green leaves.  While it’s often compared to Mandevilla, Dipladenia is more compact, making it an ideal choice for both garden beds and containers.
This plant thrives in tropical and subtropical climates, but with the right care, you can grow it in cooler areas too (as long as it’s indoors or brought inside during cold months).
Key Features of Dipladenia
- Flowers: Large, colorful blooms that attract butterflies and hummingbirds.
- Leaves: Glossy and deep green, providing a lush backdrop to the flowers.
- Growth Habit: It’s a semi-vining plant, which means it can climb trellises or cascade beautifully from hanging baskets.
Types of Dipladenia
There are a few popular varieties of Dipladenia that you might come across:
- Mandevilla: This is a common type of Dipladenia, often seen in gardens and containers.
- Sun Parasol: Known for its large, showy flowers, this variety is a favorite for many gardeners.
While the varieties may differ slightly in flower size or color, they all share the same basic care needs.
Ideal Growing Zones
Dipladenia thrives in USDA hardiness zones 10 to 11, where temperatures are warm year-round. However, it can still be grown in cooler climates as an annual or indoor plant. If you’re growing it outdoors, be sure to protect it from frost, as cold temperatures can damage or kill it.
Why Grow a Dipladenia Plant?
Apart from the stunning visual appeal, Dipladenia is low-maintenance once you understand its basic care needs. Whether you’re looking for a climbing beauty to brighten your garden, or a vibrant houseplant that thrives in direct sunlight, this plant is a great choice!
Now that you know the basics, let’s explore how to care for your Dipladenia plant so it can flourish and add a burst of color to your space. 
2. Key Care Tips for Thriving Dipladenia Plants
To ensure your Dipladenia plant thrives and produces beautiful blooms, it’s essential to meet its basic care needs. Don’t worry—caring for this stunning plant is easier than it sounds! Let’s walk through the key factors that will keep your Dipladenia happy and healthy.
Light: Give It the Sunshine It Loves 
Dipladenia plants thrive in bright, direct sunlight. They need at least 4-6 hours of sunlight each day to bloom to their full potential. If growing indoors, place your plant near a south-facing window where it can catch the most sun.

Signs of too much light: If the leaves start to scorch (turning brown or crispy), your plant might be getting too much direct sunlight. Consider moving it to a slightly shadier spot.
Signs of too little light: If the plant doesn’t bloom or the leaves start to yellow, it’s likely not getting enough light. Move it to a brighter location.
Watering: Find the Right Balance 
Dipladenia plants love moisture but don’t like to be soggy. Here’s how to strike the right balance:
- Water your plant when the top 1-2 inches of soil feel dry to the touch.
- Be sure the pot has good drainage to avoid root rot.
- During the summer (growing season), you may need to water more often, but in the winter (dormant season), reduce watering to avoid over-wetting the soil.

Tip: Always check the soil moisture before watering—better to let it dry out a bit than to overwater!
Soil: Choose Well-Draining Mix
Dipladenia needs well-draining soil to keep its roots healthy. A loamy, slightly acidic mix works best. If you’re planting it in a pot, use a high-quality potting mix designed for flowering plants.
If your soil tends to stay soggy, mix in some perlite or sand to improve drainage. This will help prevent root rot and promote healthy growth.
Temperature and Humidity: Keep It Warm and Cozy 
Dipladenia plants prefer warm, tropical climates. Aim for temperatures between 65°F and 75°F (18°C – 24°C). Keep your plant away from cold drafts or areas that get too chilly (like near windows in winter).
Dipladenia also loves humidity. If your home is dry, especially during winter, try increasing the humidity by:
- Placing a humidifier nearby.
- Grouping plants together to create a microenvironment with higher humidity.
- Misting the leaves occasionally (but avoid soaking them).
Fertilizing: Feed for Healthy Blooms
To encourage vibrant blooms and strong growth, Dipladenia needs regular feeding. Use a balanced, water-soluble fertilizer (such as a 10-10-10 formula) during the growing season (spring through summer).
Fertilize every 2-4 weeks when your plant is actively growing. In the fall and winter, cut back on fertilization as the plant enters its dormant phase.
Tip: Too much fertilizer can cause leaf burn or poor bloom production, so be sure to follow the instructions carefully!
Pruning and Deadheading: Keep It Neat and Blooming 
Regular pruning is key to maintaining a healthy and beautiful Dipladenia plant.

Here’s what to do:
- Deadhead spent flowers: Removing faded blooms encourages the plant to produce new flowers and keeps it looking neat.
- Prune for shape: If your plant starts to look leggy or overgrown, prune back the stems to encourage bushier growth. Make sure to cut just above a leaf node to promote new growth.
- Cut back in late winter or early spring: This will help your Dipladenia bounce back stronger when the growing season starts.
Repotting: Give Your Plant Space to Grow
Dipladenia plants grow fairly quickly, and their roots may outgrow their pots in a year or two. Repot your plant when you notice roots coming out of the drainage holes or when growth slows down.

- Choose a pot that’s 1-2 inches larger in diameter than the current one.
- Gently remove the plant from its pot, shake off excess soil, and place it in the new container with fresh potting mix.
- Repot in early spring before the plant starts its active growing season.
By following these essential care tips, you’ll be well on your way to enjoying a thriving Dipladenia plant with beautiful blooms!
3. Common Problems and Solutions for Dipladenia Plants
Like any plant, your Dipladenia may face a few challenges along the way. But don’t worry! With the right knowledge, you can easily troubleshoot and resolve most common issues. Here’s a look at some problems you may encounter and how to fix them.
1. Yellowing Leaves 
Problem: Yellow leaves can be a sign of several issues, from poor watering practices to nutrient deficiencies.
Solutions:
- Overwatering: If the soil is constantly soggy, it can lead to root rot and yellowing leaves. Ensure your plant has good drainage and only water when the top inch of soil is dry.
- Nutrient Deficiency: Yellow leaves may also indicate a lack of nutrients, particularly nitrogen. Use a balanced fertilizer to give your plant the nutrients it needs to thrive.
- Too much direct sun: If your plant is getting scorched by the sun, move it to a slightly shaded area to prevent leaf damage.
2. Drooping or Wilting Leaves 
Problem: Dipladenia leaves that droop or wilt could be a sign of underwatering or environmental stress.
Solutions:
- Underwatering: Dipladenia plants like to stay moist but not soggy. If the soil feels dry to the touch, give your plant a deep drink of water.
- Low humidity: If you’re growing your Dipladenia indoors, dry indoor air can cause wilting. Increase humidity by misting the leaves or using a humidifier to help your plant thrive.
- Stress from temperature changes: Dipladenia doesn’t like sudden temperature fluctuations. Keep your plant away from drafts and heating vents.
3. No Blooms 
Problem: One of the most frustrating issues for Dipladenia owners is when the plant won’t bloom, even though the care seems perfect.
Solutions:
- Lack of sunlight: Dipladenia needs at least 4-6 hours of full sun daily to bloom. If it’s not getting enough light, move it to a brighter spot.
- Over-fertilizing: Too much fertilizer, especially high-nitrogen formulas, can encourage foliage growth at the expense of flowers. Use a balanced fertilizer and follow the recommended feeding schedule.
- Pruning too much: While regular pruning encourages healthy growth, over-pruning can remove potential flower buds. Make sure to leave enough growth for blooms to form.
4. Pests 
Problem: Dipladenia can occasionally fall victim to pests like aphids, spider mites, or mealybugs, which can cause leaf damage and stunted growth.

Solutions:
- Aphids: These tiny insects suck sap from the plant and can lead to yellowing or curling leaves. Spray the affected areas with a mixture of water and mild dish soap or use insecticidal soap.
- Spider Mites: If you notice fine webbing on your plant, it’s likely spider mites. Increase humidity around the plant and spray it with water to remove the mites. You can also use neem oil to treat an infestation.
- Mealybugs: These cotton-like pests can be wiped away with a cotton swab dipped in rubbing alcohol. For severe infestations, use an insecticidal soap.
5. Leaf Spot or Mold 
Problem: If you notice dark spots or mold on the leaves, your Dipladenia could be dealing with fungal or bacterial infections, often caused by too much moisture on the leaves or poor air circulation.
Solutions:
- Improving Airflow: Ensure your plant has good airflow to reduce humidity on the leaves. Avoid overcrowding plants in your space to prevent fungal issues.
- Watering Techniques: Water at the base of the plant, avoiding getting the leaves wet. If the leaves do get wet, dry them with a clean cloth.
- Fungicide Treatment: If the infection is severe, treat your plant with a fungicide recommended for houseplants to stop the spread.
6. Leaf Scorching or Brown Edges
Problem: Brown, crispy edges or scorched patches on the leaves are a common issue when Dipladenia is exposed to too much sun or inconsistent watering.
Solutions:
- Too Much Sun: Move your plant to a spot where it gets bright but indirect light, especially if it’s in a location that gets intense afternoon sun.
- Inconsistent Watering: Letting your plant dry out completely between waterings, then watering too much, can cause stress. Stick to a consistent watering routine based on your plant’s needs.
Quick Fixes for Dipladenia Troubles:
- Regularly check for pests: Inspect your plant for pests at least once a week, especially under the leaves.
- Adjust light exposure: If the plant isn’t thriving, experiment with moving it to a different location with better light.
- Prune dead or damaged leaves: This not only helps the plant look neat but also encourages healthier growth.
By recognizing these common issues and applying the right solutions, you can keep your Dipladenia plant thriving and blooming beautifully. With a little care, your plant will be a stunning addition to your home or garden!
4. Growing Dipladenia Outdoors vs. Indoors
Whether you’re growing your Dipladenia plant indoors or outdoors, each environment has its own unique care requirements. Understanding the differences between growing it inside versus outside will help you ensure the best care for your plant. Let’s dive into the key differences and tips for success in both settings.
Growing Dipladenia Outdoors
Dipladenia plants thrive in warm, sunny climates and can be a gorgeous addition to any outdoor space. If you live in a USDA hardiness zone 10 or 11, you can enjoy your Dipladenia outside year-round. Here’s how to make the most of its outdoor life:

- Sunlight: Outdoor Dipladenia loves full sun! Choose a location that gets at least 4-6 hours of direct sunlight each day. More sun = more blooms!
- Planting Location: Dipladenia does well in garden beds, containers, or hanging baskets. If you’re planting in the ground, choose a well-drained area that won’t get too soggy after heavy rains.
- Support: Dipladenia is a semi-vining plant, so if you’re planting it in the ground, consider adding a trellis or other support for it to climb on. This allows the plant to spread and showcase its beautiful blooms.
- Protection from Frost: Dipladenia is not frost-tolerant, so if you live in a region with cold winters, be prepared to bring it indoors or protect it with plant covers when the temperature drops.

Growing Dipladenia Indoors 
If you’re in a cooler climate or simply prefer growing plants inside, Dipladenia can adapt well to indoor life with the right care. Here’s what to keep in mind when growing it indoors:
- Light: Since Dipladenia needs plenty of sunlight to bloom, place your plant near a south-facing window where it can soak up direct sunlight for 4-6 hours a day. If natural light is limited, consider supplementing with a grow light.
- Temperature: Indoor Dipladenia prefers a warm environment, ideally between 65°F to 75°F (18°C – 24°C). Avoid placing it near drafts or air conditioners, as sudden temperature changes can stress the plant.
- Humidity: Indoor air can get dry, especially in winter. Dipladenia loves humidity, so try to increase moisture around your plant by using a humidifier or placing a tray of water nearby. Misting the leaves occasionally can also help, but avoid excess moisture on the leaves to prevent fungal growth.

- Container Size: Make sure your pot has good drainage to prevent water from sitting at the bottom and causing root rot. Repot every couple of years when your plant outgrows its container.
Outdoor vs. Indoor: Key Differences at a Glance 
Factor | Outdoors | Indoors |
Sunlight | Full sun (4-6 hours daily) | Bright, direct sunlight (preferably south-facing window) |
Temperature | Warm climate (zones 10-11) | 65°F to 75°F (18°C – 24°C) |
Humidity | Naturally humid in tropical climates | Needs extra humidity indoors (use a humidifier) |
Watering | Regular watering, but ensure good drainage | Keep soil moist but avoid overwatering |
Protection from Cold | Protect from frost in colder months | Keep away from cold drafts and air conditioning |
Growth Habit | Can climb on trellises, spreads easily | Grows more compact, ideal for pots or containers |
When to Move Your Dipladenia Indoors or Outdoors 
If you live in a region with changing seasons, you might need to move your Dipladenia from indoors to outdoors (or vice versa). Here’s when to make the switch:
- Spring to Summer: Once the weather warms up, you can move your Dipladenia outdoors to enjoy full sunlight and fresh air.
- Fall to Winter: As temperatures drop and frost becomes a concern, bring your plant back indoors to protect it from cold damage.
Quick Tips for Both Settings
- Watering: Both indoors and outdoors, always check the soil moisture before watering. Dipladenia prefers soil that’s moist but not soggy.
- Pruning: Whether inside or outside, prune dead flowers and overgrown stems regularly to encourage new growth and more blooms.
- Pests: Keep an eye on your plant for pests. If you spot any, treat the plant immediately with insecticidal soap or neem oil.
By understanding the unique needs of your Dipladenia plant, you can successfully grow it both indoors and outdoors, ensuring it thrives wherever you choose to place it!
5. Advanced Dipladenia Care: Expert Tips for Experienced Gardeners
For seasoned gardeners looking to elevate their Dipladenia plant care to the next level, there are several advanced techniques to ensure your plant not only survives but thrives with spectacular blooms. Here are expert tips to optimize your Dipladenia’s growth and health.
1. Fine-Tune Pruning for Maximum Blooms
Pruning is key to maintaining a healthy, well-shaped Dipladenia that produces abundant flowers. Here’s how to prune like a pro:
- When to Prune: Prune your Dipladenia in early spring before the growing season starts. This encourages new growth and sets the stage for stronger blooms.
- Where to Cut: Trim the stems just above a leaf node (where leaves emerge), which will encourage branching and denser foliage. Removing dead or damaged branches also redirects energy into healthy growth.
- Shape and Size: For a more compact, bushy plant, trim back long, leggy stems. If you want your Dipladenia to climb or trail, let the vines grow longer while maintaining the structure with selective pruning.
2. Use Specialized Fertilizers for Extra Blooms
Dipladenia benefits from regular feeding, but for maximum flowering, it’s worth using specialized fertilizers. Here’s what you can do:
- Slow-Release Fertilizer: Opt for a slow-release, balanced fertilizer with equal parts nitrogen (N), phosphorus (P), and potassium (K). This ensures consistent feeding throughout the growing season.
- High-Phosphorus Fertilizer: To promote larger and more vibrant blooms, consider switching to a high-phosphorus fertilizer in the mid-to-late growing season. Phosphorus helps plants produce flowers rather than focusing on foliage growth.
- Feeding Frequency: Apply fertilizer every 4-6 weeks during the growing season. In winter, reduce feeding as the plant enters its dormant phase.
3. Propagate Your Dipladenia Plant
Growing more Dipladenia plants from your healthy, thriving specimen is a fun and rewarding process. Here’s how to propagate your plant through cuttings:
- Choose Healthy Stems: Select a healthy, non-flowering stem that’s at least 4-6 inches long.
- Take the Cutting: Using sharp, sterilized scissors, cut just below a leaf node. Remove the lower leaves and dip the cut end into rooting hormone to promote faster root growth.
- Rooting: Place the cutting in a small container with well-draining potting mix and keep it in a warm, bright spot. Keep the soil lightly moist and cover the cutting with a plastic bag to increase humidity. Roots should develop in about 3-4 weeks.
- Transplant: Once roots are well-established, transplant the cutting into a larger pot and treat it like an adult plant.
4. Master Temperature Control for Year-Round Growth
Dipladenia thrives in warmth, and temperature control can make a huge difference in the plant’s performance. Here’s how to fine-tune the temperature for optimal growth:
- Consistent Warmth: Keep your Dipladenia at a consistent temperature of 65°F to 75°F (18°C – 24°C). If temperatures dip below 50°F (10°C), bring the plant indoors to protect it from cold stress.
- Indoor Heating: During colder months, if you’re growing your Dipladenia indoors, make sure it’s not near heating vents or air conditioners, as these can cause temperature fluctuations and dry out the plant.
- Outdoor Care: In areas with cold winters, bring your plant indoors before the first frost. You can also place it in a greenhouse or a frost-free garden area with a cover during the colder months.
5. Prevent and Treat Diseases Proactively 
While Dipladenia is relatively disease-resistant, it can occasionally face fungal or bacterial issues. Being proactive in disease prevention will keep your plant healthy.
- Good Airflow: Ensure your Dipladenia has adequate spacing and airflow around it, especially when growing multiple plants together. This helps reduce the risk of fungal infections like powdery mildew.
- Proper Watering: Water at the base of the plant to avoid getting the leaves wet. Wet foliage can lead to fungal growth, especially in humid environments.
- Neem Oil for Prevention: Use neem oil or insecticidal soap to treat and prevent both pests and fungal infections. A regular light misting of neem oil can keep pests at bay and boost plant immunity.
6. Advanced Soil Care: Optimize pH for Blooming
While Dipladenia thrives in slightly acidic to neutral soil (pH 6-7), maintaining the right soil balance is crucial for maximizing flower production.
- Soil pH: Test your soil’s pH periodically to ensure it stays in the optimal range for Dipladenia. If it’s too alkaline, you can amend the soil by adding organic matter like compost or pine bark, which helps acidify the soil.
- Well-Draining Mix: Make sure your soil is well-draining—a mix that retains moisture but doesn’t stay soggy. Too much water retention can lead to root rot.
Bonus Expert Tip: Use Vertical Gardening Techniques for a Stunning Display
Dipladenia loves to climb, and using vertical gardening techniques is an excellent way to showcase its beauty. Consider installing trellises, garden arches, or other climbing structures to let your Dipladenia vine and create a dramatic visual display. The more vertical space your plant has to grow, the more room it has for stunning flowers!
By applying these expert-level care strategies, your Dipladenia plant will not only survive but thrive, filling your home or garden with an abundance of gorgeous blooms and lush greenery. Happy gardening!
6. Tips for Keeping Your Dipladenia Healthy Year-Round
Maintaining a healthy Dipladenia plant throughout the year requires a bit of attention and care, especially as seasons change. Whether your plant is indoors or outdoors, following a few simple tips will ensure it thrives and blooms beautifully all year long. Let’s break it down.
1. Adjust Watering for Seasonal Changes
Watering needs fluctuate with the seasons. Here’s how to keep your Dipladenia hydrated properly throughout the year:
- Spring and Summer: During the growing season, your Dipladenia will need more water. Water it when the top inch of soil feels dry. Don’t let it sit in water, though—always ensure the pot has proper drainage.
- Fall and Winter: As the plant goes dormant in cooler months, cut back on watering. Check the soil before watering and allow it to dry out more than usual between waterings. Overwatering in winter can lead to root rot.
2. Maintain Consistent Temperature
Dipladenia prefers consistent warmth. Sudden temperature changes can stress the plant and affect its health. Here’s how to ensure the right environment:
- Indoors: Keep the temperature between 65°F to 75°F (18°C – 24°C). Avoid placing your plant near cold drafts, heating vents, or air conditioners, which can cause sudden temperature shifts.
- Outdoors: In colder months, protect your Dipladenia from frost. If you live in a region where temperatures drop below 50°F (10°C), bring the plant indoors or cover it with frost protection material.
3. Provide Proper Light Year-Round
Light is essential for healthy growth and blooming. Here’s how to adjust your Dipladenia’s light conditions as the seasons change:
- Spring and Summer: Place your plant in a spot that gets 4-6 hours of direct sunlight each day. Outdoor plants should be positioned in full sun to promote abundant blooms.
- Fall and Winter: Indoor Dipladenia might not get as much natural light during the shorter days. Consider moving your plant to a brighter window or supplementing with a grow light to ensure it continues getting enough sunlight.
4. Prune for Shape and Health
Regular pruning keeps your Dipladenia healthy and encourages new growth. Here’s when and how to prune throughout the year:
- Spring: Prune dead or damaged stems before the growing season begins. This gives your plant a fresh start and promotes better blooms.
- Fall and Winter: During dormancy, avoid heavy pruning, but you can still remove any dead or unhealthy parts to prevent disease.
5. Boost Humidity in Dry Months 
Dipladenia plants love humidity, especially during winter when indoor air tends to be dry. Here’s how to help your plant thrive:
- Use a Humidifier: If you’re growing your plant indoors, a humidifier can provide the extra moisture it needs, particularly in the winter months when indoor heating systems dry out the air.
- Mist the Leaves: Lightly misting the leaves every few days will help maintain humidity around the plant. Just be sure not to overdo it, as excess moisture on the leaves can lead to fungal growth.
6. Fertilize Regularly During the Growing Season
For vibrant blooms and healthy growth, feed your Dipladenia plant during the growing months. Follow these simple fertilizing guidelines:
- Spring to Summer: Use a balanced, water-soluble fertilizer once every 4-6 weeks to keep your plant well-nourished.
- Fall and Winter: Cut back on fertilizing as the plant enters its dormant phase. Fertilizing during this time can cause stress and unnecessary growth.
7. Keep an Eye Out for Pests
Pests like aphids, spider mites, and mealybugs can cause problems year-round. Regular inspections will help you catch infestations early. Here’s how to keep pests at bay:
- Check for pests: Inspect your plant weekly, especially under the leaves. If you spot any pests, treat your plant with a gentle insecticidal soap or neem oil.
- Improve Airflow: Make sure your plant has good airflow to reduce the risk of fungal infections and pests. Don’t overcrowd plants in your home or garden.
8. Repot When Necessary 
Over time, your Dipladenia will outgrow its pot and need repotting. Here’s how to ensure it has enough room to thrive:
- Repotting Time: Repot your Dipladenia every 1-2 years or when you notice roots coming out of the drainage holes. It’s best to do this in the spring, right before the growing season begins.
- Choose the Right Pot: When repotting, select a pot that is 1-2 inches larger in diameter than the current one. Ensure it has drainage holes to prevent waterlogging.
By following these tips and adjusting your care routine with the seasons, you can keep your Dipladenia plant healthy, happy, and blooming all year long. With consistent attention to light, temperature, watering, and humidity, your plant will flourish season after season.
Conclusion
Caring for a Dipladenia plant may seem daunting at first, but with the right knowledge and attention, you can enjoy its stunning blooms and lush greenery year-round. By understanding its light, water, and temperature needs, along with the occasional pruning and repotting, your Dipladenia will thrive in both indoor and outdoor environments.
Remember, consistency is key—whether it’s adjusting your watering routine with the seasons, ensuring proper humidity, or feeding your plant regularly during the growing season. By following the expert tips shared in this guide, you’ll not only overcome common challenges but also become a confident and informed Dipladenia caretaker.
Now it’s your turn to apply these tips and enjoy the beauty of a flourishing Dipladenia plant in your home or garden! Feel free to experiment, observe, and make adjustments as you go—your Dipladenia will reward you with vibrant, healthy blooms that brighten your space. Happy gardening! 