There is a specific, primal magic that happens when a gallon of liquid milk transforms into a solid, ivory-hued wheel of cheese on your kitchen counter. For many, the art of cheesemaking feels like a guarded secret—a complex science reserved for those with aging caves and expensive pH meters. However, the truth is far more accessible. By mastering a few easy soft cheeses, you can bypass the months of waiting and technical hurdles, producing high-quality, organic dairy products that are fresher and more flavorful than anything found in a plastic tub at the grocery store. Whether you are a small-scale homesteader or a culinary enthusiast, the journey from “dairy novice” to “artisan” begins with these simple, acid-set miracles.
1. The Renaissance of Farm-to-Table Dairy
In recent years, we have seen a massive shift in how people view their food sources. The “Slow Food” movement and the rise of organic farming practices have brought us back to the basics. We no longer want food that has traveled thousands of miles; we want food with a story.
Making your own cheese is the ultimate expression of this philosophy. When you make easy soft cheeses at home, you are in total control of the narrative. You choose the quality of the milk, the amount of salt, and the absence of synthetic preservatives or stabilizers like carrageenan. For beginners, the fear of “spoiling” milk or failing to get a curd often acts as a barrier. This guide is designed to tear down those barriers, using a science-based yet approachable method to ensure your first batch is a resounding success.
2. The Science of Soft Cheese: Why Beginners Should Start Here
To understand cheesemaking, we must first look at milk as a biological system. Milk is essentially an emulsion of water, fats, and proteins (specifically casein and whey). To make cheese, our goal is to separate those solids (curds) from the liquid (whey).
What Defines an “Easy” Soft Cheese?
In the professional world, “easy” refers to fresh cheeses that do not require specialized cultures or a long ripening period.
-
Acid-Set vs. Rennet-Set: Most professional cheeses (like Cheddar or Brie) use rennet—an enzyme—to coagulate milk. While effective, rennet can be finicky for a first-timer. The “easy” method uses food-grade acids like lemon juice, vinegar, or citric acid. These acids lower the pH of the milk, causing the casein proteins to clump together instantly when heat is applied.
-
No Aging Required: Because these cheeses have high moisture content and are set with acid, they are meant to be eaten fresh. You don’t need a temperature-controlled cave; you just need a refrigerator and a fork.
Why Quality Milk is the Foundation
As an agricultural expert will tell you: You cannot make great cheese from poor milk.
-
Avoid Ultra-Pasteurized (UHT) Milk: This is the most common reason for failure. UHT milk is heated to such a high temperature (°C or °F) that the protein structure is “denatured.” It will never form a firm curd; it will only produce a grainy, yogurt-like silt.
-
Pasteurized vs. Raw: Standard pasteurized milk is excellent for cheesemaking. If you have access to high-quality raw milk from a local organic farm, the flavor profile will be more complex, and the natural enzymes will assist in a better curd set.
-
The Role of Fat: While you can make cheese with skim milk, the “mouthfeel” of easy soft cheeses comes from butterfat. Aim for Whole Milk (% to %) for the best results.
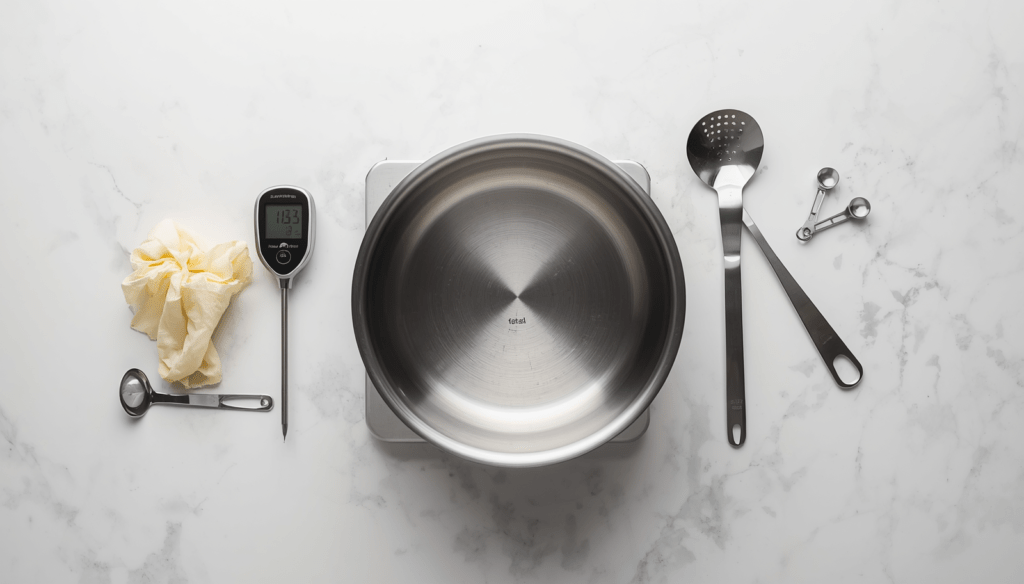
3. Essential Gear: Setting Up Your Small-Scale “Creamery”
You likely already have % of what you need in your kitchen. However, the difference between a messy experiment and a professional result lies in a few specific tools.
The Minimalist Toolkit
-
Non-Reactive Stockpot: Use stainless steel or heavy-duty enamel. Avoid aluminum or unlined copper, as the acid used in cheesemaking can react with these metals, leaving a metallic tang in your Farmer’s Cheese.
-
Digital Thermometer: Precision is everything. A difference of degrees can change your cheese from “creamy” to “rubbery.”
-
Butter Muslin vs. Cheesecloth: Forget the loose-weave “cheesecloth” sold in grocery stores; it’s too porous. You want Butter Muslin, which has a tight weave that captures the fine curds while allowing the whey to drain.
-
Long-Handled Slotted Spoon: For gently “cutting” and lifting the curds without shattering them.
Sanitation & Safety Protocols
Cheesemaking is a form of controlled fermentation (or acidification). To ensure only the “good” elements thrive:
-
Sterilize: Boil your spoons and muslin for minutes before use.
-
Clean Surface: Wipe down your counters with a food-safe sanitizer or a vinegar-water solution.
-
Chlorine Warning: If using tap water to rinse your cheese or equipment, be aware that chlorine can interfere with flavor. Use filtered water if possible.

4. Ingredient Spotlight: Organic and Natural Additives
When you move away from industrial cheese, you realize that flavor isn’t just about “salt.” It’s about the chemistry of your additives.
Choosing Your Acids
-
Lemon Juice: Lends a bright, citrusy note. Best for Ricotta or dessert cheeses.
-
White Vinegar: The most neutral option. It provides a clean “snap” to the cheese without altering the milk flavor.
-
Citric Acid: Highly consistent. It’s a dry powder that allows for precise pH control, often used by professionals for a consistent “stretch” or “set.”
Salt: The Unsung Hero
Never use iodized table salt. Iodine inhibits the natural sweetness of the milk and can give the cheese a bitter, chemical aftertaste. Use Cheese Salt, Kosher salt, or non-iodized Sea salt. The grains should be fine enough to dissolve quickly into the warm curds.
Infusing from the Organic Garden
This is where your agricultural expertise shines. Soft cheeses are a blank canvas.
-
Fresh Herbs: Chives, dill, and parsley should be folded in after the cheese has drained but while it is still slightly warm.
-
Garlic and Peppers: For a spicy kick, finely minced habaneros or roasted garlic can be added to Queso Blanco for a “signature” farmstead blend.
5. The “Big Three”: Comprehensive Guides to Easy Soft Cheeses
The following recipes represent the “gold standard” for beginners. They require no specialized cultures and provide immediate results. By following these steps, you are mimicking the processes used in small-scale organic creameries worldwide.
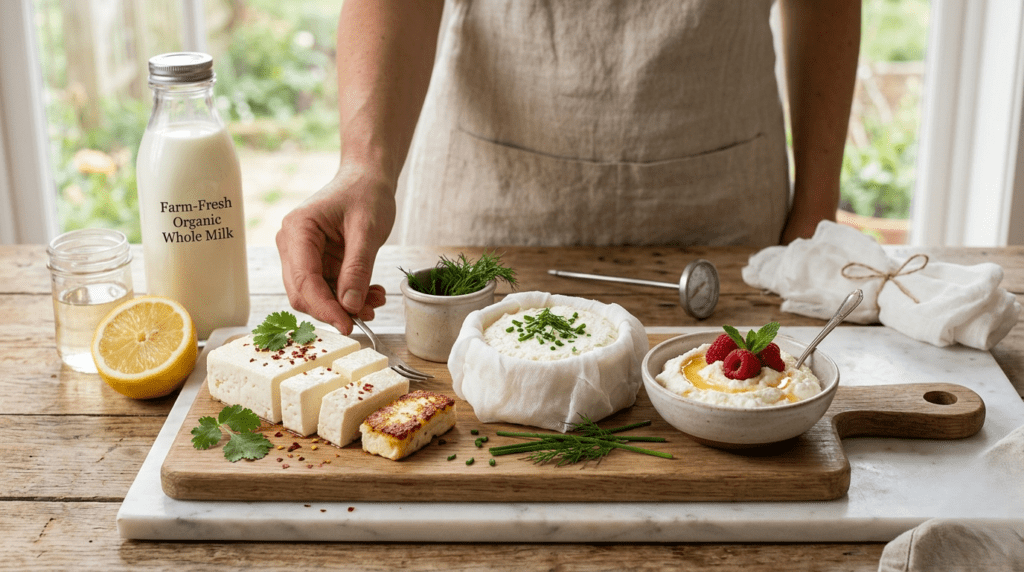
Recipe 1: Farmer’s Cheese (The Versatile Classic)
Farmer’s cheese is the quintessential “entry-level” dairy product. It is a pressed curd cheese that can be eaten crumbled over salads, spread on sourdough, or used as a filling for pierogies or blintzes.
-
Ingredients: 1 gallon of whole milk, 1/2 cup of white vinegar (or lemon juice), 1 tsp of salt.
-
The Process:
-
Heating: Slowly heat the milk in your non-reactive pot to 88°C (190°F). Stir constantly to prevent scorching at the bottom.
-
Acidification: Remove from heat. Add the vinegar one tablespoon at a time, stirring very slowly in a figure-eight motion. You will see the curds (white solids) separate from the whey (yellowish liquid) almost instantly.
-
The Rest: Cover the pot and let it sit undisturbed for 10–15 minutes. This “sets” the curd.
-
Draining: Line a colander with sterilized butter muslin. Gently ladle the curds into the cloth.
-
Achieving Texture: For a spreadable cheese, drain for 20 minutes. For a firmer, sliceable block, tie the corners of the muslin and hang it over your sink for 2–4 hours.
-
-
Expert Tip: If the cheese feels too dry, fold in a tablespoon of heavy cream or organic yogurt after draining to restore a silky mouthfeel.
Recipe 2: Authentic Queso Blanco
Unlike Farmer’s cheese, Queso Blanco (White Cheese) is designed to have a high melting point. This is a staple in Latin American agriculture, often served seared or grilled alongside fresh vegetables.
-
The Technical Secret: The key to Queso Blanco is the high-heat application, which denatures the proteins in a way that allows them to hold their shape even when fried.
-
The Process: Follow the same heating instructions as Farmer’s cheese, but ensure the milk reaches a full 90°C (194°F). After adding the acid and draining the curds for 30 minutes, place the muslin-wrapped bundle into a cheese press (or under a heavy cast-iron skillet) for 2 hours. This expels the maximum amount of moisture, creating a firm, “squeaky” cheese that can be cubed and sautéed without melting into a puddle.
Recipe 3: Homemade Ricotta (The Liquid Gold)
While traditional Italian Ricotta is made from the leftover whey of other cheesemaking processes, “Whole Milk Ricotta” is the preferred method for home cooks because of its incredible richness.
-
The Method: Heat a mixture of milk and a splash of heavy cream to 93°C (200°F). Add citric acid dissolved in a little water. The curds will be much finer and more delicate than Farmer’s cheese.
-
The “Fluff” Factor: Do not hang Ricotta. Let it drain in a colander for only 5–10 minutes. The goal is a light, airy, and moist curd that carries the natural sweetness of the lactose.
6. Troubleshooting Common Soft Cheese Mistakes
Even with easy soft cheeses, variables like humidity, milk protein levels, and seasonal changes in cow diet can affect your results.
Why Didn’t My Milk Curdle?
-
The Milk Quality: As mentioned, verify that your milk is not “Ultra-Pasteurized.”
-
Temperature: If the milk is too cold (below 82°C/180°F), the acid won’t be able to force the proteins to bond. Reheat the milk slowly and add a teaspoon more of acid.
-
Acid Strength: Bottled lemon juice is often more consistent than fresh lemons, which vary in acidity.
Dealing with “Off” Flavors or Rubbery Texture
-
Rubbery Curds: This usually happens if the milk was boiled for too long or if too much acid was used. The proteins become “over-tightened.”
-
Metallic Taste: Ensure your equipment is truly non-reactive (stainless steel).
-
Bitterness: This is often caused by using iodized salt or low-quality tap water containing high levels of chlorine.
Proper Storage and Shelf Life
Since these cheeses contain no chemical preservatives, they are living, fresh products.
-
Fridge Life: Store in an airtight container for 5–7 days.
-
Freezing: Soft cheeses like Farmer’s cheese can be frozen, but the texture will become slightly more crumbly upon thawing. It is best used for baking after being frozen.

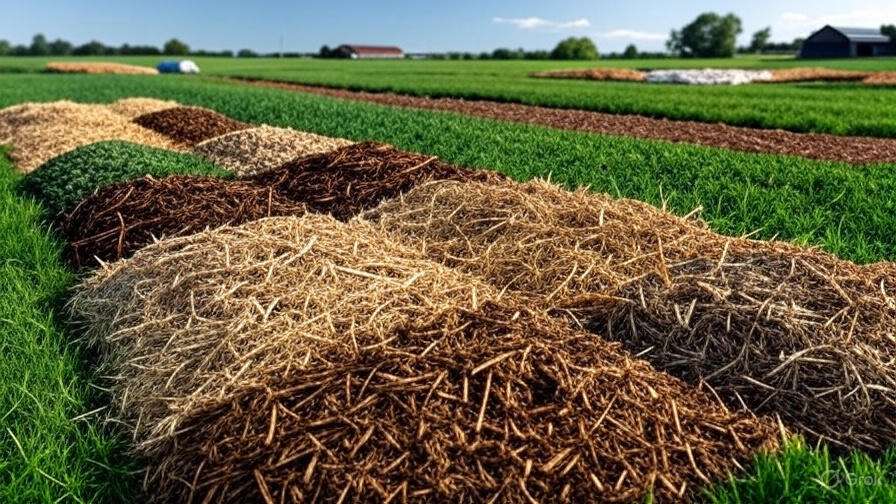
7. Agricultural Integration: The Organic Loop
As someone interested in agricultural guidelines, it is vital to see cheesemaking as part of a larger ecosystem. In an organic farming system, there is no such thing as “waste.”
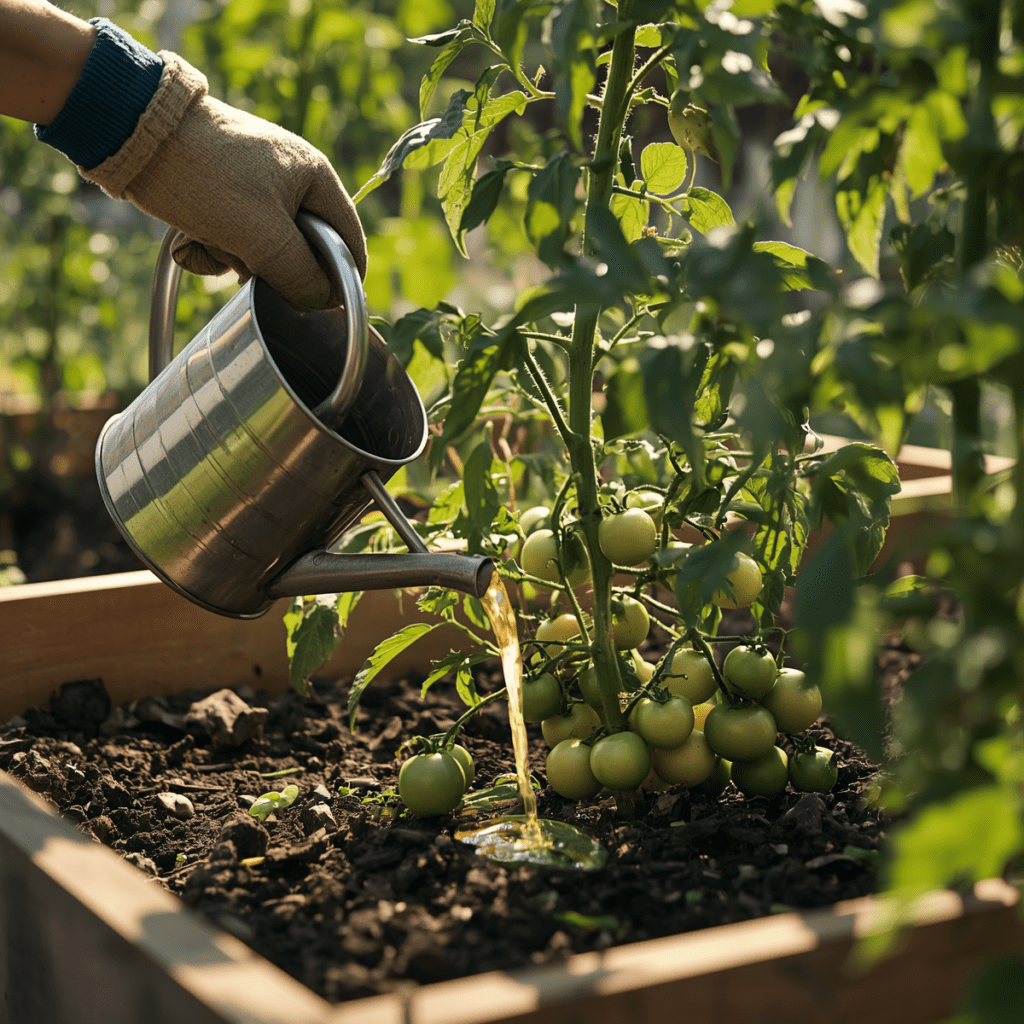
Utilizing Cheese Whey in the Garden
For every gallon of milk, you will produce roughly 3/4 gallon of whey. Do not pour this down the drain!
-
Soil Amendment: Whey is rich in nitrogen, phosphorus, and potassium (NPK). Diluted at a 1:10 ratio with water, it acts as an excellent fertilizer for acid-loving plants like blueberries or tomatoes.
-
Powdery Mildew Control: Spraying a diluted whey solution on plant leaves has been shown in some organic trials to help combat certain fungal infections.
-
Animal Feed: If you keep chickens or pigs, whey is a high-protein supplement that they will readily consume.
Soft Cheese as a Value-Added Product
For small-scale farmers, selling raw milk can be legally complex and low-margin. Converting that milk into easy soft cheeses adds significant value. A gallon of organic milk costing $6 can be transformed into a pound of artisan Farmer’s Cheese that retails for $15–$20 at a local farmers’ market, highlighting the economic potential of agricultural “upcycling.”
8. Culinary Inspiration: Beyond the Bagel
While a simple spread on a bagel is delightful, the versatility of easy soft cheeses allows them to shine in complex, gourmet applications. Because these cheeses are unaged, they possess a lactic “brightness” that complements both savory and sweet profiles.
H2: 5 Pro-Chef Ways to Use Your Fresh Soft Cheese
-
Gourmet Pasta Fillings: Use your homemade Ricotta or Farmer’s Cheese as a base for ravioli or manicotti. Mix in organic spinach, nutmeg, and a hint of lemon zest to elevate the creamy texture.
-
The “Whipped” Technique: Take your fresh soft cheese and pulse it in a food processor with a drizzle of extra virgin olive oil and a pinch of sea salt. This creates a “whipped” consistency that serves as a sophisticated base for roasted root vegetables or heirloom tomato toasts.
-
Agricultural Herb Spreads: Incorporate seasonal herbs directly from your organic garden. A blend of chive, tarragon, and chervil folded into soft Farmer’s Cheese creates a “Boursin-style” spread that is far superior to store-bought versions.
-
Traditional Frying: Use your Queso Blanco in “Saganaki” style. Because it doesn’t melt, you can sear cubes in a hot skillet with a bit of organic butter until a golden-brown crust forms. Serve with a squeeze of lime and a dash of chili powder.
-
Cultured Desserts: Soft cheese isn’t just for dinner. Mix your creamy Farmer’s Cheese with honey and fresh berries for a high-protein, probiotic-rich breakfast or a light summer dessert.
9. FAQ: Expert Answers for New Dairy Folks
Navigating the world of home dairy can lead to many questions. Here are the most common inquiries from the community, answered with agricultural precision.
Q: Can I make cheese with plant-based milks using this guide? A: Unfortunately, no. This guide relies on the specific structure of animal proteins (casein). Plant-based milks (almond, soy, oat) require different coagulants like agar-agar or carrageenan and follow an entirely different chemical process.
Q: How long does homemade soft cheese last? A: Because there are no commercial stabilizers, you should consume your easy soft cheeses within 5 to 7 days. Always keep them in a sealed, airtight container in the coldest part of your refrigerator.
Q: Is it actually cheaper to make cheese than to buy it? A: If you are comparing it to “commodity” cheese, the cost is similar. However, if you are comparing it to organic, artisan-grade soft cheese, making it at home is significantly more cost-effective—often saving you 50% or more per pound.
Q: What is the best temperature for curd formation? A: For most acid-set soft cheeses, the “sweet spot” is between 85°C and 92°C (185°F – 198°F). Going below this may result in a weak set, while going above may result in a “cooked” flavor.
10. Conclusion: Your Journey into Agricultural Craft
Mastering easy soft cheeses is more than just a culinary skill; it is a step toward self-sufficiency and a deeper connection to the agricultural cycle. By understanding the science of milk, the importance of sanitation, and the value of organic inputs, you have moved from being a passive consumer to an active producer of high-quality nutrition.
As you stand in your kitchen, holding a bowl of warm, fresh curds that you created from scratch, you are participating in a tradition that spans thousands of years. Whether you use the leftover whey to nourish your garden or share a wheel of Queso Blanco with your neighbors, you are strengthening the “farm-to-table” bond.
Take the first step today. Grab a gallon of high-quality milk, your favorite organic acid, and start your journey. The world of artisan dairy is waiting for you, one curd at a time.