
Orchids are often seen as delicate, exotic beauties that require expert care—but did you know that ground orchid plants are different?  Whether you’re a seasoned gardener or just getting started, these stunning plants are surprisingly easy to grow and care for. If you’ve ever dreamed of filling your garden with vibrant orchid blooms, ground orchids may be your perfect choice!
In this guide, we’ll show you exactly how to plant, nurture, and maintain ground orchid plants to ensure they thrive in your garden all year round.  From selecting the right spot to troubleshooting common issues, you’ll find actionable tips that can help you avoid mistakes and achieve success. If you’ve struggled with orchids before or are simply looking for a more beginner-friendly option, this article is designed for you!
By the end of this guide, you’ll have a deeper understanding of ground orchid plants and feel confident in your ability to cultivate beautiful, healthy blooms right at home. Ready to dive in? Let’s explore the world of ground orchids and discover how you can make your garden bloom with ease! 
1: Understanding Ground Orchid Plants
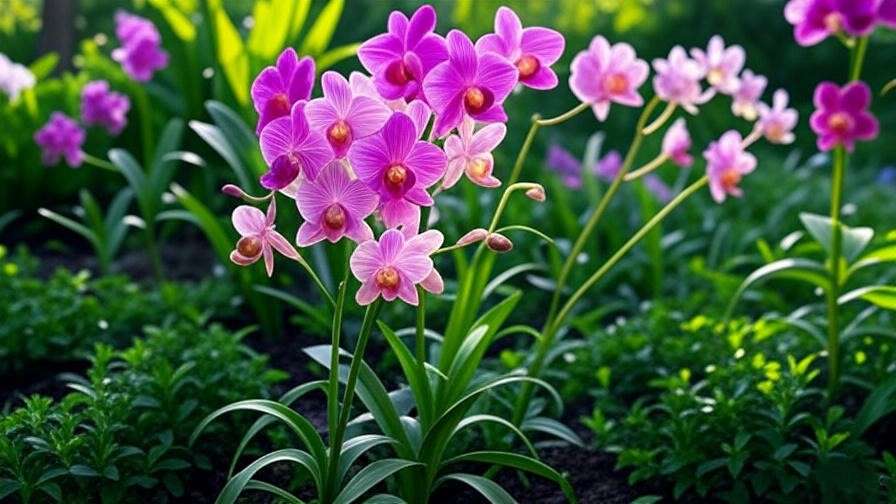
Ground orchid plants are a beautiful and often overlooked choice for gardeners looking to add a touch of exotic beauty to their landscape. Unlike their epiphytic relatives that grow on trees, ground orchids thrive in the soil, making them easier to grow and care for. Whether you’re a beginner or an experienced gardener, ground orchids are a low-maintenance option that can bring year-round color to your garden.

What Are Ground Orchid Plants?
Ground orchids are terrestrial orchids that grow in the ground rather than on trees or rocks. Popular varieties, such as Bletilla striata and Calanthe, have become favorites for garden enthusiasts due to their ability to adapt to different environments. These orchids grow in clumps of beautiful, long-lasting blooms and are known for their hardiness in various climates.
Why Choose Ground Orchids?
Here are some key reasons why ground orchids might be the perfect choice for your garden:
- Easy to Grow: Ground orchids are generally more forgiving and easier to care for than their epiphytic counterparts.
- Vibrant Blooms: These orchids produce beautiful flowers in a range of colors, from soft pinks to rich purples, adding a burst of color to your garden.
- Hardy and Adaptable: Many ground orchids are cold-hardy, meaning they can survive in a variety of climates, including colder regions where typical orchids might struggle.

Key Differences Between Ground Orchids and Epiphytic Orchids
While both types are orchids, ground orchids and epiphytic orchids have different growing requirements:
- Ground Orchids: Thrive in soil, requiring well-drained, fertile ground with moderate watering.
- Epiphytic Orchids: Grow on trees or rocks and need a more humid environment with good air circulation.
Choosing the right type of orchid for your garden depends on the climate and the care you’re able to provide. Ground orchids are perfect for gardeners looking for an easy-to-manage yet stunning addition to their outdoor space.
By understanding what makes ground orchids unique, you’ll be better equipped to decide if they’re the right plant for you. Ready to start growing them in your garden? Let’s move on to the next step: choosing the perfect spot for them to thrive! 
2: Choosing the Right Location for Ground Orchids
Choosing the right spot for your ground orchids is essential for their success. These plants thrive when their needs for light, temperature, and soil are met. Whether you’re planting in your garden or in a container, finding the ideal location will help ensure your orchids grow strong and bloom beautifully.

Light Requirements: Finding the Perfect Balance
Ground orchids do best in partial sunlight—around 4 to 6 hours of indirect light per day. Too much direct sunlight can scorch their leaves, while too little light can prevent them from blooming.  Here’s how to find that sweet spot:
- Morning Sun: If you can, place your orchids where they receive morning sunlight and some afternoon shade. This provides the right balance of light without overexposing them to the sun’s harsh rays.
- Shady Corners: Ground orchids also do well in slightly shaded areas, like under trees or beside taller plants that provide dappled sunlight.
Temperature: Keeping Your Ground Orchids Comfortable
Ground orchids are generally hardy plants, but they have their preferred temperature range. Most varieties prefer temperatures between 60°F and 75°F (15°C – 24°C). If you’re in a region with cold winters, consider the following:
- Cold-Hardy Varieties: Some ground orchids, like Bletilla striata, are cold-hardy and can withstand light frosts. However, they may need some protection during extremely cold spells.
- Warm Climates: In warmer areas, ground orchids thrive without much extra care, as long as they have some afternoon shade to protect them from the hottest part of the day.
Soil: The Key to Healthy Root Growth
Ground orchids need well-drained, fertile soil. While they can tolerate different soil types, they do best in slightly acidic to neutral soil (pH 6.0 to 7.0). Here’s how to get the soil just right:
- Loamy Soil: Aim for loamy or sandy soil that drains well but holds some moisture.
- Add Organic Matter: Mixing in compost or organic matter will improve soil texture and provide essential nutrients for healthy growth.
- Good Drainage: Ensure that the soil doesn’t become waterlogged. You can also plant ground orchids in raised beds or containers to improve drainage.
Planting in Containers or Garden Beds
Ground orchids can thrive both in garden beds and containers, but each option comes with its considerations:
- Garden Beds: If planting in the ground, choose a spot with good drainage and enough space for the orchids to spread.
- Containers: Containers are a great option for smaller spaces or if you want to move your orchids around. Just make sure to use pots with drainage holes and a well-draining orchid potting mix.

By selecting the right location, you’ll create an ideal environment for your ground orchids to thrive. A little planning can go a long way in helping them bloom beautifully and stay healthy. Ready to get your hands dirty and plant your orchids? Let’s move on to the next step: planting ground orchids for the best results!
3: Planting Ground Orchids
Planting ground orchids is a rewarding task that requires some attention to detail, but with the right approach, you’ll have beautiful blooms in no time! Follow these simple steps to ensure your ground orchids have the best start in your garden or containers.

Step 1: Prepare the Soil
The foundation of healthy orchid growth starts with the right soil. Ground orchids prefer well-drained, fertile soil, so it’s important to prepare the planting area properly. Here’s what to do:
- Loosen the Soil: If you’re planting in the ground, dig the soil to a depth of about 6-8 inches. This ensures good root penetration.
- Improve Drainage: If your soil is heavy or clay-like, mix in sand or perlite to improve drainage.
- Add Organic Matter: Incorporate compost or aged manure to provide nutrients and help retain moisture without making the soil soggy.
Step 2: Dig the Right Hole
For each ground orchid, dig a hole that’s slightly larger than the plant’s root ball. Aim for a depth of about 4-6 inches, depending on the size of the orchid.
- Spacing: Ground orchids need space to grow, so make sure to space them 12-18 inches apart, depending on the variety. This allows air circulation and prevents overcrowding, which can lead to disease.
Step 3: Plant the Orchid
Now it’s time to place your orchid in the hole:
- Positioning: Gently remove the orchid from its container, and place it in the hole with the top of the root ball level with the soil surface.
- Don’t Plant Too Deep: Avoid planting the orchid too deep, as this can lead to root rot. Make sure the plant is at the same depth it was in its nursery pot.
- Fill the Hole: Cover the roots with soil and gently firm it around the base to eliminate air pockets.
Step 4: Water After Planting
After planting, water your orchid thoroughly to settle the soil and hydrate the roots. Make sure the soil is moist but not soggy.  Over-watering can cause root rot, so always check that the soil has good drainage.
Step 5: Mulch for Protection (Optional)
Applying a light layer of mulch around your newly planted orchids can help conserve moisture, regulate temperature, and reduce weed growth. Just be sure to leave a gap around the base of the plant to allow for airflow and prevent rot.
Step 6: Care After Planting
After your orchids are planted, it’s time to focus on their ongoing care:
- Watering: Keep the soil moist but not waterlogged. Ground orchids prefer consistent moisture, especially during the growing season.
- Fertilizing: Use a balanced fertilizer to feed your orchids during the growing season, typically every 4-6 weeks.
By following these simple steps, you’ll give your ground orchids the best start possible, ensuring they grow strong and produce beautiful blooms. Ready to get your hands dirty and see your orchids thrive? Let’s move on to the next step: watering and fertilizing to keep your orchids healthy and vibrant!
4: Watering and Fertilizing Ground Orchids
Proper watering and fertilizing are key to keeping your ground orchids healthy and blooming beautifully. Whether you’re a seasoned gardener or just starting out, it’s important to strike the right balance—too much water or fertilizer can harm your orchids, while too little can stunt their growth.

Watering Ground Orchids
Ground orchids prefer consistent moisture but do not like to sit in soggy soil. Here’s how to get watering just right:
- Frequency: Water your orchids when the top 1-2 inches of soil feel dry to the touch. During the growing season (spring and summer), this might mean watering once a week, but always adjust based on the weather and soil moisture. In winter, when orchids are dormant, you can water less frequently.
- Deep Watering: Ensure that water reaches the roots by watering deeply. Shallow watering will only moisten the surface, leaving the roots dry.
- Drainage is Key: Always make sure the soil drains well. If your orchid’s soil stays too wet, it can lead to root rot, which is one of the most common problems with orchids.
- Morning Watering: Watering in the morning allows the plants to dry out by the afternoon, reducing the risk of fungal diseases that thrive in damp conditions.
Fertilizing Ground Orchids
Ground orchids benefit from regular feeding to ensure they have the nutrients they need for healthy growth and blooming. However, over-fertilizing can harm the plant, so follow these tips to avoid common mistakes:
- Type of Fertilizer: Use a balanced, water-soluble fertilizer with equal amounts of nitrogen, phosphorus, and potassium (e.g., 20-20-20). Alternatively, you can use a specialized orchid fertilizer for terrestrial orchids.
- Feeding Schedule: During the growing season (spring and summer), fertilize your ground orchids once every 4-6 weeks. Reduce fertilizing during the dormant period (fall and winter) to once every 6-8 weeks, or stop altogether if your orchid isn’t actively growing.
- Dilute the Fertilizer: Always dilute your fertilizer to half the recommended strength to avoid overfeeding. This prevents burning the roots or causing nutrient imbalances.
- Organic Fertilizers: You can also opt for organic fertilizers like compost or well-rotted manure, which provide a slow release of nutrients.
Signs of Over-Watering and Over-Fertilizing
- Over-Watering: If your orchid’s leaves turn yellow and soft, it could be a sign of over-watering. Check the soil to see if it’s staying too wet.
- Over-Fertilizing: If your orchid’s leaves turn brown or you see white, crusty buildup around the plant’s base, this might be from too much fertilizer. If this happens, flush the soil with water to remove excess fertilizer.
By maintaining a consistent watering and fertilizing routine, your ground orchids will thrive and reward you with vibrant blooms season after season. Proper care now will set your orchids up for success throughout the year.
Ready for the next step? Let’s dive into caring for your orchids throughout the seasons!
5: Caring for Ground Orchids Throughout the Year
Caring for ground orchids is an ongoing process that varies with the seasons. By understanding their needs throughout the year, you can ensure your orchids stay healthy, vibrant, and blooming. Let’s break it down season by season, so you know exactly what to do for your ground orchids, no matter the time of year.

Spring: Preparing for a Blooming Season
Spring is the time when your ground orchids come out of dormancy and begin their active growth phase. Here’s how to care for them:
- Check for New Growth: As temperatures warm, look for new shoots emerging from the soil. Trim away any dead or damaged growth to allow new stems to thrive.
- Increase Watering: With warmer weather, your orchids will need more water. Be sure the soil stays moist but not soggy, as this is their active growing period.
- Fertilize Regularly: Spring is the time to start fertilizing your ground orchids every 4-6 weeks with a balanced orchid fertilizer to support their growth and blooming.
Summer: Maintaining Health and Vibrancy
Summer brings the peak growing season, where your ground orchids will need consistent care to continue thriving:
- Monitor Watering: Summer heat means your orchids will need regular watering. Check the soil moisture often and ensure it doesn’t dry out completely. If you’re in a particularly hot area, increase watering frequency.
- Mulch for Moisture: Applying a thin layer of mulch around your orchids can help keep the soil moist and cool during hot summer days, preventing the roots from overheating.
- Deadhead Spent Blooms: Remove any faded or dead flowers to encourage new blooms. Pruning back spent flowers also keeps the plant looking tidy.
Fall: Transitioning to Dormancy
As temperatures cool down in fall, your ground orchids will begin to slow down and enter a resting phase. Here’s what you should focus on:
- Reduce Watering: With cooler weather, ground orchids need less water. Allow the soil to dry slightly between waterings to avoid root rot.
- Stop Fertilizing: During fall, reduce fertilizing to once every 6-8 weeks or stop altogether. Orchids don’t need much nourishment while they rest.
- Protect from Frost: If you live in an area that experiences frost, consider adding a layer of mulch or moving your pots to a sheltered location to prevent any damage from early frosts.
Winter: Rest and Renewal
Winter is the most dormant period for ground orchids, but they still need some attention:
- Minimal Watering: Watering should be minimal during the winter months, as orchids are not actively growing. Check the soil regularly, but only water when it feels dry about 2-3 inches down.
- Keep Warm: Ensure that your orchids aren’t exposed to freezing temperatures. If you’re growing them in pots, move them to a warmer spot during cold spells.
- Don’t Fertilize: Orchids do not need fertilizing during their dormancy period. This is the time to give them a break, allowing them to rest and prepare for the upcoming growing season.
Year-Round Tips for Healthy Orchids
- Watch for Pests: Regularly check for pests like aphids or snails, especially during the warmer months. Treat infestations early to prevent damage.
- Pruning: After the blooming season, prune away any dead or yellowing leaves and spent flowers to keep your ground orchids healthy and looking neat.
- Check Soil Drainage: Throughout the year, make sure your ground orchids’ soil drains properly. Good drainage prevents root rot, which is one of the most common issues for orchids.
By following these seasonal care tips, you’ll keep your ground orchids strong, healthy, and ready to bloom year after year. Each season presents unique challenges, but with the right care, your orchids will reward you with beautiful flowers and lush foliage.
Ready to tackle any challenges? Let’s move on to troubleshooting common issues and solving problems that might come up with your ground orchids!
6: Common Problems and Solutions for Ground Orchids
Even though ground orchids are relatively easy to care for, like any plant, they can face a few challenges. By knowing what to look for and how to troubleshoot common problems, you can keep your orchids healthy and thriving. Let’s go over some of the most common issues and how to fix them.

1. Yellowing Leaves
One of the most frequent problems with ground orchids is yellowing leaves. This can be caused by several factors:
- Overwatering: Too much water can lead to root rot, which prevents the plant from absorbing nutrients. If the leaves turn yellow and soft, it might be a sign of overwatering.
- Solution: Ensure proper drainage and water the plant only when the top of the soil feels dry. Consider adjusting your watering schedule, especially during cooler months.
- Solution: Ensure proper drainage and water the plant only when the top of the soil feels dry. Consider adjusting your watering schedule, especially during cooler months.
- Nutrient Deficiency: Yellow leaves can also indicate a lack of essential nutrients, particularly nitrogen or iron.
- Solution: Fertilize your orchid with a balanced, water-soluble fertilizer (diluted to half strength) to restore nutrients. Always follow the recommended fertilizing schedule.
2. Brown Tips on Leaves
If you notice brown tips or edges on your orchid’s leaves, it’s usually a sign of one of the following:
- Low Humidity: Ground orchids prefer moderate humidity levels. If the air is too dry, it can lead to brown leaf tips.
- Solution: Increase humidity around your orchid by misting the plant occasionally or placing a humidity tray nearby. You can also group plants together to naturally raise humidity.
- Overfertilizing: Using too much fertilizer can burn the roots, leading to brown spots on the leaves.
- Solution: If overfertilizing is the issue, flush the soil with water to remove excess nutrients and resume feeding at half the recommended strength.
3. Drooping or Wilting Leaves
If your ground orchid’s leaves are drooping or wilting, it may be a sign of stress:
- Underwatering: Orchids with insufficient water will start to droop as they dehydrate.
- Solution: Check the soil to ensure it’s dry a couple of inches below the surface. If it is, water deeply and evenly.
- Solution: Check the soil to ensure it’s dry a couple of inches below the surface. If it is, water deeply and evenly.
- Temperature Stress: Orchids may also wilt if exposed to extreme temperatures, whether too hot or too cold.
- Solution: Make sure your orchids are in a location with consistent temperatures, ideally between 60°F and 75°F (15°C – 24°C). Avoid placing them near drafts or heat sources.
4. Pest Infestations
Like many garden plants, ground orchids can attract pests, especially during warmer months. Common pests include aphids, snails, and spider mites.
- Aphids: Small, green or black insects that suck sap from the leaves.
- Solution: Spray the affected areas with insecticidal soap or neem oil to kill aphids. You can also rinse the plant with water to remove them.
- Snails and Slugs: These pests leave slimy trails and can damage leaves.
- Solution: Place traps or use organic slug pellets around your orchids to keep snails at bay. Alternatively, create a barrier with crushed eggshells to deter them.
5. Root Rot
Root rot is a common problem caused by waterlogged soil and poor drainage. If your orchid’s roots are mushy and brown, it may have root rot.
- Solution: Remove the orchid from the soil, trim away any rotting roots, and replant in fresh, well-draining soil. To prevent future issues, make sure the pot has proper drainage, and avoid overwatering.
6. No Blooms
If your ground orchid isn’t blooming, it can be frustrating, especially if it’s healthy otherwise. Lack of blooms can be due to:
- Inadequate Light: Orchids need partial sunlight to flower. Too much direct sun or too little can prevent blooming.
- Solution: Ensure your orchids are getting around 4-6 hours of indirect light each day. A spot with morning sun or dappled shade works best.
- Solution: Ensure your orchids are getting around 4-6 hours of indirect light each day. A spot with morning sun or dappled shade works best.
- Nutrient Imbalance: Orchids need the right nutrients to bloom, especially phosphorus.
- Solution: Use a fertilizer with higher phosphorus content (often labeled as “bloom booster”) to promote flowering. Follow a regular feeding schedule during the growing season.
7. Fungal or Mold Growth
Fungal issues, such as mold or mildew, can develop in overly damp conditions.
- Solution: Ensure good air circulation around your orchids. Avoid overhead watering, and always water in the morning to allow plants to dry out by evening. If mold appears, remove it with a diluted solution of water and hydrogen peroxide (1 part hydrogen peroxide to 10 parts water).
By recognizing these common problems and taking proactive steps, you can keep your ground orchids in top condition, ensuring they continue to thrive and add beauty to your garden. If you ever encounter issues, simply adjust your care routine and monitor the results. With patience and the right approach, your orchids will flourish!
Conclusion
Caring for ground orchids can be a truly rewarding experience. With the right knowledge and attention, these beautiful plants can thrive in your garden, offering vibrant blooms season after season. By understanding their needs—whether it’s choosing the right location, providing consistent watering and fertilizing, or troubleshooting common issues—you’ll be well-equipped to grow healthy, happy orchids.
Remember, patience is key! Ground orchids may require some initial care and attention, but once established, they’re relatively low-maintenance and can adapt to a variety of conditions. Whether you’re a beginner or an experienced gardener, these orchids will add a touch of elegance and color to your outdoor space.
We hope this guide has given you the confidence to start or improve your ground orchid journey. If you have any further questions or need advice, don’t hesitate to reach out. Happy gardening, and may your orchids bloom beautifully!