
If you’ve ever repotted a plant only to watch it wilt and struggle to recover, you’re not alone! 🌱 While repotting is essential for a plant’s growth, it’s easy to make a mistake that can cause unnecessary stress or even harm your beloved greenery. But don’t worry! In this guide, we’ll walk you through how to repot a plant the right way, ensuring it thrives after the big move. Whether you’re a plant newbie or someone with a bit more experience, this step-by-step process will help you avoid common pitfalls and give your plant the best chance for healthy growth.
Repotting doesn’t have to be a scary task. With the right technique, it’s an opportunity to refresh your plant’s environment and help it flourish. Ready to learn how to keep your plants happy and strong through repotting? Let’s dive in and make sure your next repotting experience is a success! 🌿
1: When to Repot Your Plant (Know the Right Time) 🌿
Repotting your plant at the right time is crucial to its health and growth. Repotting too early or too late can lead to unnecessary stress, but don’t worry — once you know the signs, it’s easy to get it right. Here’s how to tell when your plant is ready for a new home:

1.1 Signs Your Plant Needs Repotting
Look for these telltale signs that it’s time to repot your plant:
- Roots are Growing Through the Drainage Holes 🌱
If you see roots poking out through the bottom of the pot, it’s a clear sign that your plant has outgrown its container. - Growth Has Slowed Down ⏳
Your plant may not be growing as quickly as it used to, even with proper care. A small, cramped pot can restrict root development, slowing growth. - Top-Heavy or Falling Over 🌳
If your plant is top-heavy, struggling to stand tall, or tipping over frequently, it might be too large for its current pot. - Soil Dries Out Too Quickly 💦
If the soil seems to dry out much faster than usual, the roots could be crowding the pot, leaving less space for water retention.
1.2 Best Time to Repot Your Plant
Timing matters when it comes to repotting! 🌞
- Spring or Early Summer 🌷
The best time to repot most plants is during their active growing season, which usually falls in spring or early summer. This gives the plant the best chance to adjust and thrive in its new pot. - Avoid Repotting in Winter ❄️
Winter is a time when many plants are dormant. Repotting during this time can shock the plant and hinder its recovery. Stick to the growing season for the best results!
2: Tools and Materials You’ll Need 🛠️
Before you dive into repotting your plant, gathering the right tools and materials is essential to ensure the process goes smoothly. Here’s a list of everything you’ll need, with simple tips to help you get the job done without a hitch.
2.1 Essential Tools for Repotting
Having the right tools will make the process quicker and less stressful. Here’s what you’ll need:
- New Pot 🪴
Choose a pot that’s 1-2 inches larger than your plant’s current one. Ensure the pot has drainage holes to allow excess water to escape and prevent root rot. - Well-Draining Potting Soil 🌱
Different plants need different types of soil. For example, cactus plants prefer a mix with more sand, while tropical plants need a moisture-retaining mix. Make sure to pick the right one for your plant type! - Watering Can or Spray Bottle 💧
A watering can helps you thoroughly moisten the soil once your plant is repotted. A spray bottle is also useful for giving the plant a gentle mist, especially if you’re working with delicate leaves. - Trowel or Small Shovel 🏡
A small trowel is perfect for scooping and moving soil into the pot. It’s also handy for loosening compacted soil around the roots. - Gardening Gloves 🧤 (Optional)
While not essential, gloves can protect your hands from dirt and any thorns, sharp edges, or irritants in the soil. - Pruning Shears or Scissors ✂️
These are used to trim any dead or damaged roots during the repotting process, allowing your plant to thrive without struggling against unhealthy growth.
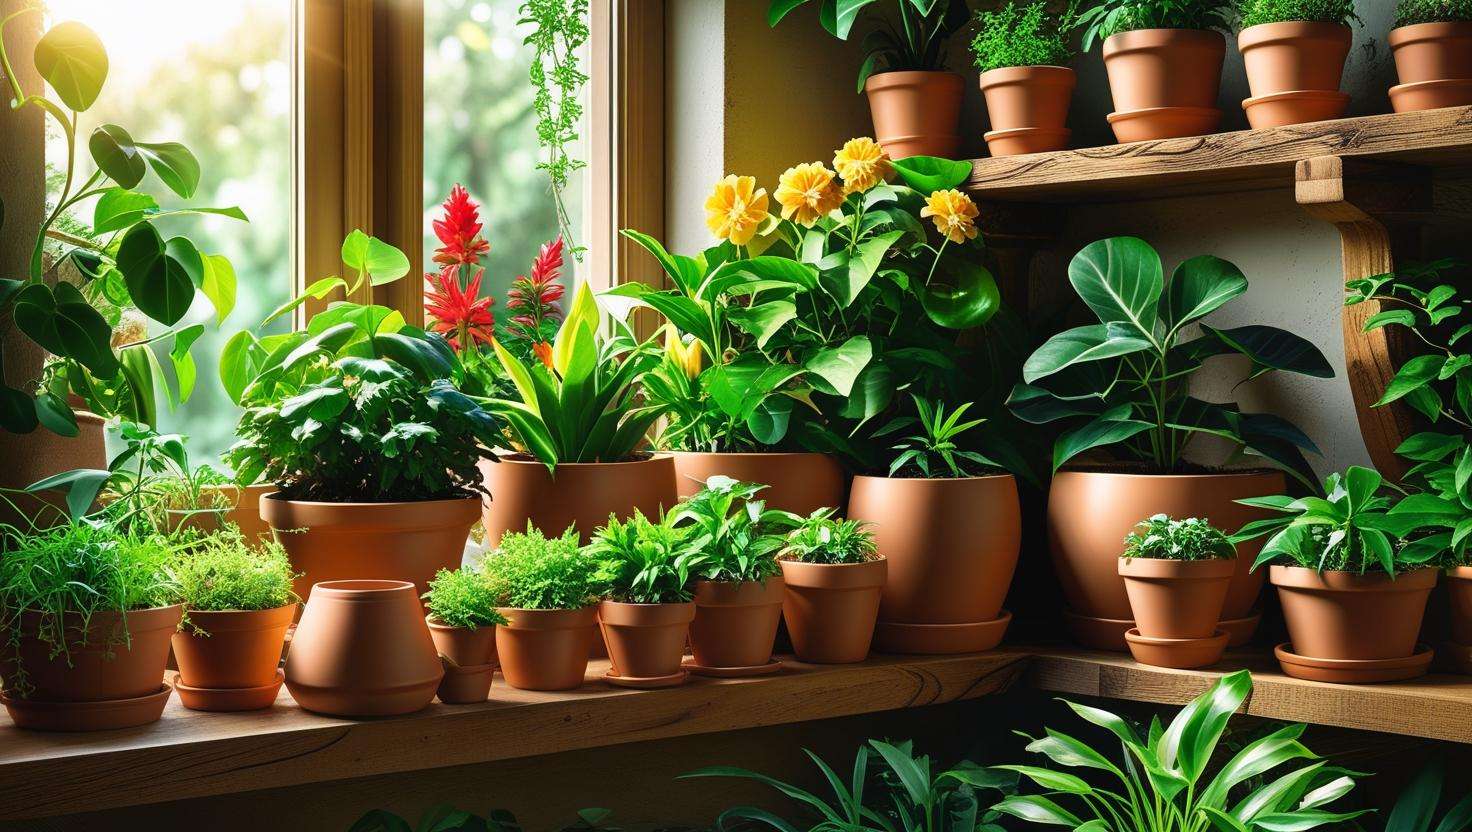
2.2 Choosing the Right Pot Size and Material
Picking the right pot is crucial to your plant’s success. Here’s how to make the best choice:

- Pot Size
If the pot is too large, it can lead to water retention and root rot. A pot that’s 1-2 inches larger than the current one is usually perfect for most plants. - Material
Terracotta pots are great for plants that need good drainage, as they are porous and allow air to circulate. Plastic pots are lightweight and retain moisture, which is ideal for plants that like their soil a bit more humid.
3: Step-by-Step Guide to Repotting Your Plant 🌿
Repotting a plant may seem intimidating, but with a little care and attention, you can easily do it yourself! Follow these simple steps to ensure your plant is repotted safely and comfortably, setting it up for healthy growth.

3.1 Step 1: Prepare the New Pot
Start by preparing the new pot to ensure it’s ready for your plant’s new home.
- Check the Drainage 🕳️
Make sure the new pot has drainage holes at the bottom. If it doesn’t, your plant could suffer from waterlogging, leading to root rot. - Add a Drainage Layer 🪴
Place a thin layer of small rocks, pebbles, or broken pottery at the bottom of the pot to help with drainage. This helps water flow freely through the soil. - Add Fresh Potting Soil 🌱
Add a small amount of fresh potting soil to the bottom of the pot, enough to elevate the root ball slightly above the edge of the pot when placed inside. This ensures the plant will sit comfortably in its new container.
3.2 Step 2: Remove the Plant from Its Current Pot
Now it’s time to gently remove the plant from its old home.
- Loosen the Plant 🌾
Gently tap the sides of the pot or squeeze the edges to loosen the soil. If needed, use a small trowel to gently separate the roots from the pot. - Handle with Care 🤲
Be careful when pulling the plant out of the pot. Hold the base of the plant by the stem or root ball to avoid damaging the delicate leaves or stems.
3.3 Step 3: Inspect and Trim the Roots
Take a moment to inspect the roots for any signs of damage or disease.
- Look for Root Bound or Rotten Roots 🚫
If the roots are tightly coiled or brown and mushy, trim them off with clean pruning shears or scissors. This helps the plant avoid root rot and allows for better growth in the new pot. - Trim Excess Roots ✂️
If the roots have become too long or spread out too much, trim them back by about 1-2 inches to encourage healthier growth.
3.4 Step 4: Repot the Plant
It’s time to place your plant in its new pot!
- Place the Plant in the New Pot 🪴
Gently lower the root ball into the new pot. The top of the root ball should be about 1 inch below the rim of the pot to allow space for watering. - Fill with Fresh Soil 🌿
Fill in around the root ball with fresh potting soil, pressing gently to eliminate air pockets. Be sure to leave enough space at the top for water to settle.
3.5 Step 5: Water the Plant Thoroughly
Watering after repotting is crucial to help your plant adjust.
- Water Gently 💧
Water the plant slowly until you see water draining out of the bottom. This helps settle the soil around the roots and removes any air pockets. - Avoid Overwatering 🚫💦
After repotting, avoid overwatering. Let the soil dry out a little before watering again to prevent root rot.
3.6 Step 6: Post-Repotting Care
Now that your plant is in its new home, give it the proper care to help it adjust.
- Place in Indirect Light 🌞
Put your plant in a spot with indirect sunlight for the next few days. This will help it recover from the shock of being repotted. - Avoid Fertilizing 🚫🌱
Don’t fertilize immediately after repotting. Give the plant a few weeks to adjust before introducing any nutrients. - Monitor for Stress 💚
Watch for any signs of stress, like yellowing leaves or wilting. This is normal as the plant settles in, but if it continues for more than a week, reassess watering and lighting conditions.
4: Common Mistakes to Avoid While Repotting ❌
Repotting can seem simple, but there are a few common mistakes that can harm your plant. Avoiding these pitfalls will help ensure a smooth transition for your plant into its new home. Let’s go through some of the most frequent errors and how to sidestep them.

4.1 Repotting Too Often
One of the biggest mistakes you can make is repotting your plant too frequently. 🌱
- Why It’s a Problem: Plants like stability, and repotting too often can stress them out, leading to poor growth. You should only repot when the plant has outgrown its pot or shows signs of root problems.
- How to Avoid It: Stick to repotting every 1-2 years for most plants unless there are clear signs it’s needed sooner.
4.2 Choosing a Pot That’s Too Large
Picking a pot that’s much larger than your plant’s current one can cause issues. 🛑
- Why It’s a Problem: If the pot is too big, the soil retains too much moisture, which can lead to root rot. The plant’s roots will also have difficulty filling the space, making it harder for them to establish themselves.
- How to Avoid It: Select a pot that’s only 1-2 inches larger than the plant’s current pot to avoid excess moisture and promote healthy root development.
4.3 Not Checking for Drainage
Proper drainage is essential for your plant’s health. 🌿
- Why It’s a Problem: Without drainage holes, excess water will sit in the pot, suffocating the roots and potentially causing rot.
- How to Avoid It: Always ensure the new pot has drainage holes at the bottom. If it doesn’t, add a layer of small stones or gravel to improve drainage.
4.4 Using the Wrong Soil Type
Not all plants need the same type of soil. 🏵️
- Why It’s a Problem: Using the wrong soil can suffocate the roots, hinder growth, or cause moisture problems.
- How to Avoid It: Research your plant’s needs before choosing the soil. For example, succulents and cacti need a gritty, well-draining soil, while tropical plants prefer a more moisture-retaining mix.
4.5 Overwatering After Repotting 💦
Overwatering is a common mistake, especially right after repotting.
- Why It’s a Problem: Newly repotted plants don’t need excessive water right away. Overwatering can stress the plant and cause root rot.
- How to Avoid It: Water the plant lightly after repotting, just enough to settle the soil. Wait for the soil to dry out before watering again.
4.6 Forgetting to Trim the Roots ✂️
Trimming the roots isn’t just a “nice-to-do” — it’s essential!
- Why It’s a Problem: If your plant’s roots are tangled, circling around the pot, or damaged, they’ll struggle to grow and absorb nutrients.
- How to Avoid It: Gently trim any damaged or overgrown roots with clean pruning shears before repotting. This gives your plant a fresh start and encourages healthy growth.
4.7 Not Allowing Time for Adjustment ⏳
After repotting, your plant needs time to settle into its new environment.
- Why It’s a Problem: If you place your plant straight back in bright sunlight or fertilize too soon, it can shock the plant and stunt its recovery.
- How to Avoid It: Keep your plant in a shaded, indirect light spot for a few days after repotting to help it acclimate. Avoid fertilizing until the plant shows signs of new growth.
5: How to Help Your Plant Recover After Repotting 🌱
Repotting can be a stressful experience for your plant, so it’s essential to give it extra care during the recovery process. Here’s how to help your plant bounce back and thrive in its new home!
5.1 Understanding Plant Shock
After repotting, plants often go through a phase known as “transplant shock.” This is completely normal and can cause the plant to look a little droopy or have yellowing leaves. Don’t panic — it’s a sign that your plant is adjusting to its new environment. 🌿
- What to Expect: The plant may appear a bit wilted, and the leaves might yellow or fall off. This is temporary and should improve as the plant adjusts.
- How to Manage: Be patient — it can take anywhere from a few days to a couple of weeks for your plant to fully adjust. As long as the roots are healthy and you’ve followed the proper steps, your plant will bounce back.
5.2 Post-Repotting Care Tips:

Here are a few practical tips to help your plant recover smoothly after repotting:
- Give It a Rest in Indirect Light 🌞
Avoid placing your plant in direct sunlight right after repotting. The bright light can stress it further. Instead, keep it in a spot with indirect or filtered light for a few days to help it adjust. - Don’t Fertilize Immediately 🚫🌱
Your plant has just undergone a big change, and fertilizing too soon can further stress it. Wait at least 2-3 weeks before introducing fertilizer, giving the roots time to establish themselves in the new soil. - Water Carefully 💦
After repotting, give the plant a gentle watering to help the soil settle, but be careful not to overdo it. Overwatering can lead to root rot. Let the top inch of soil dry out before watering again to avoid stressing the plant. - Monitor for Stress 🧐
Keep an eye on the plant in the days following repotting. Signs of stress include drooping, yellowing leaves, or slow growth. If these issues persist, make sure the plant is getting the right amount of water, light, and air circulation.
5.3 Encouraging New Growth
Once your plant has recovered from transplant shock, it’s time to encourage healthy growth. Here’s how:
- Regularly Check for New Growth 🌱
New leaves or shoots are signs that your plant is settling in well. Keep an eye out for these signs of recovery and give it a little extra love when you see them. - Gradually Increase Sunlight 🌞
After a few days in indirect light, gradually move the plant to a location with more sunlight, but avoid placing it in harsh midday rays. Most plants thrive in bright, indirect light.
6: Final Thoughts 🌿
Repotting your plant doesn’t have to be a daunting task. With the right tools, a little patience, and attention to detail, you can ensure that your plant thrives in its new home. Whether you’re a first-time plant owner or a seasoned gardener, following the steps in this guide will help you repot your plants successfully — without harming them in the process.
Remember, timing is everything. Repot when your plant truly needs it, and avoid overdoing it with oversized pots or excessive watering. Post-repotting care is equally important, as your plant will need time to adjust to its new environment.
As long as you take the time to prepare properly, monitor your plant’s recovery, and avoid common mistakes, repotting can be an exciting opportunity for growth. 🌱
By following these simple steps, you’re not just giving your plant a new pot — you’re setting it up for healthier, stronger growth in the long run. So, go ahead and take the plunge — your plant will thank you! 😊
Repotting your plant is a simple but essential step in ensuring its long-term health and growth. By following the right techniques, timing, and care, you can easily avoid common mistakes and help your plant thrive in its new environment. Remember to check for signs that it’s time to repot, choose the appropriate pot size, and give your plant time to recover after the process. With a little patience and the right tools, your plant will thank you with vibrant growth and a healthy future.
So, whether you’re a seasoned plant owner or a beginner, repotting doesn’t have to be intimidating. Follow the step-by-step guide, and soon you’ll have a thriving, healthy plant in your home! 🌿
Happy gardening, and may your plants continue to thrive! 🌿