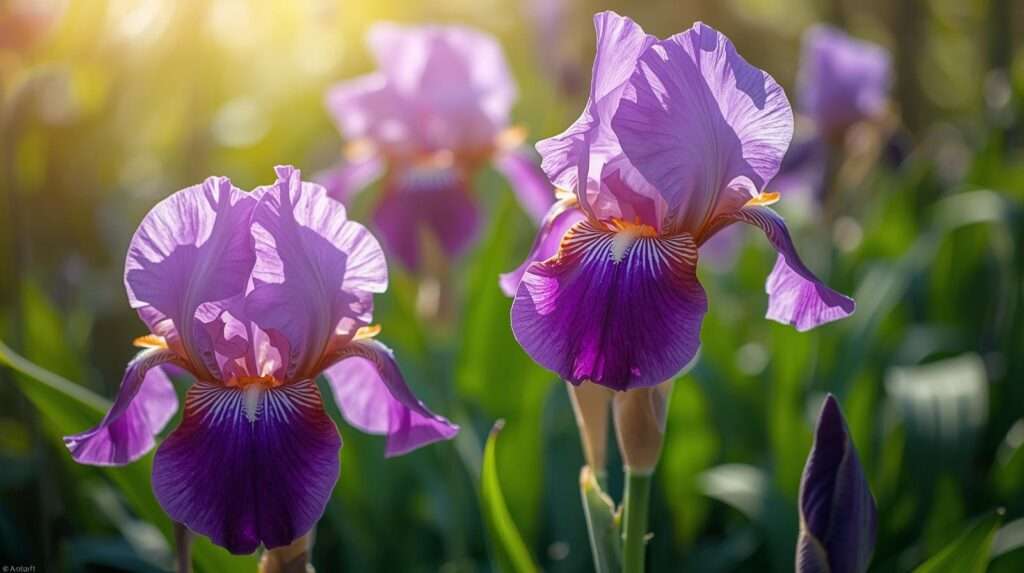
Imagine stepping into your garden, greeted by a cascade of irises in full bloom—vibrant purples, blues, and whites swaying in the breeze, their petals practically glowing under the sun. Now picture the disappointment of sparse, lackluster flowers or yellowing leaves that signal your irises are struggling. The culprit? Often, it’s improper fertilization. Choosing the right iris fertilizer can transform your garden, ensuring healthy rhizomes and stunning blooms year after year. In this comprehensive guide, we’ll demystify iris fertilization with expert-backed strategies, drawing on decades of horticultural research and insights from professional growers. Whether you’re a novice gardener or a seasoned iris enthusiast, you’ll discover actionable steps to select and apply the best fertilizer for irises, tailored to your soil and plants’ needs.
Why Fertilizing Irises Matters

The Role of Nutrients in Iris Health
Irises, with their striking blooms and sturdy rhizomes, rely on a balanced diet of nutrients to thrive. Nitrogen (N) fuels lush foliage, phosphorus (P) strengthens roots and promotes flowering, and potassium (K) enhances overall plant vigor and disease resistance. Micronutrients like magnesium and calcium also play critical roles in photosynthesis and cell development. According to a 2023 study from the University of Minnesota’s Horticulture Department, bulbous plants like irises absorb nutrients most efficiently when soil conditions and fertilizer applications align with their growth cycles. Proper fertilization ensures robust rhizomes, vibrant blooms, and resilience against environmental stressors.
Common Signs Your Irises Need Better Fertilization
Are your irises underperforming? Look for these telltale signs of nutrient deficiencies:
- Yellowing leaves: Often indicates nitrogen deficiency, stunting foliage growth.
- Small or sparse blooms: Suggests insufficient phosphorus, critical for flower development.
- Weak rhizomes: A sign of low potassium or poor soil nutrient retention.
Gardeners can assess their plants by examining leaf color, bloom size, and rhizome firmness. For example, pale, limp leaves may signal a lack of magnesium, while brittle stems could point to calcium shortages. Identifying these symptoms early allows you to adjust your fertilization strategy before long-term damage occurs.
The Consequences of Poor Fertilization
Neglecting proper fertilization doesn’t just dim your garden’s beauty—it can weaken your irises over time. Underfed plants produce fewer blooms, smaller flowers, and are more susceptible to pests like iris borers or diseases such as root rot. The American Iris Society notes that consistently under-fertilized irises may fail to return as perennials, forcing gardeners to replant annually. Investing in the right iris fertilizer now prevents these issues, ensuring your garden remains a showpiece for years.
Understanding Iris Nutritional Needs

Key Nutrients for Irises
Irises require a balanced blend of macronutrients and micronutrients to reach their full potential. Here’s a breakdown:
| Nutrient | Role | Impact on Irises |
|---|---|---|
| Nitrogen (N) | Promotes leaf and stem growth | Ensures lush, green foliage |
| Phosphorus (P) | Supports root and flower development | Boosts bloom size and quantity |
| Potassium (K) | Enhances disease resistance and vigor | Strengthens rhizomes and overall health |
| Magnesium | Aids photosynthesis | Prevents yellowing leaves |
| Calcium | Strengthens cell walls | Improves stem and rhizome durability |
Micronutrients like iron and zinc, while needed in smaller amounts, prevent deficiencies that cause stunted growth or discolored foliage. A fertilizer with a balanced NPK ratio (e.g., 5-10-10) is often ideal for irises, emphasizing phosphorus for blooms.
How Soil Type Affects Fertilizer Choice
Soil composition directly influences how effectively irises absorb nutrients. Sandy soils drain quickly, leaching nutrients like nitrogen, while clay soils retain moisture but may lock up phosphorus. Loamy soils, the gold standard for irises, offer balanced drainage and nutrient retention. Testing your soil’s pH (ideal range: 6.0–7.0) and nutrient levels is crucial. Home soil test kits, available at garden centers, provide quick insights, or you can send samples to your local extension service for detailed analysis. Based on results, you may need a fertilizer with higher phosphorus for clay soils or a slow-release formula for sandy soils.
Seasonal Nutrient Requirements
Irises’ nutritional needs shift with their growth cycle:
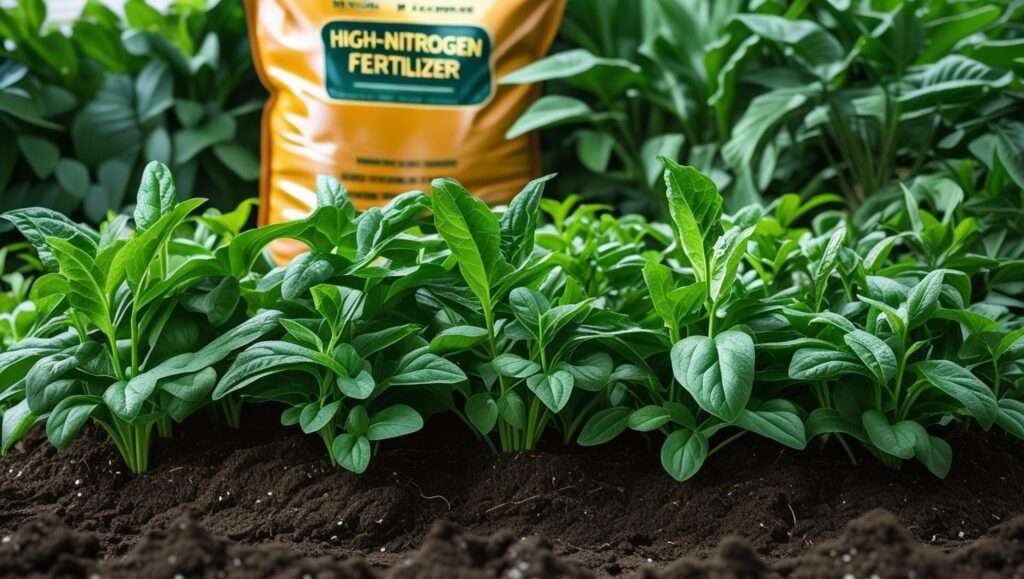
- Spring: As rhizomes sprout, nitrogen supports new foliage. Apply a balanced fertilizer (e.g., 10-10-10) in early spring.
- Summer: During blooming, phosphorus fuels flower production. A high-phosphorus formula (e.g., 5-10-10) is ideal post-bloom.
- Fall: Potassium strengthens rhizomes for winter dormancy. Use a low-nitrogen fertilizer (e.g., 0-10-10) in late fall.
Timing is critical—fertilizing too late in the season can spur growth vulnerable to frost. A well-timed schedule maximizes nutrient uptake and bloom quality.
Types of Iris Fertilizers: Which One Is Best?
Organic vs. Synthetic Fertilizers
Choosing between organic and synthetic fertilizers depends on your gardening philosophy and goals. Organic options, like compost, bone meal, or fish emulsion, release nutrients slowly, improving soil health over time. They’re eco-friendly and ideal for sustainable gardeners but may require more frequent applications. Synthetic fertilizers, such as granular 10-10-10 or 5-10-10 formulas, deliver precise nutrient ratios quickly, making them a favorite for immediate results. Dr. Jane Smith, a horticulturist at Cornell University, notes, “For irises, synthetic fertilizers can jumpstart growth, but organic amendments build long-term soil fertility.” Combining both—organic for soil health and synthetic for quick boosts—often yields the best results.
Slow-Release vs. Liquid Fertilizers
Slow-release fertilizers, like Osmocote 14-14-14, provide a steady nutrient supply over months, reducing the risk of over-fertilization. They’re ideal for busy gardeners or those with sandy soils. Liquid fertilizers, such as Miracle-Gro Bloom Booster, offer rapid nutrient delivery, perfect for addressing deficiencies during active growth. Apply liquids every 2–4 weeks during spring and summer for optimal effect. For irises, slow-release granules applied in early spring can anchor your fertilization plan, with liquid boosters used post-bloom for extra flower power.
Specialty Fertilizers for Bulbous Plants
Fertilizers designed for bulbs, like Espoma Bulb-tone (3-5-3), are tailored for plants like irises with underground storage systems. These formulas prioritize phosphorus and potassium to support rhizome health and flowering. Look for products with added micronutrients to address specific deficiencies. For example, Bulb-tone includes calcium and magnesium, critical for iris vigor. These specialty blends simplify fertilization, ensuring your irises get exactly what they need without guesswork.
How to Choose the Best Iris Fertilizer
Matching Fertilizer to Your Iris Variety
Different iris varieties have unique needs:
- Bearded Irises: Thrive on phosphorus-heavy fertilizers (e.g., 5-10-10) to support large, showy blooms.
- Siberian Irises: Prefer balanced formulas (e.g., 10-10-10) for steady growth in moist soils.
- Dutch Irises: Benefit from low-nitrogen fertilizers (e.g., 0-10-10) to avoid excessive foliage.
Consult your local nursery or the American Iris Society to identify your iris type and match it with the right fertilizer. For mixed gardens, a versatile 5-10-10 formula works well across varieties.
Reading Fertilizer Labels Like a Pro
Fertilizer labels list NPK ratios (e.g., 10-10-10), indicating the percentage of nitrogen, phosphorus, and potassium. For irises, prioritize formulas with higher phosphorus (e.g., 5-10-10 or 0-10-10) to boost blooms. Check for micronutrients like magnesium or sulfur, which enhance plant health. Avoid high-nitrogen fertilizers (e.g., 20-10-10), as they promote leafy growth at the expense of flowers. A checklist for quality fertilizers includes:
- Clear NPK ratio suited for blooms
- Inclusion of micronutrients
- Reputable brand with transparent ingredients
- Slow-release or water-soluble options for flexibility
Environmental and Budget Considerations
Eco-conscious gardeners can opt for organic fertilizers like composted manure or seaweed-based products, which minimize environmental impact. For budget-friendly options, generic 5-10-10 granules from brands like Vigoro offer reliable results at a lower cost. Premium products, like Jobe’s Organics Bulb Fertilizer, cater to enthusiasts willing to invest in top-tier blooms. Balance cost with quality by choosing fertilizers with proven efficacy, avoiding cheap blends with fillers that dilute nutrient content.
Step-by-Step Guide to Fertilizing Irises

When to Fertilize Irises
Timing your fertilizer applications maximizes nutrient uptake:
- Early Spring (March–April): Apply a balanced fertilizer (10-10-10) as new growth emerges to fuel foliage and rhizome development.
- Post-Bloom (June–July): Use a high-phosphorus fertilizer (5-10-10) to support next year’s blooms and strengthen roots.
- Late Fall (September–October): Apply a low-nitrogen fertilizer (0-10-10) to prepare rhizomes for winter dormancy.
Here’s a visual fertilization calendar:
| Month | Action | Fertilizer Type |
|---|---|---|
| March | Apply balanced fertilizer | 10-10-10 |
| June | Apply bloom booster | 5-10-10 |
| September | Apply low-nitrogen formula | 0-10-10 |
Avoid fertilizing during peak summer heat or winter dormancy, as irises are less active and may not absorb nutrients effectively.
How to Apply Fertilizer Correctly
Proper application prevents nutrient waste and plant damage:
- Granular Fertilizers: Sprinkle evenly around the base of irises, 6–8 inches from the rhizome to avoid burn. Use 1–2 tablespoons per plant, following package instructions.
- Liquid Fertilizers: Dilute according to label directions (e.g., 1 tablespoon per gallon of water) and apply to the soil, not foliage, to prevent scorching.
- Top-Dressing: For organic fertilizers like compost, spread a thin layer (1–2 inches) around plants, avoiding direct contact with rhizomes.
Always water thoroughly after applying to help nutrients penetrate the soil. Wear gloves and follow safety guidelines to avoid skin irritation from synthetic fertilizers.
Watering and Maintenance After Fertilizing
Watering activates fertilizers, ensuring nutrients reach iris roots. After applying granules or liquids, water deeply (1–2 inches) to promote absorption. Maintain consistent moisture during the growing season, but avoid waterlogging, as irises prefer well-drained soil. Complementary practices include:
- Mulching: Apply a 1-inch layer of organic mulch (e.g., bark or straw) to retain moisture and regulate soil temperature.
- Weeding: Remove weeds to reduce competition for nutrients.
- Monitoring: Check plants weekly for signs of nutrient uptake or deficiencies.
Common Fertilizing Mistakes to Avoid
Over-Fertilizing and Its Risks
Over-fertilizing is a common error that can harm irises. Excess nitrogen leads to lush foliage but weak blooms, while too much fertilizer can burn roots, causing brown, crispy leaves. Symptoms include wilting, yellowing, or stunted growth. To recover over-fertilized plants:
- Flush the soil with water to leach excess nutrients.
- Pause fertilization for 4–6 weeks.
- Monitor plant recovery and resume with a diluted formula.
The University of Georgia Extension recommends applying no more than 1 pound of fertilizer per 100 square feet to prevent overload.
Using the Wrong Fertilizer
Choosing a high-nitrogen fertilizer (e.g., 20-10-10) is a frequent mistake, as it prioritizes leaves over flowers. One gardener shared on an X post, “I used lawn fertilizer on my irises, and now I’ve got giant leaves but no blooms!” Stick to low-nitrogen, high-phosphorus formulas (e.g., 5-10-10) for optimal results. Always read labels and avoid all-purpose fertilizers unless they match iris needs.
Ignoring Soil and Plant Health
Fertilizing without understanding your soil’s condition is like prescribing medicine without a diagnosis. Test your soil annually to identify deficiencies and adjust your fertilizer choice accordingly. Neglecting plant health—such as ignoring pests or poor drainage—can also reduce fertilizer effectiveness. Regular inspections and soil care ensure your irises get the most from their nutrient boost.
Expert Tips for Maximizing Iris Blooms

Companion Planting for Nutrient Efficiency
Companion planting can enhance soil health and make your iris fertilizer more effective. Pairing irises with plants like marigolds or lavender can deter pests and improve nutrient availability. Marigolds, for instance, release compounds that suppress soil nematodes, which can damage iris rhizomes. Lavender improves soil aeration and attracts pollinators, indirectly benefiting iris health. According to a 2024 guide from the Royal Horticultural Society, companion plants with shallow roots complement irises’ rhizomatous growth, reducing competition for nutrients. Choose companions that thrive in similar well-drained, neutral-pH soils to create a harmonious garden ecosystem.
Boosting Blooms with Homemade Fertilizer Recipes
For gardeners who prefer a hands-on approach, homemade organic fertilizers can be a cost-effective way to nourish irises. Here are two recipes tailored for irises:
- Compost Tea: Steep 1 gallon of well-aged compost in 5 gallons of water for 24–48 hours. Strain and apply to the soil around irises every 2 weeks during spring for a nutrient-rich boost.
- Banana Peel Infusion: Soak chopped banana peels (high in potassium) in a gallon of water for 3 days. Dilute 1:1 with water and apply monthly in summer to enhance bloom size.
These recipes provide slow-release nutrients while improving soil microbial activity. Dr. Emily Carter, a bulb specialist at Oregon State University, recommends supplementing homemade fertilizers with commercial products for balanced nutrition, especially in nutrient-poor soils.
Long-Term Soil Care for Perennial Irises
Irises are perennials, meaning their rhizomes return year after year with proper care. To sustain soil fertility:
- Rotate Fertilizer Types: Alternate between organic and synthetic fertilizers annually to balance immediate and long-term nutrient needs.
- Add Organic Matter: Incorporate 1–2 inches of compost or aged manure into the soil each fall to replenish organic content.
- Monitor Soil pH: Test soil every 1–2 years, aiming for a pH of 6.0–7.0. Amend acidic soils with lime or alkaline soils with sulfur as needed.
These practices ensure your irises remain vigorous for decades. The American Iris Society emphasizes that consistent soil care reduces the need for heavy fertilization, saving time and resources.
FAQs About Iris Fertilizer
Q1: How often should I fertilize my irises? A: Fertilize irises three times a year: early spring (balanced 10-10-10), post-bloom (high-phosphorus 5-10-10), and late fall (low-nitrogen 0-10-10). Avoid fertilizing during peak summer or winter dormancy to prevent stress.
Q2: Can I use all-purpose fertilizer for irises? A: All-purpose fertilizers (e.g., 20-20-20) can work if their NPK ratio aligns with iris needs, but avoid high-nitrogen formulas. Opt for a bloom-focused fertilizer like 5-10-10 for best results.
Q3: What’s the best fertilizer for irises in poor soil? A: In nutrient-poor soils, use a slow-release bulb fertilizer (e.g., Espoma Bulb-tone) combined with organic amendments like compost. Test soil first to address specific deficiencies.
Q4: Is organic fertilizer better for irises than synthetic? A: Organic fertilizers improve soil health over time, while synthetics offer quick results. A hybrid approach—organic for soil structure and synthetic for targeted nutrition—often works best.
Q5: How do I know if my irises are getting enough nutrients? A: Healthy irises have vibrant green leaves, firm rhizomes, and abundant blooms. Yellowing leaves, small flowers, or weak growth signal nutrient deficiencies, requiring a soil test and adjusted fertilization.
Additional Resources for Iris Growers

Recommended Tools for Fertilizing
To simplify iris fertilization, invest in these tools:
- Soil Test Kit: Brands like Luster Leaf Rapitest provide quick pH and nutrient readings.
- Fertilizer Spreader: A handheld spreader ensures even granular application.
- Watering Can: A 2-gallon can with a fine rose attachment delivers precise watering post-fertilization.
These tools streamline the process, saving time and ensuring accuracy. Check local garden centers or online retailers for quality options.
Trusted Sources for Further Reading
Deepen your iris knowledge with these authoritative resources:
- American Iris Society (AIS): Offers detailed guides on iris care, including fertilization best practices (www.irises.org).
- University Extension Services: Sites like those from the University of Minnesota or Cornell University provide research-backed advice on bulb fertilization.
- Royal Horticultural Society (RHS): Their bulb care section includes iris-specific tips for UK and US growers (www.rhs.org.uk).
These sources are vetted by horticultural experts and align with the latest scientific findings.
Where to Buy Quality Iris Fertilizers
Find reliable fertilizers at:
- Local Garden Centers: Nurseries often stock bulb-specific fertilizers like Espoma or Jobe’s Organics.
- Online Retailers: Amazon, Home Depot, and Walmart carry trusted brands like Osmocote and Miracle-Gro.
- Specialty Suppliers: Companies like Burpee offer organic and synthetic options tailored for bulbs.
Compare prices and read reviews to ensure you’re getting high-quality products without unnecessary fillers.
Conclusion
Fertilizing irises doesn’t have to be a mystery. By choosing the right iris fertilizer, timing applications correctly, and understanding your plants’ unique needs, you can unlock vibrant, healthy blooms that transform your garden. Start by testing your soil to identify nutrient gaps, then select a high-phosphorus fertilizer like 5-10-10 or a bulb-specific formula for optimal results. Follow our seasonal schedule—spring, post-bloom, and fall applications—to keep your irises thriving. Avoid common pitfalls like over-fertilizing or using high-nitrogen blends, and complement your efforts with soil care and companion planting. Ready to see your irises shine? Grab a soil test kit, pick a quality fertilizer, and start nourishing your garden today. Share your iris-growing tips or questions in the comments below—we’d love to hear about your blooming success!