
Are you dreaming of growing your own fresh vegetables, herbs, or flowers but find yourself limited by space? 🌱 A Lean to Greenhouse might be the perfect solution for your backyard gardening needs. This efficient and space-saving greenhouse design attaches directly to an existing wall, allowing you to maximize your garden potential even in the smallest of spaces.
In this guide, we’ll walk you through the process of building a Lean to Greenhouse that is both cost-effective and functional. Whether you’re new to gardening or a seasoned pro, you’ll learn how to transform underutilized areas into a thriving garden. Let’s dive in and turn that limited space into a year-round growing paradise! 🌞
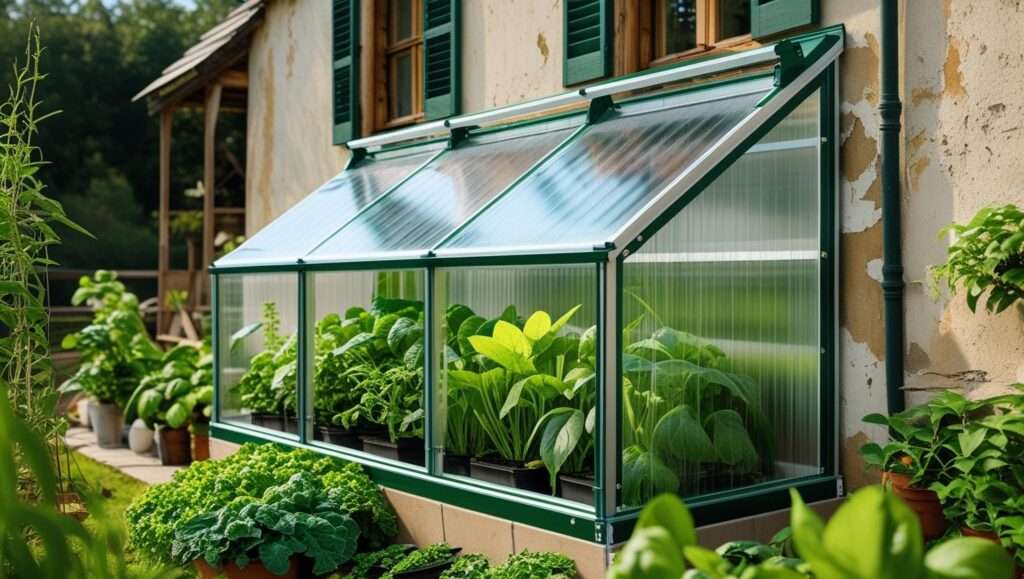
What is a Lean to Greenhouse?
A Lean to Greenhouse is a space-efficient greenhouse design that leans against an existing structure, such as a house, garage, or fence. Unlike traditional greenhouses, which are freestanding, a Lean to Greenhouse makes use of one wall for support, allowing you to save valuable space while still creating an ideal environment for plants to thrive. 🌱
Key Features of a Lean to Greenhouse:

- Space-Saving: Since it attaches to an existing building, it works perfectly in small backyards or urban spaces where you don’t have room for a standalone greenhouse.
- Optimal Light Exposure: Positioned against a wall, it can take advantage of sunlight reflected off the structure, helping your plants get more light throughout the day.
- Easy Access: Being close to your house or garage means easy access to your plants, making it more convenient for watering, maintaining, or harvesting.
- Cost-Effective: Using a wall to support your greenhouse reduces the cost of materials needed for the structure, making it a more affordable option than traditional greenhouses.
In short, a Lean to Greenhouse offers all the benefits of a traditional greenhouse but in a compact, cost-effective, and easy-to-build package! 😎
Key Considerations Before Building Your Lean to Greenhouse
Building a Lean to Greenhouse is a fantastic way to make the most of limited space. However, before you start, there are a few important factors to consider to ensure your greenhouse is both effective and efficient. Let’s dive into these key considerations:
1. Location and Sunlight Exposure 🌞
The location of your Lean to Greenhouse is crucial for maximizing plant growth. It should ideally be positioned where it gets plenty of sunlight throughout the day, especially during the colder months. If you’re attaching it to the south or west side of your house, you’ll get the best light exposure.
Action Tip: Observe the sun patterns in your garden before building. Ideally, aim for a location where the greenhouse receives full sun for at least 6 hours a day.
2. Space Availability 📏
While a Lean to Greenhouse is designed for smaller spaces, you still need to make sure there’s enough room for your plants to grow and for you to move around comfortably. Measure the area carefully, including the height and width, to ensure you have sufficient space for planting, walking, and maintaining the greenhouse.
Action Tip: Consider future growth when planning. Make sure there’s enough space for your plants to thrive without overcrowding, and think about where you’ll store gardening tools.
3. Building Permits and Regulations 📜
Depending on where you live, you might need a building permit or need to follow specific zoning regulations before you start construction. Always check with your local authorities to ensure you’re following the right procedures and not violating any codes.
Action Tip: Contact your local council or building office before you begin to confirm if you need permits or specific approvals for your greenhouse.
4. Structural Support and Materials 🏗️
Your Lean to Greenhouse will rely on an existing structure (like your house or garage) for support, but you’ll still need to ensure the structure is sturdy enough to withstand weather conditions, especially if you live in a windy or snowy area.
Action Tip: Make sure the wall you’re attaching the greenhouse to is in good condition. You may need additional framing or support if you’re using lightweight materials like polycarbonate or plastic.
5. Ventilation and Temperature Control 🌬️🌡️
Proper ventilation is essential to maintain a healthy growing environment inside your Lean to Greenhouse. It prevents overheating and ensures that your plants receive fresh air.
Action Tip: Install windows or vents that can be opened easily to let hot air out during warm days. You can also opt for automated window systems that open based on temperature for added convenience.
6. Budget and Cost-Effectiveness 💰
Building a Lean to Greenhouse is a cost-effective solution, but it’s still important to plan your budget carefully. Consider the costs of materials, tools, and any professional help you might need.
Action Tip: Make a list of required materials (e.g., frame, glazing, doors) and compare prices from different suppliers to get the best value. If you’re on a tight budget, you can start with basic materials and upgrade as you go.
7. Accessibility and Maintenance 🔧
Don’t forget about ease of access! Since the Lean to Greenhouse will likely be attached to an existing building, make sure there’s an easy entry point for maintenance, watering, and harvesting.
Action Tip: Position the door where it’s easy to reach from your house or yard. Ensure that there’s enough room around the greenhouse for cleaning and other essential maintenance tasks.
Step-by-Step Guide to Building Your Lean to Greenhouse
Building your Lean to Greenhouse is a rewarding DIY project that can bring fresh produce, herbs, or flowers into your small space. Follow this simple, step-by-step guide to create an efficient, cost-effective greenhouse that maximizes your available space. 🌱

Step 1: Plan and Prepare 📏
Before you start building, you need a solid plan in place.
- Measure your space: Determine the exact dimensions of your greenhouse. Think about how much room you need for plants and movement. Make sure the site gets adequate sunlight.
- Choose a design: There are many ways to build a Lean to Greenhouse. Do you want a slanted roof or a flat one? Will you use polycarbonate panels, glass, or plastic sheeting for the walls? Sketch it out.
Action Tip: Create a simple blueprint to ensure your materials fit and your structure aligns with your space.
Step 2: Gather Materials 🛠️
The materials you choose will impact the greenhouse’s durability, efficiency, and cost. Here’s a basic list of what you might need:
- Frame material: Wood, metal, or PVC pipe (metal is typically the most durable)
- Covering material: Polycarbonate panels, glass, or UV-resistant plastic
- Foundation: Concrete blocks or pressure-treated wood (to secure the frame)
- Doors and windows: Use standard door frames or custom-made wood doors; consider windows for ventilation
Action Tip: Make sure to check the weather in your area and select materials that will withstand local conditions (e.g., heavy snow, high winds).
Step 3: Build the Frame 🏗️
Start by constructing the frame, which will provide support for your greenhouse.
- Attach the frame to your wall: Since it’s a Lean to Greenhouse, the frame will be secured against the wall of your house or shed. Use screws or bolts to attach the frame to the existing structure securely.
- Assemble the support beams: These will be placed horizontally and vertically to create the structure’s skeleton. For strength, use 2×4 or metal pipes.
- Build the roof frame: Depending on your design, attach slanted roof beams, ensuring the greenhouse has proper drainage.
Action Tip: Make sure everything is level and aligned. Uneven frames can cause problems later with window placement and ventilation.
Step 4: Install the Flooring (Optional) 🪴
While not always necessary, adding a foundation or flooring can make your greenhouse more stable and easier to maintain.
- Pour a gravel base: This helps with drainage, keeping water from pooling in the greenhouse.
- Install a wooden or concrete foundation: If you live in a damp area, use pressure-treated wood or concrete to prevent rot and pests.
Action Tip: If you’re on a budget, a gravel base is a simple and cost-effective option that allows water to drain properly.
Step 5: Attach the Walls and Roof 📜
Now, it’s time to cover your greenhouse with the materials you’ve selected.
- Install the covering: Whether you’re using glass, polycarbonate, or plastic sheeting, start from the bottom and work your way up, ensuring the material is tightly secured to prevent drafts.
- Seal the edges: Use caulk or weatherproof tape to seal any gaps where the material meets the frame.
Action Tip: For added insulation, choose double-walled polycarbonate, which retains heat better than single-layer materials.
Step 6: Install Doors and Windows 🚪
Ventilation is key to maintaining an optimal environment for your plants, so include windows and a door that allow air circulation.
- Install the door: Ensure it swings freely and opens easily. Consider adding a lock if you have small pets or want extra security.
- Add windows for ventilation: Use hinged windows or vents that can be opened automatically or manually to regulate the temperature and airflow.
Action Tip: For automatic ventilation, consider a temperature-controlled window system that opens when it gets too hot, reducing the need for manual adjustments.
Step 7: Final Touches 🌟
Your Lean to Greenhouse is almost complete! Now, let’s add the finishing touches.
- Secure the structure: Double-check all joints, screws, and bolts to ensure everything is tightly fastened.
- Add shelves or hanging hooks: These can help you organize plants, tools, and supplies.
- Test the windows and doors: Open and close them to make sure they function properly and allow airflow.
Action Tip: If you plan to grow delicate plants, consider adding a shade netting to protect them from harsh midday sun.
Types of Materials for Your Lean to Greenhouse 🏗️🌿
Choosing the right materials for your Lean to Greenhouse is crucial to ensure durability, energy efficiency, and overall plant health. The material you select will impact insulation, sunlight transmission, and the structure’s longevity. Let’s explore the most common options and their benefits:

1. Glass 🪟
Glass is the classic material for greenhouse windows. It offers superior clarity, allowing maximum sunlight to reach your plants.
- Benefits:
- Excellent light transmission ☀️
- Aesthetic appeal with a sleek, clean look
- Durable when properly maintained
- Drawbacks:
- Poor insulation, leading to temperature fluctuations
- Prone to breaking under impact (e.g., during storms)
Ideal For: Small greenhouses in mild climates where temperature regulation is less critical.
2. Polycarbonate (Twin-Wall or Single-Wall) 💎
Polycarbonate is a popular choice due to its balance of durability and insulation. It comes in single-wall and twin-wall varieties. Twin-wall offers better insulation, while single-wall is lighter and more affordable.
- Benefits:
- Superior insulation: Twin-wall provides excellent temperature control 🌡️
- UV protection to safeguard plants from harmful rays 🌞
- Impact-resistant: Withstands storms and harsh conditions better than glass or acrylic
- Drawbacks:
- Less clear than glass, reducing visibility
- Surface can scratch more easily
Ideal For: Greenhouses in areas with extreme temperatures or unpredictable weather where insulation and durability are a priority.
3. Acrylic 🔲
Acrylic is a versatile, lightweight material that combines the clarity of glass with the durability of polycarbonate. It’s often used as a middle-ground option for greenhouses.
- Benefits:
- Clearer than polycarbonate: Almost as transparent as glass 🔍
- Impact-resistant: Withstands heavy impacts without shattering
- Lightweight and easy to handle
- Drawbacks:
- Poor insulation compared to polycarbonate
- Scratches easily, which may reduce clarity over time
Ideal For: Greenhouses that need a balance of clarity and durability but where insulation isn’t the top priority.
4. Polyethylene (Plastic Sheeting) 🌱
Polyethylene is an affordable and lightweight material commonly used for larger greenhouses or hoop houses. It’s perfect if you’re on a budget and want to cover a large area quickly.
- Benefits:
- Cost-effective: One of the cheapest options for larger greenhouses 💰
- Provides light diffusion, reducing hotspots and helping plants grow evenly 🌞
- Flexible and easy to install
- Drawbacks:
- Short lifespan, typically needing replacement every 3-5 years ⏳
- Poor insulation in colder climates, making it unsuitable for year-round use
Ideal For: Large-scale greenhouses or hoop houses in mild climates or for those on a budget.
5. Shade Cloth 🏖️
While not a traditional window material, shade cloth is often used to cover greenhouses in extremely hot climates. It helps regulate sunlight and heat while maintaining airflow.
- Benefits:
- Heat control: Reduces sunlight intensity, preventing overheating in hot climates 🌞
- Affordable and easy to install
- Customizable: Available in various densities, allowing you to adjust shading levels
- Drawbacks:
- Limited light transmission, which may not be suitable for all plants
- Needs to be replaced periodically due to wear and tear
Ideal For: Greenhouses in very hot climates or for shading specific plants during peak sunlight hours.
6. Metal (Frame Material) 🏗️
While the frame material doesn’t directly impact sunlight or insulation, it plays a crucial role in the durability and stability of your Lean to Greenhouse.
- Benefits:
- Durable and long-lasting, especially with galvanized steel
- Resistant to pests and rot compared to wood
- Lightweight and easy to work with
- Drawbacks:
- Poor insulation properties, unless combined with insulating materials like polycarbonate
Ideal For: Those seeking long-lasting durability and a low-maintenance frame material.
Ventilation and Temperature Control in Your Lean to Greenhouse 🌬️🌡️
Proper ventilation and temperature control are essential for creating an optimal growing environment in your Lean to Greenhouse. Without these key elements, your greenhouse can quickly become too hot, too humid, or too cold for plants to thrive. Let’s explore how to manage these factors effectively, especially when dealing with small spaces.

Why Ventilation is Crucial for Your Greenhouse 🌬️
Good ventilation is key to maintaining a healthy airflow inside your greenhouse. It helps regulate both humidity and temperature, ensuring that plants get fresh air and the environment stays comfortable.
- Prevents overheating: Without proper airflow, the heat from sunlight can quickly raise the temperature inside, stressing plants and limiting growth. 🌞
- Reduces humidity: Excess humidity can promote the growth of mold, fungi, and mildew, which can damage plants. 🌱
- Improves air circulation: Fresh air helps regulate oxygen and carbon dioxide levels, which are essential for photosynthesis and healthy plant growth. 🌿
Natural Ventilation Techniques 🌱
In a Lean to Greenhouse, you may not have the space for elaborate mechanical systems. Instead, use natural ventilation methods to regulate air exchange and temperature.
- Roof Vents 🏠
- Installing roof vents allows hot air to escape from the top of the greenhouse, while cooler air enters from the bottom. This creates a natural convection system that helps maintain airflow.
- Tip: Install automatic roof vents that open when the temperature rises to 75-80°F (24-27°C). This ensures your greenhouse stays cool without manual intervention.
- Side Vents 🪟
- Side vents placed on opposite walls help create a cross-ventilation effect, which is vital for maintaining consistent airflow.
- Tip: Place these vents on the lee side (windward side) to ensure that air flows across the greenhouse. Larger windows on the downwind side will help expel the hot air more effectively.
- Doors and Windows 🚪
- Make sure to open doors and windows regularly to let fresh air in, especially during the hot months.
- Tip: Consider louvered windows at the lower part of the greenhouse to bring in cool air, with a roof vent above to let the warm air rise.
Temperature Control: Keeping It Just Right 🌡️
Temperature regulation is one of the most important aspects of greenhouse management. Too much heat or cold can stunt plant growth and even lead to plant death. Here’s how you can control the temperature in your Lean to Greenhouse:
- Insulation and Shade 🏖️
- In hot climates, shade cloth can reduce direct sunlight exposure, preventing overheating. It also helps maintain a more consistent temperature inside.
- In cold climates, consider double glazing or polycarbonate panels to improve insulation and keep the heat inside during winter.
- Tip: Use roll-up sides for extra cooling during peak summer months. These can be lowered or raised based on the temperature.
- Passive Heating ☀️
- If you’re in a colder climate, passive heating methods like thermal mass (using concrete or water barrels) can help store heat during the day and release it at night.
- Tip: Install dark-colored barrels or stones inside your greenhouse to absorb heat during the day. At night, they slowly release the heat, maintaining a stable temperature for your plants.
- Heaters and Fans 🔥
- In extreme climates, a space heater or fan may be necessary. Ensure you choose an energy-efficient heater that won’t overheat the space or be too costly to run.
- Tip: Consider a solar-powered fan or heater to reduce energy consumption.
Monitoring and Adjusting Temperature & Humidity 📊
- Thermometers & Hygrometers: Use a thermometer to monitor temperature and a hygrometer to measure humidity. You can even opt for digital versions that display the data in real-time.
- Action Tip: Set an ideal range for temperature and humidity based on the plants you are growing. For most plants, daytime temperatures between 70-85°F (21-29°C) and humidity levels between 50-60% work best.
Cost Breakdown and Budgeting Tips 💰🔨
Building a Lean to Greenhouse is an excellent way to maximize your gardening space without breaking the bank. However, like any project, it requires careful budgeting to ensure you get the best value for your investment. In this section, we’ll break down the key costs involved and provide some practical budgeting tips to keep your project both affordable and efficient.

1. Materials: The Core of Your Budget 🏗️
The materials you choose for your greenhouse will make up the majority of your costs. Here’s a breakdown of common materials and their estimated prices:
- Frame Material:
- Wood: $2 to $5 per linear foot (great for DIY and smaller greenhouses, but may need maintenance).
- Metal (Steel or Aluminum): $5 to $10 per linear foot (more durable, weather-resistant, and requires less maintenance).
- PVC: $2 to $4 per linear foot (affordable and lightweight but less durable than metal).
- Covering Materials:
- Polycarbonate Sheets: $8 to $15 per square foot (best for insulation and durability, but pricier).
- Polyethylene Film: $0.50 to $1 per square foot (budget-friendly but less durable).
- Glass: $10 to $25 per square foot (aesthetic but fragile and less energy-efficient).
- Doors & Windows:
- Polycarbonate or Acrylic Panels: $15 to $25 per panel (provides good insulation and visibility).
- Simple Wooden or PVC Frames: $30 to $50 per door/window (for custom or DIY projects).
Estimated total cost for materials:
For a 10×10 Lean to Greenhouse, expect to spend between $500 and $1,500, depending on your material choices.
2. Additional Costs: Don’t Forget These Extras! 🧰
Aside from the basic materials, there are a few extra expenses that may crop up during your greenhouse construction:
- Ventilation: Automatic roof vents and side vents may cost anywhere from $50 to $300 depending on the size and automation features.
- Heating Systems: For winter climates, a small space heater could range from $50 to $200.
- Shade Cloth: For hot climates, a shade cloth can cost $50 to $150 for a 10×10 area.
- Tools: If you don’t already have tools like a saw, drill, or staple gun, expect to spend $100 to $200.
3. Labor Costs (If You’re Hiring Help) 👷♂️💼
If you’re hiring professionals to help with the construction, the labor costs will be an additional factor. On average, labor rates for greenhouse construction can range from $20 to $50 per hour depending on your location and the complexity of the project.
- DIY Savings: If you’re doing the project yourself, you can save anywhere from $500 to $1,500 on labor.
- Estimated Total Labor Costs: For a 10×10 greenhouse, labor can cost between $1,000 and $3,000 depending on the duration of the project.
4. Budgeting Tips to Save Money 💡
Building a Lean to Greenhouse doesn’t have to be expensive. Here are some money-saving tips to keep costs under control:
- DIY Frame Construction: If you’re handy, consider building your own frame from reclaimed wood or PVC pipes. It’s cheaper and adds a unique personal touch. 👷♀️
- Use Affordable Coverings: If insulation isn’t a huge priority (e.g., if you live in a mild climate), opt for polyethylene film instead of polycarbonate. This will save you money upfront. 💸
- Shop Around for Materials: Check for sales, local classifieds, or even scrap yards for second-hand materials like glass or polycarbonate sheets. Often, you can find good deals on surplus or leftover materials. 🛠️
- Scale Down: If you’re tight on budget or space, consider building a smaller greenhouse. A 6×6 greenhouse will cost less than a 10×10 one, but it can still be highly functional for most home gardeners. 🏡
- Plan for the Long Term: While it may cost more upfront, choosing durable materials (like polycarbonate and metal frames) will save money on repairs and replacements in the long run. 🔄
5. Total Estimated Cost 📊
To build a small, cost-effective Lean to Greenhouse, here’s what you can expect:
- DIY Budget-Friendly: Around $500 to $800 if you use affordable materials and do most of the work yourself.
- Mid-Range Budget: Expect to spend around $1,000 to $2,000 for a sturdy, well-insulated greenhouse with good materials and some professional help.
- High-End Build: If you want premium materials like glass, high-end automation, or professional labor, costs could reach $3,000 or more.
Common Challenges and Solutions for Lean to Greenhouses 🌱🔧
Building and maintaining a Lean to Greenhouse can be incredibly rewarding, but like any DIY project, it comes with its own set of challenges. Understanding these potential obstacles and knowing how to solve them in advance will ensure your greenhouse stays efficient and effective. Let’s explore some common problems and their practical solutions.

1. Limited Space for Ventilation 🌬️
Challenge: Since Lean to Greenhouses often attach to a wall, space for ventilation can be limited, especially if you have a small or narrow area. Poor airflow can lead to overheating or humidity buildup, which can harm your plants.
Solution:
- Strategically placed vents: Install side vents and roof vents to promote airflow, allowing fresh air to circulate and cool the space. You can add manual or automatic venting systems for better control.
- Cross-ventilation: Create a cross-ventilation path by placing windows or vents on opposite sides of the greenhouse. This will allow the air to flow freely from one side to the other.
- Consider fan installation: In tight spaces, small circulation fans can help maintain airflow.
2. Insufficient Insulation 🌡️
Challenge: A Lean to Greenhouse built with poor insulation can lead to extreme temperature fluctuations, especially in colder months. Insufficient insulation will make it harder to maintain a consistent temperature for your plants, and may result in higher heating costs.
Solution:
- Use double-layered materials: Polycarbonate sheets or double-glazed glass offer superior insulation compared to single-layer options.
- Reflective materials: Consider adding reflective film or bubble wrap insulation on the inside of the greenhouse to maintain warmth during cold months.
- Seal gaps: Ensure all edges, corners, and seams are sealed tightly to prevent drafts or heat loss. Apply weatherproof sealants to any visible gaps in the frame.
3. Water Drainage Issues 💧
Challenge: Poor water drainage can cause water to pool inside your greenhouse, leading to root rot or mold growth. This is especially common in areas with heavy rainfall or poor soil drainage.
Solution:
- Proper slope design: When constructing your greenhouse, ensure the floor has a slight slope (1–2%) towards a drainage system. This will help water flow out of the greenhouse rather than pool inside.
- Gravel base: Lay a gravel base or drainage mat to improve water flow and prevent pooling.
- Install a drainage system: Adding drain pipes or a French drain along the perimeter of the greenhouse will effectively channel excess water away from the structure.
4. Overheating in Summer 🌞
Challenge: In the summer months, a Lean to Greenhouse can become too hot, especially if it’s not well-ventilated. Without proper cooling measures, high temperatures can stress plants and hinder their growth.
Solution:
- Shade cloth: Install a shade cloth or netting on the roof and sides of the greenhouse to reduce direct sunlight, especially during the hottest parts of the day.
- Automated venting systems: Install automatic roof vents that open when the temperature rises above a certain threshold, allowing hot air to escape.
- Insulated coverings: Use polycarbonate or bubble wrap insulation to block out some of the sun’s heat while still allowing light to pass through.
5. Structural Stability and Durability 🏗️
Challenge: Lean to Greenhouses are often attached to a wall or building, but their frames must be stable enough to withstand external forces like wind, snow, or rain. Poorly constructed frames can weaken over time, leading to structural failure.
Solution:
- Use durable materials: Opt for steel, aluminum, or treated wood for the frame to ensure long-lasting stability.
- Secure the frame: Attach the greenhouse frame securely to the wall or foundation using bolts or screws. Ensure that the frame is anchored properly to prevent shifting or damage from strong winds.
- Reinforce with braces: Adding diagonal braces at key points of the frame can help distribute the pressure and improve stability.
6. Pest Control 🐜
Challenge: Greenhouses, especially those with open windows or vents, can attract pests such as aphids, whiteflies, or even rodents that might enter and damage your plants.
Solution:
- Insect netting: Install fine mesh netting around windows and vents to prevent pests from entering while still allowing air to flow through.
- Natural pest control: Consider introducing beneficial insects like ladybugs or predatory mites that target harmful pests without the need for chemicals.
- Seal gaps: Make sure that there are no open gaps or cracks that pests can sneak through. This will reduce the risk of infestations.
7. Maintenance and Repairs 🛠️
Challenge: Over time, your Lean to Greenhouse may require maintenance—whether it’s repairing a cracked window, replacing a vent, or updating the insulation. Neglecting regular upkeep can reduce the greenhouse’s lifespan and efficiency.
Solution:
- Regular inspections: Perform seasonal inspections to check for wear and tear, especially after severe weather events. Look for issues like cracks in the covering, rusting frames, or damaged seals.
- Immediate repairs: Don’t wait for small problems to escalate. If you notice any issues, fix them as soon as possible to avoid costly repairs in the future.
- Upkeep schedule: Set a maintenance schedule for cleaning windows, checking ventilation, and inspecting structural integrity. This will help you stay on top of repairs before they become major issues.
Building a Lean to Greenhouse is one of the best ways to maximize your growing space while keeping costs down. Whether you’re working with a small backyard, a narrow side yard, or a unique urban space, a lean-to design offers an efficient and cost-effective solution for year-round gardening.
By carefully considering key factors such as location, materials, ventilation, and budgeting, you can create a greenhouse that not only supports plant growth but also provides long-term value. Overcoming common challenges like poor insulation, water drainage issues, and overheating requires thoughtful planning, but with the right steps and resources, your greenhouse will thrive and meet all your growing needs.
Remember, the success of your Lean to Greenhouse depends on the details. With proper construction, thoughtful material choices, and regular maintenance, you can enjoy a space where plants flourish in the most efficient way possible, all while staying within your budget. 🌱🌟
Action Tip: Take the time to plan your greenhouse with these insights in mind, and soon you’ll be enjoying fresh, homegrown produce no matter the size of your space. Happy gardening! 😊