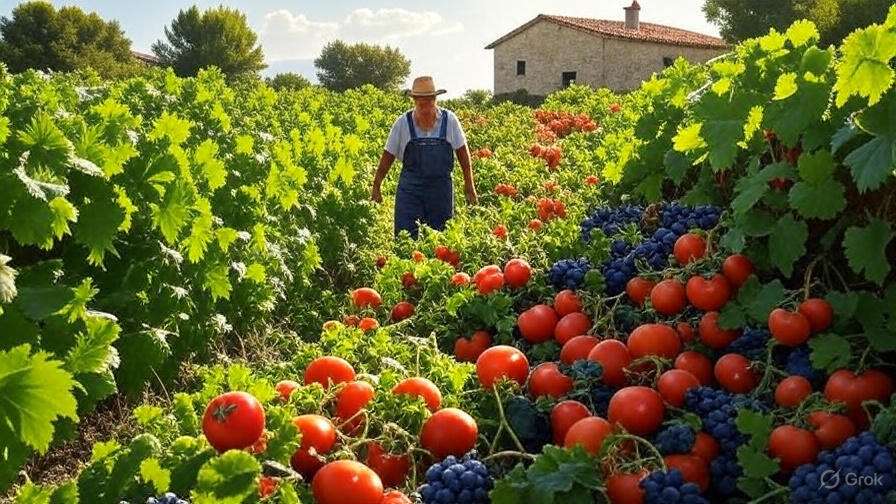
Picture the traditional backyard garden. For many, it conjures images of backbreaking labor: tilling the soil under a hot sun, pulling endless weeds, constantly watering thirsty plants, and spending a fortune on synthetic fertilizers and pesticides. It is a constant, exhausting battle against nature. But what if your garden could practically take care of itself? What if you could build a system that produces abundant food while requiring a fraction of the maintenance?
Enter the world of permaculture for total beginners. Whether you have a sprawling rural acreage or a modest suburban backyard, permaculture is the ultimate design system for creating a low-maintenance, high-yield backyard ecosystem.
As agricultural science increasingly shifts away from extractive farming toward sustainable agriculture, the principles of permaculture have emerged as the gold standard for ecological design. It is not just a buzzword; it is an evidence-based approach to mimicking the self-sustaining patterns found in natural forests. In this comprehensive guide, we will break down the science and strategy behind this methodology, giving you a proven, actionable 5-step blueprint to transform your outdoor space into a thriving food forest.
What Exactly is Permaculture? (Demystifying the Buzzword)
Before digging in the dirt, it is crucial to understand what you are actually doing. Permaculture is a portmanteau of “permanent” and “agriculture” (and later, “permanent culture”). Coined in the 1970s by Bill Mollison and David Holmgren, it is a design philosophy rooted in observing how natural ecosystems function and replicating those relationships in human habitats.
In a natural forest, nobody is tilling the soil, applying chemical fertilizers, or pulling weeds—yet the forest is highly productive and resilient. Permaculture aims to design your garden to behave exactly like that forest.
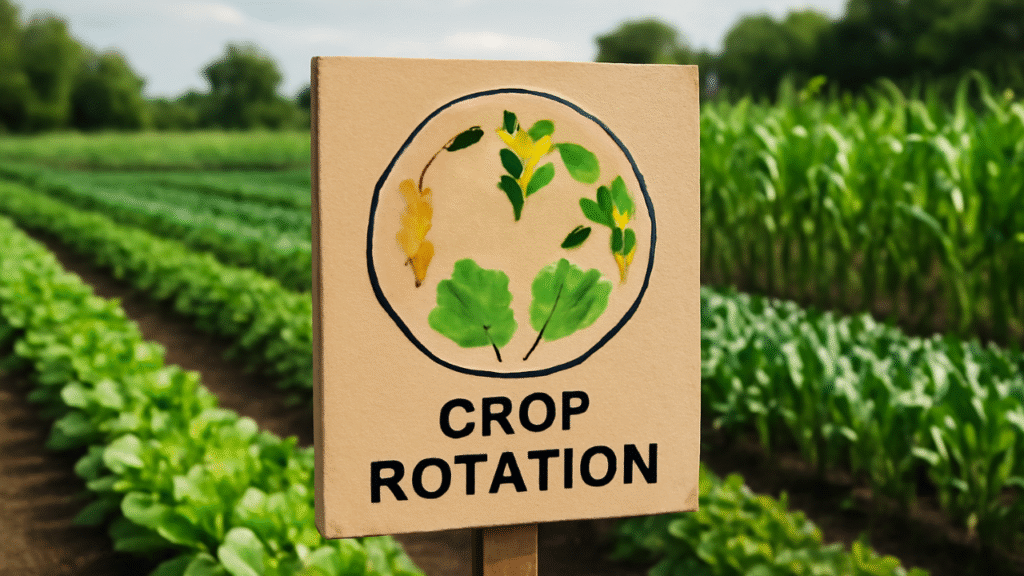
Traditional Gardening vs. Permaculture: The Core Differences
To understand why permaculture saves you time and effort, look at how it contrasts with conventional gardening methods.
| Feature | Traditional Gardening | Permaculture Design |
| Soil Management | Tilling, which destroys soil structure and microbiome. | No-till gardening; building soil from the top down. |
| Planting Layout | Single-crop rows (monoculture) requiring high maintenance. | Plant guilds (polyculture) that support each other. |
| Watering | Heavy reliance on municipal hoses and daily irrigation. | Passive water harvesting via swales and deep mulch. |
| Pest Control | Chemical pesticides that kill beneficial insects. | Natural predators and companion planting. |
| Waste System | Bagging yard waste and buying bagged compost. | Closed-loop “chop and drop” composting. |
Expert Insight:
“The problem is the solution.” — Bill Mollison, co-founder of Permaculture.
In permaculture, a slug infestation isn’t a “slug problem”; it’s a “duck deficiency.” Every element in your garden should serve multiple functions, and every challenge can be solved by introducing the right biological partner.
The 5-Step Blueprint to Your First Permaculture Garden
Transitioning to a permaculture system does not happen overnight. It is a gradual process of shifting your mindset from “controller” of nature to “facilitator” of nature. Here are the five foundational steps to building your resilient, high-yield garden.
Step 1: Observe and Interact (Don’t Dig Just Yet!)
The biggest mistake eager beginners make is rushing to the hardware store, buying raised beds, and planting immediately. The foundational principle of permaculture for total beginners is observation. You cannot design a system that works with nature if you do not understand the specific natural forces at play in your yard.
Spend at least one full season—ideally a full year—simply watching your land before making permanent changes. You need to map out the microscopic realities of your specific microclimate.
Key Factors to Map in Your Yard:
-
Sun Sectors: Where do the shadows fall? Remember, the sun’s trajectory is drastically different in the peak of summer compared to the dead of winter. A spot that gets full sun in July might be completely shaded by a neighbor’s house in November.
-
Wind Tunnels: Notice where the prevailing winds enter your property. Strong winds can dry out your soil, break fragile stems, and stunt plant growth. Identifying these zones allows you to plant sturdy windbreaks.
-
Water Flow: Put on your rain boots during a heavy downpour and go outside. Where does the water naturally pool? Where does it run off your property?
The Zone Mapping Strategy:
Permaculture utilizes “Zones” based on frequency of use.
-
Zone 1: The area closest to your door. Plant things you need daily, like culinary herbs, salad greens, and cherry tomatoes.
-
Zone 2: Staple crops and vegetables that need checking every few days.
-
Zone 3: Main crop farming (potatoes, corn) and orchards.
-
Zone 4: Semi-wild areas for foraging and timber.
-
Zone 5: Completely wild, unmanaged areas left for native wildlife.
Start your design exclusively in Zone 1.
Step 2: Catch and Store Water (Drought-Proofing Your Garden)
A resilient ecosystem does not rely on the municipal water grid. Your goal is to slow water down, spread it out, and sink it deep into the ground before it has a chance to run off your property. This concept is often referred to as “planting the rain.”
When you catch and store water effectively, your garden can survive extended dry spells without you having to drag out the hose every morning.
Techniques for Beginners:
-
Rain Barrels: The simplest starting point. Connect a 50-gallon drum to your roof’s downspouts. This provides a chemical-free water source for your delicate Zone 1 seedlings.
-
Swales on Contour: A swale is a shallow, level trench dug along the natural contour lines of your land, with the excavated dirt piled on the downhill side to form a soft berm. When rain falls, the water flows down the slope, hits the swale, stops, and slowly percolates deep into the soil profile. Trees planted on the downhill berm of a swale rarely need manual watering after their first year.
-
Heavy Organic Mulch: Bare soil is bleeding soil. Exposed dirt evaporates moisture rapidly and bakes the essential soil microbes. Applying a thick, 4-to-6-inch layer of organic matter (like wood chips or straw) acts as an insulating blanket, locking in moisture and radically reducing your watering needs.
Step 3: Build the Soil Without Tilling (Sheet Mulching)
In conventional agriculture, tilling the earth with a rototiller or a shovel is an annual ritual. However, from a biological standpoint, tilling is a catastrophic event for your soil. It slices up beneficial earthworms, destroys the delicate mycorrhizal fungi networks that transport nutrients to plant roots, and exposes dormant weed seeds to the sunlight they need to germinate.
To build a resilient food forest, you must practice no-till gardening. The most effective way to establish a new growing area without digging is a technique called sheet mulching (also known as “lasagna gardening”). This method builds rich, loamy soil from the top down, suffocating grass and weeds while feeding the soil food web.
The Sheet Mulching Recipe:
-
Chop it down: Mow the existing grass or weeds as low to the ground as possible. Leave the clippings exactly where they fall; they provide a great initial layer of nitrogen.
-
The Weed Barrier: Lay down a continuous, overlapping layer of plain, un-waxed brown cardboard (remove all tape and staples). This blocks sunlight, killing the grass beneath it.
-
The Nitrogen Layer: Add 2 to 3 inches of nitrogen-rich organic matter directly on top of the cardboard. High-quality compost, aged herbivore manure (chicken, cow, or horse), or fresh grass clippings work perfectly.
-
The Carbon Topcoat: Cap the entire bed with 4 to 6 inches of carbon-heavy mulch. Straw (not hay, which contains seeds), shredded autumn leaves, or untreated wood chips are excellent choices.
E-E-A-T Field Note: Why does sheet mulching work so well? As the cardboard slowly decomposes, it creates a dark, moist habitat that attracts earthworms and beneficial microbes. These organisms act as nature’s rototillers, aerating the soil and pulling the nutrient-dense compost down into the native earth, creating a spongy, water-retaining topsoil without you ever lifting a shovel.
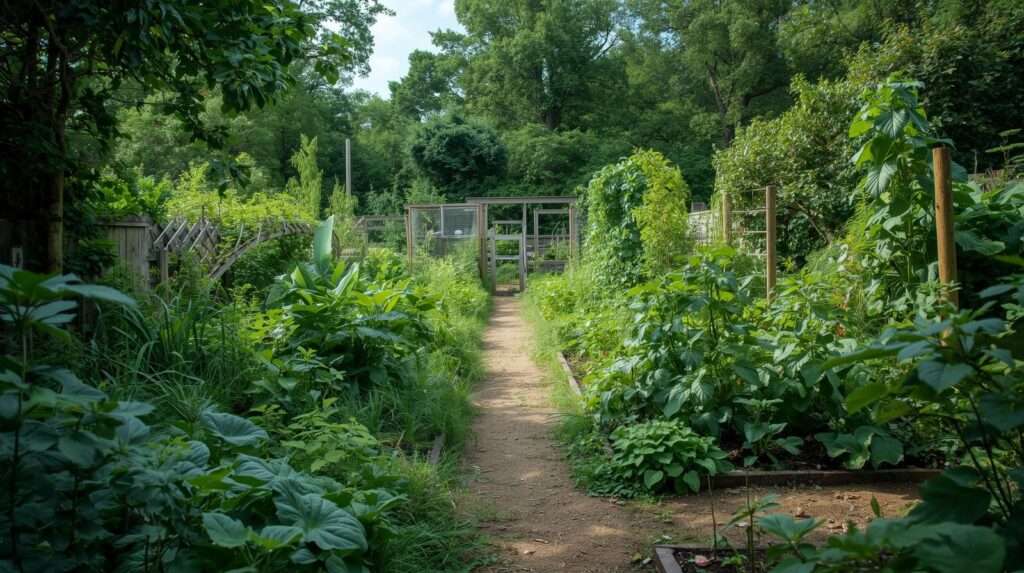
Step 4: Plant in “Guilds” Instead of Rows
Nature abhors a monoculture. When you plant a single crop in long, neat rows (like a massive field of only tomatoes or only corn), you are setting out an all-you-can-eat buffet for pests and rapidly depleting specific nutrients from the soil.
Permaculture solves this by utilizing companion planting on a macroscopic scale, known as plant guilds. A guild is a carefully selected community of plants, animals, and insects that work together to support a central element—usually a fruit or nut tree. Each member of the guild performs a specific ecological job, reducing the gardener’s workload.
The Classic Example: The Three Sisters Indigenous peoples of the Americas perfected a simple, highly effective guild known as the Three Sisters: corn, beans, and squash.
-
The corn grows tall, providing a natural trellis.
-
The pole beans climb the corn and act as nitrogen fixers, pulling nitrogen from the air and depositing it into the soil to feed the heavy-feeding corn.
-
The squash grows low to the ground, its massive leaves acting as living mulch that suppresses weeds and retains soil moisture.
Building a Fruit Tree Guild Blueprint: If you are planting an apple tree, do not plant it alone in the middle of a grass lawn. Surround it with a supporting cast:
-
Nitrogen Fixers: Plant clover or a shrub like Goumi berry to fertilize the tree naturally.
-
Dynamic Accumulators: Plant deep-rooted herbs like Comfrey or Borage. Their taproots mine minerals (like calcium and potassium) from deep subsoils and bring them to the surface.
-
Insectaries/Pest Deterrents: Plant aromatic herbs like chives, garlic, or daffodils in a ring around the trunk to confuse burrowing pests and deter deer, while attracting pollinators like bees and parasitic wasps.
Step 5: “Chop and Drop” Maintenance (Closing the Loop)
One of the most labor-intensive parts of traditional gardening is the endless cycle of “cleaning up.” Gardeners spend hours raking leaves, pulling weeds, pruning branches, bagging it all up in plastic, and paying the city to haul it away. Then, in the spring, they go to the garden center to buy plastic bags of compost and mulch to put those nutrients back into the soil.
Permaculture for total beginners eliminates this wasteful cycle through a technique called chop and drop. In a sustainable agriculture system, organic matter rarely leaves the property.
How to Chop and Drop: When you prune a branch, harvest the heads of your broccoli, or cut back overgrown plants, simply use your shears to chop the organic material into smaller pieces and drop it directly onto the soil at the base of your plants.
The Ecological Benefits:
-
Free Fertilizer: As the dropped plant matter breaks down, it returns the exact nutrients it extracted back into the soil profile.
-
Living Mulch: The debris protects the soil from the harsh sun and heavy rains.
-
Saves Immense Labor: You never have to haul yard waste again.
Plants like comfrey are specifically grown in permaculture systems just to be chopped and dropped. Because it grows incredibly fast and is packed with nutrients, you can cut a comfrey plant to the ground 3-4 times a season, dropping its leaves around your fruit trees for an instant, free nutrient boost.
Common Beginner Mistakes to Avoid
Even with the best intentions, it is easy to stumble when transitioning from conventional gardening to ecological design. Avoid these three common pitfalls to ensure your journey into permaculture is successful and stress-free.
1. Starting Too Big (The Fast Track to Burnout)
The enthusiasm to transform your entire yard in one weekend is dangerous. Converting a quarter-acre into a food forest all at once is physically exhausting and difficult to manage.
-
The Fix: Start incredibly small. Build one 10×10 foot sheet-mulched bed right outside your back door (Zone 1). Master the interactions of water, soil, and plants on this small scale for a season before expanding your borders.
2. Fighting Native Weeds Instead of Reading Them
In permaculture, weeds are not your enemy; they are indicator plants. Nature uses pioneer weeds to heal damaged soil.
-
The Fix: If your yard is overrun with dandelions, nature is telling you that your soil is heavily compacted (the dandelion’s deep taproot is trying to break it up). If you have creeping charlie or moss, your soil is likely acidic and waterlogged. Instead of spraying herbicides, fix the underlying soil condition, and the weeds will naturally phase themselves out.
3. Ignoring the “Stacking Functions” Rule
Every single element you introduce to your garden should serve at least two (ideally three or more) purposes.
-
The Fix: Think about a backyard chicken. If you view a chicken only as an egg producer, you are missing its potential. A chicken in a permaculture system is a pest-control agent (eating ticks and grubs), a biological rototiller (scratching the soil), and a mobile fertilizer factory (dropping nitrogen-rich manure). Design your systems so that the outputs of one element meet the needs of another.
Permaculture for Small Spaces (Urban & Suburban Tips)
A common misconception is that you need a sprawling 5-acre rural homestead to practice sustainable agriculture. This is entirely false. Permaculture is a design science, meaning its principles scale perfectly to tiny urban lots, suburban backyards, and even apartment balconies.
-
Vertical Gardening: When you lack horizontal square footage, grow upward. Utilize trellises, fences, and pergolas to grow vining crops like cucumbers, pole beans, kiwi, and grapes.
-
Balcony Container Guilds: You can create mini-guilds in large pots. Plant a dwarf patio tomato in the center, surround it with basil (which repels tomato hornworms), and drape trailing nasturtiums over the edge (a trap crop for aphids).
-
Leveraging Microclimates: Urban environments are full of microclimates. A south-facing brick wall absorbs the sun’s energy all day and radiates heat at night, creating a warm pocket where you can grow tender perennials or citrus trees that wouldn’t normally survive in your climate zone.
Frequently Asked Questions (FAQ)
To help you get started with total confidence, here are the answers to the most common questions people ask when exploring ecological gardening.
Is permaculture expensive to start?
No, it is remarkably cost-effective. While traditional gardening requires you to constantly purchase synthetic fertilizers, chemical pesticides, and bagged soils, permaculture relies on upcycling. You can source free cardboard from local appliance stores, get free wood chips dropped off by local arborist services, and save your own seeds year after year. The primary investment is your time in the observation phase.
How long does a permaculture garden take to yield?
It depends on what you plant. You can see rapid yields from annual vegetables (like lettuce, radishes, and tomatoes) in your very first season. However, the true magic of permaculture lies in perennials and food forests, which take 3 to 5 years to establish. The trade-off is that once a food forest matures, it produces exponential yields for decades with almost zero annual labor.
Can I do permaculture in raised beds?
Absolutely. While permaculture often utilizes in-ground swales, you can easily adapt the principles to raised beds using the Hugelkultur method. Instead of filling an expensive raised bed entirely with store-bought soil, place rotting logs and thick branches at the bottom of the bed, then layer organic matter, compost, and soil on top. The rotting wood acts as an underground sponge, holding moisture and feeding the soil for years.
Conclusion: Your Backyard Ecosystem Awaits
The transition to ecological gardening is one of the most rewarding journeys you can undertake. By stepping back and allowing nature to do the heavy lifting, you trade the exhausting battle of conventional gardening for a system of abundance, resilience, and harmony.
Permaculture for total beginners is not about mastering complex agricultural science overnight; it is about shifting your perspective. It begins with observing the sun, catching the rain, protecting the soil, and pairing plants that want to grow together.
Your Next Step: You don’t need a shovel to start today. Go outside this weekend, grab a cup of coffee, and simply observe your yard. Where does the water flow? Where does the sun hit?
Are you ready to build a high-yield, low-effort garden? Drop a comment below with your biggest current gardening struggle, or subscribe to our Agricultural Tips newsletter to receive our free “Beginner’s Guild Planting Chart” to help you plan your very first plant community!