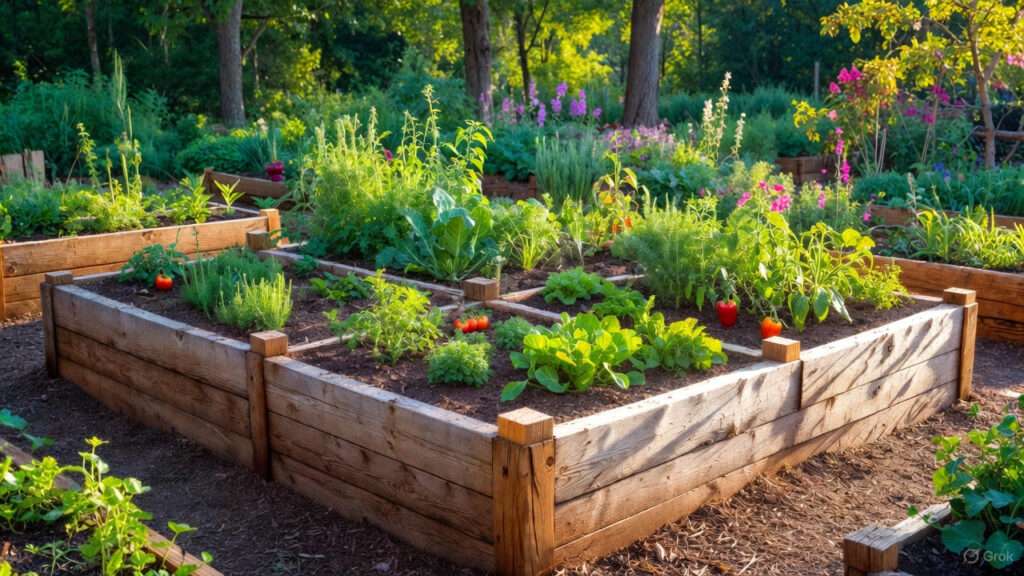
As the final tomatoes blush on the vine and the once-vibrant leaves of your zucchini plants begin to yellow and droop, a familiar feeling settles in — the growing season is winding down. Many gardeners stand at the edge of their plots with a mix of pride in this year’s harvest and quiet uncertainty about what comes next. Should you cut everything back aggressively, leave the beds untouched, or follow some middle path?Putting the Garden to Bed
Putting the garden to bed is far more than a simple end-of-season tidy-up. It is a thoughtful act of preparation that protects your soil over winter, breaks pest and disease cycles, conserves nutrients, and sets the foundation for a stronger, more productive garden when spring returns. Neglecting this critical step often leads to overwintering pests, nutrient leaching from bare soil, increased weed pressure, and extra work in spring. Done correctly, it rewards you with healthier soil biology, fewer problems next year, and noticeably better yields.
In this comprehensive guide, you will discover a complete, expert-backed process for putting the garden to bed. Drawing from years of hands-on experience in sustainable vegetable gardening, university extension principles, and soil science best practices, this article goes beyond basic checklists. You will learn not only the “how” but also the “why” behind each step, common pitfalls to avoid, and practical adaptations for different climates — including warmer or subtropical regions where hard freezes are rare but dry seasons and heavy rains pose their own challenges. By the end, you will have a clear, actionable plan to tuck your garden in properly and wake up to a more resilient plot next season.
Whether you grow in raised beds, in-ground plots, or containers, these fall garden cleanup and winter preparation strategies will save you time, reduce future pest and disease issues, and build long-term soil fertility. Let’s begin.
Why Putting Your Garden to Bed Properly Matters
Putting the garden to bed is one of the highest-leverage tasks in the entire gardening calendar. It directly influences soil health, pest pressure, nutrient retention, and overall garden productivity for the following year.
When plants finish their cycle, leftover debris — spent stems, fallen leaves, and rotting fruit — can harbor fungal spores, bacteria, and insect eggs. Many common garden pathogens, such as early blight on tomatoes or powdery mildew, overwinter in this material and reinfect new plants in spring. Similarly, weeds that go to seed or perennial weeds with established roots multiply rapidly if left unchecked. Bare soil, meanwhile, is vulnerable to erosion from winter rains or winds, and valuable nutrients can leach away before spring planting.
Proper fall preparation does the opposite. It:
- Breaks disease and pest cycles by removing infected material.
- Protects and builds soil structure through mulch and organic matter.
- Feeds beneficial soil microbes and earthworms that continue working through cooler months.
- Prevents nutrient loss and erosion.
- Reduces spring workload, allowing you to focus on planting rather than heavy cleanup.
- Supports biodiversity by providing limited habitat for beneficial insects and birds while still maintaining cleanliness.
From a broader perspective, healthy garden soil acts as a carbon sink and improves water retention — benefits that extend beyond your backyard to environmental stewardship. Gardeners who invest time in fall bed prep consistently report stronger seedlings, fewer pest outbreaks, and higher vegetable yields season after season. In short, putting the garden to bed is preventive medicine for your soil and plants.
Many gardeners still believe the myth that “leaving everything alone is more natural.” While some debris benefits wildlife, a balanced approach — targeted removal of diseased or weedy material combined with protective mulch or cover crops — delivers far better results for productive vegetable gardens.
Timing Your Garden Bed Prep – When to Start Putting the Garden to Bed
Successful winter garden preparation depends heavily on timing. Starting too early wastes the last bits of harvest; starting too late risks working in frozen or waterlogged soil.
Key indicators that it is time to begin:
- Most warm-season crops (tomatoes, peppers, cucumbers, squash) have stopped producing or been killed by the first light frost.
- Foliage on annual vegetables turns yellow or brown and begins to die back naturally.
- Nights consistently cool down, and daytime temperatures drop below the ideal range for active growth (generally below 15–18°C / 59–64°F for many summer crops).
- You have completed the final major harvest.
In temperate climates with distinct seasons and hard freezes, aim to complete major cleanup 2–4 weeks before the first expected killing frost. This gives you time to amend soil and apply mulch while the ground is still workable.
In milder, subtropical, or tropical-influenced areas (such as parts of Bangladesh, India, or similar warm climates), timing shifts. There may be no hard frost, so focus on the transition from the main rainy/monsoon period to the drier or cooler season. Put beds to bed once peak summer production slows and before heavy dry-season stress or off-season rains begin. In these regions, you can often continue growing cool-season or winter greens (spinach, radish, lettuce, carrots) while preparing other beds for the next warm cycle. The goal remains soil protection and fertility building rather than full dormancy preparation.
Keep a simple garden journal or use a free frost-date app to track your local first and last frost dates, rainfall patterns, and observations year after year. This data becomes invaluable for refining your timing.
Step-by-Step Guide to Putting the Garden to Bed
This is the heart of effective fall garden cleanup. Follow these steps in roughly this order for best results.

1. Harvest the Last Crops and Assess Your Garden
Begin by gathering any remaining produce. Pick ripe or near-ripe vegetables promptly — overripe fruit left on plants or on the ground invites pests and rot that can spread disease. For root crops like carrots, beets, or potatoes, harvest before the soil becomes too wet or frozen, as excess moisture can cause cracking or rot in storage.
While harvesting, take time to assess the garden:
- Note which varieties performed well and which struggled (record in your journal).
- Identify any obvious disease or pest issues for future prevention (e.g., tomato hornworms, blight, or aphid pressure).
- Photograph beds for before-and-after comparison — this helps track long-term soil improvement.
This assessment turns cleanup into a learning opportunity and improves decision-making for next season’s crop rotation and variety selection.
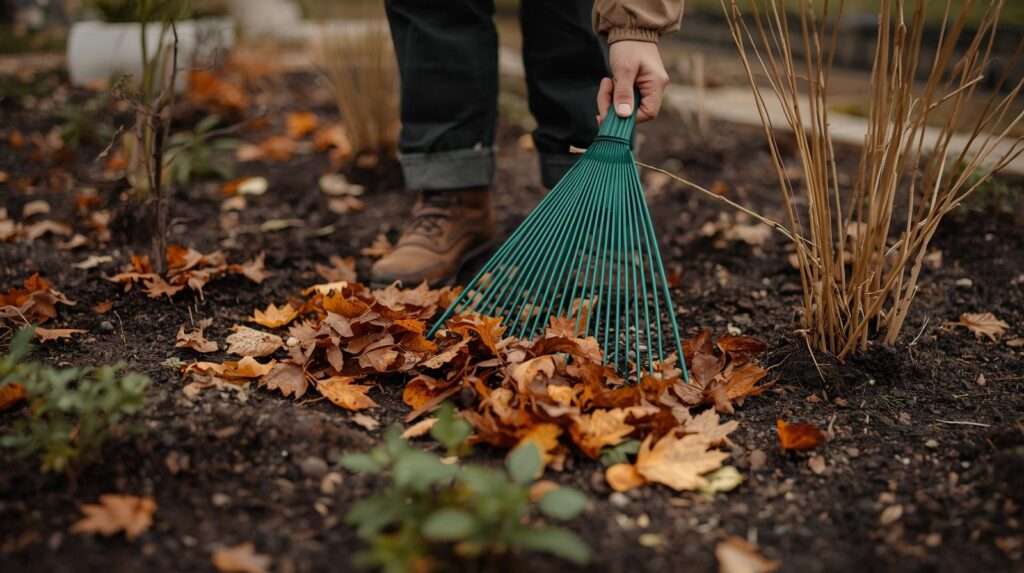
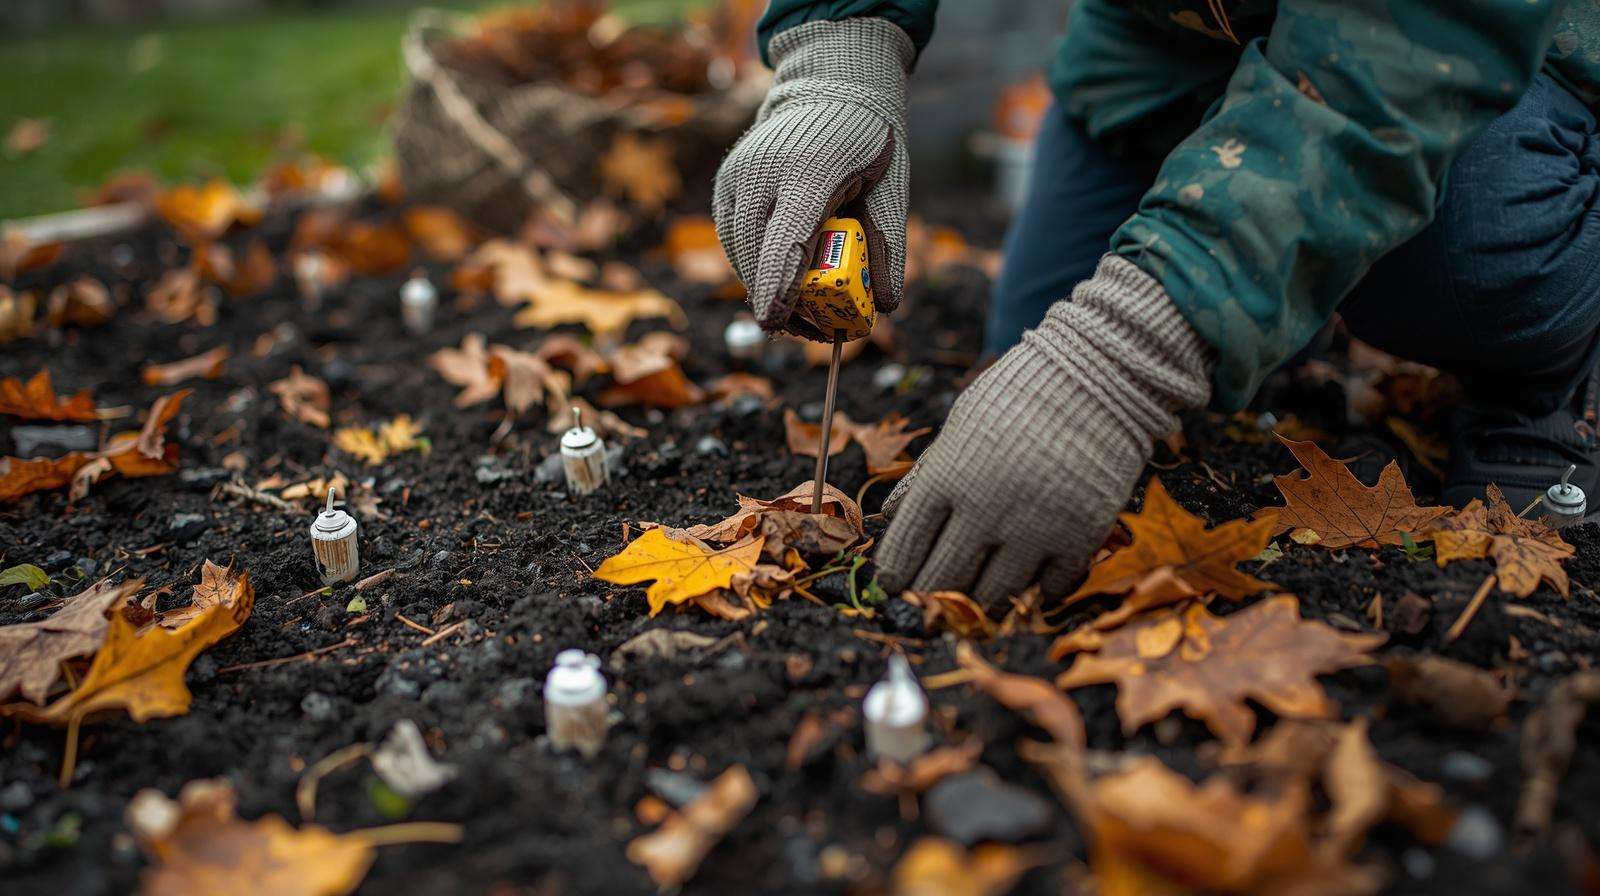
2. Remove Spent Plants and Debris – What to Pull, Cut, or Leave
Careful removal of plant material is one of the most important steps in putting the garden to bed.
General rule: Remove all spent annual vegetables and flowers unless they are healthy and you want to leave certain seed heads for wildlife.
- Diseased or pest-infested material: Bag and dispose of it in the trash or burn it (where permitted). Do not compost. This includes tomato vines with blight, squash leaves with powdery mildew, or any plants showing significant insect damage. Many home compost piles do not reach temperatures high enough to kill pathogens.
- Healthy annual debris: Cut or pull plants and add them to your compost pile. Chopping larger stems into smaller pieces speeds decomposition.
- Perennials: Cut back selectively. For example, cut peonies, hostas, and daylilies to ground level to reduce overwintering sites for pests. Leave ornamental grasses, coneflowers, or black-eyed Susans standing — their seed heads feed birds and provide winter interest and insect habitat.
- Roots: In many cases, you can leave healthy roots in the ground. They add organic matter as they break down and help maintain soil structure. However, remove large, woody roots that could harbor problems.
For vegetable gardens, thorough removal of tomato, potato, and brassica family debris is especially important to interrupt disease cycles like verticillium wilt or clubroot.
Leave some clean, disease-free fallen leaves or chopped material in designated areas if you want to support beneficial insects, but avoid thick layers that could smother soil or invite rodents.
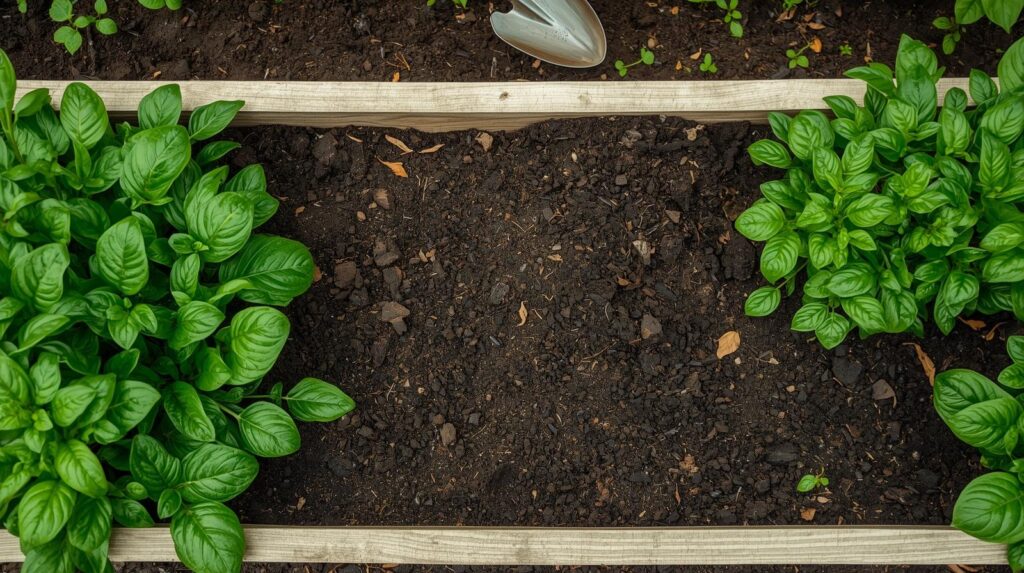
3. Weed Thoroughly – Your Last Chance to Prevent Spring Headaches
Fall weeding pays huge dividends. Many winter annual weeds germinate in cool weather and establish roots before spring. Perennial weeds with deep taproots or runners become much harder to control once they regrow vigorously.
Pull or dig weeds while the soil is still relatively soft. Remove the entire root system when possible. For persistent weeds, consider smothering techniques: lay cardboard or thick newspaper over weedy patches and top with mulch. This deprives them of light over winter.
Avoid deep tilling solely for weed control, as it can bring buried weed seeds to the surface and disrupt soil biology. Hand-weeding or shallow cultivation is usually sufficient at this stage.
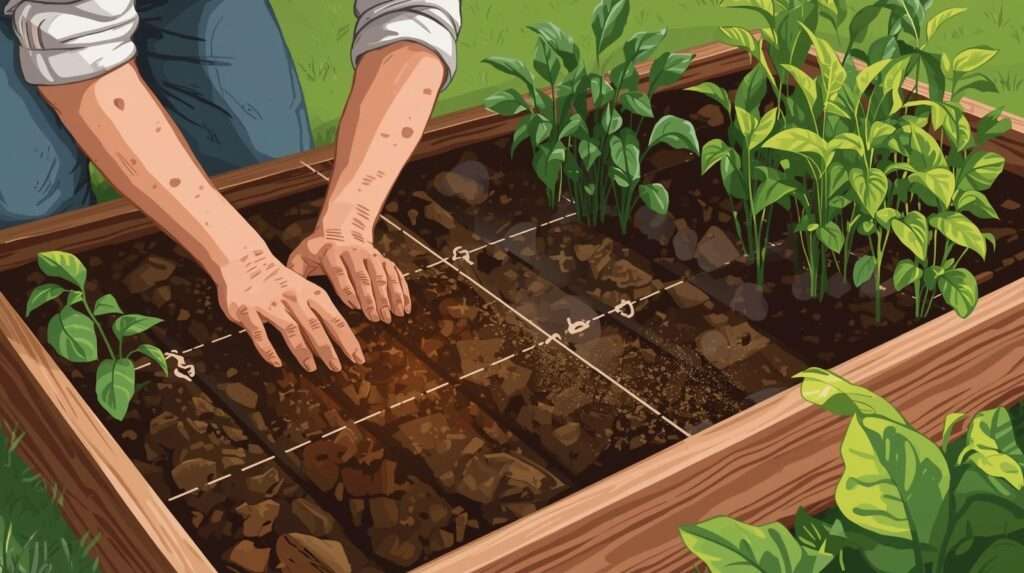
4. Soil Testing and Amendment – Building Fertility for Next Season
Healthy soil is the foundation of a productive garden, and fall is one of the best times to improve it.
Get a soil test if you have not done so recently. Many local agricultural extension services or private labs offer affordable testing that measures pH, macronutrients (nitrogen, phosphorus, potassium), and micronutrients. Fall testing gives results in time to apply slow-acting amendments like lime or rock phosphate, which need months to integrate.
Based on test results:
- Add compost or well-aged manure (2–4 inches) to boost organic matter and microbial life.
- Incorporate worm castings or other high-quality organic amendments for gentle nutrient release.
- Adjust pH if needed (most vegetables prefer slightly acidic to neutral soil, around 6.0–7.0).
Spread amendments evenly over cleared beds. You do not need to dig them in deeply — earthworms, microbes, and winter weather will incorporate them gradually. This no-dig or low-till approach preserves soil structure and fungal networks that are vital for plant health.
Expert insight: Adding organic matter in fall allows beneficial microbes to break it down slowly over winter, making nutrients more plant-available by spring without the risk of burning young roots that fresh amendments might cause.
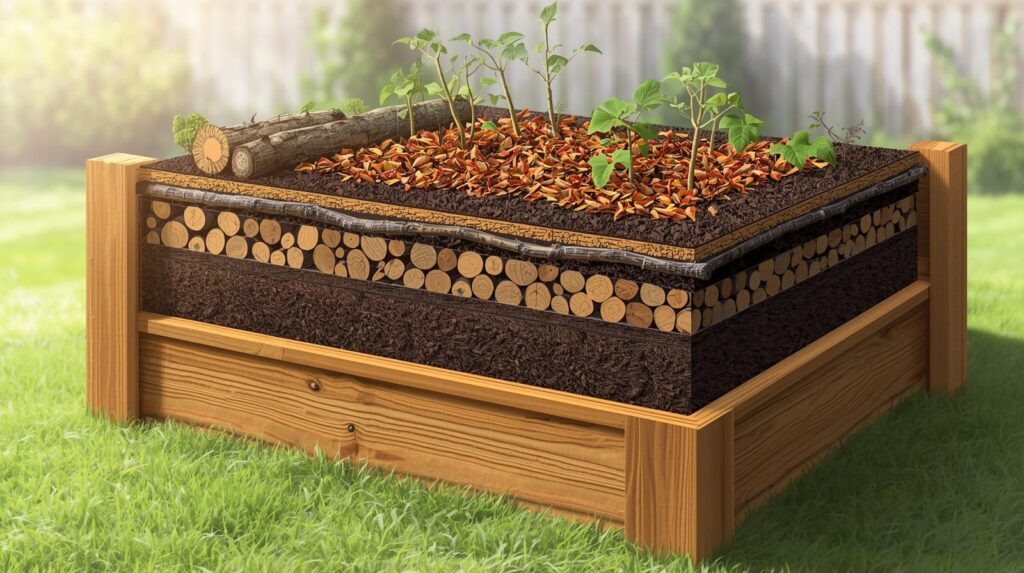
5. Mulch and Cover Crops – Protecting and Nourishing Bare Soil
Never leave soil bare over winter. Exposed soil loses structure, erodes, and allows nutrient leaching.
Mulching is one of the simplest yet most powerful steps. Apply 2–4 inches (or more in colder climates) of organic mulch such as:
- Shredded leaves (excellent and free in many areas)
- Straw or hay (seed-free)
- Grass clippings (dried, pesticide-free)
- Composted bark or wood chips (for pathways or around perennials)
Mulch conserves moisture, moderates soil temperature, suppresses weeds, and feeds soil life as it slowly decomposes. In warmer climates, a slightly thinner layer may suffice to avoid excess moisture buildup during rainy periods.
Cover crops offer another excellent option, especially for larger beds or when you want to build soil aggressively. Popular choices include:
- Cereal rye (excellent for erosion control and biomass)
- Clover (nitrogen-fixing)
- Field peas or vetch (legumes that improve fertility)
- Annual ryegrass
Sow cover crops several weeks before hard frost so they establish. In spring, you can mow or cut them and either leave as mulch or lightly incorporate. In subtropical areas with mild winters, choose heat-tolerant or quick-growing options and manage them to avoid going to seed.
Many gardeners combine approaches: add compost, then mulch on top, or sow cover crops in some beds while mulching others. Both methods protect against winter erosion and improve soil tilth dramatically over time.
Note on compost vs. mulch: Compost is primarily a soil amendment that adds nutrients and biology when worked into or top-dressed on beds. Mulch is a protective surface layer. Using both together — compost first, then mulch — gives the best of both worlds.
6. Divide, Transplant, and Protect Perennials
While most annual vegetables are removed completely, many perennial flowers, herbs, and some edible perennials benefit from attention during fall garden cleanup.
Divide overcrowded clumps of perennials such as daylilies, hostas, irises, rhubarb, or asparagus every 3–5 years in fall (or early spring in colder zones). Division rejuvenates the plants, prevents decline in the center of the clump, and gives you free plants to expand your garden or share with neighbors.
How to divide:
- Dig up the entire clump carefully, keeping as much root ball intact as possible.
- Use a sharp knife or garden spade to separate into smaller sections, each with healthy roots and growing points (crowns).
- Replant divisions immediately at the same depth they were growing, water thoroughly, and apply a generous layer of mulch around (but not touching) the crowns to protect roots from temperature swings.
For tender perennials or borderline-hardy plants (such as certain salvias, rosemary in cooler areas, or ginger in subtropical zones), add extra mulch insulation or consider moving pots to a protected spot. In regions without hard frost, focus more on moisture management and light pruning rather than heavy protection.
Expert tip: Fall division works well because plants are entering dormancy, reducing transplant shock. The roots continue growing slowly below ground even as top growth slows, establishing a stronger root system before the next active season.
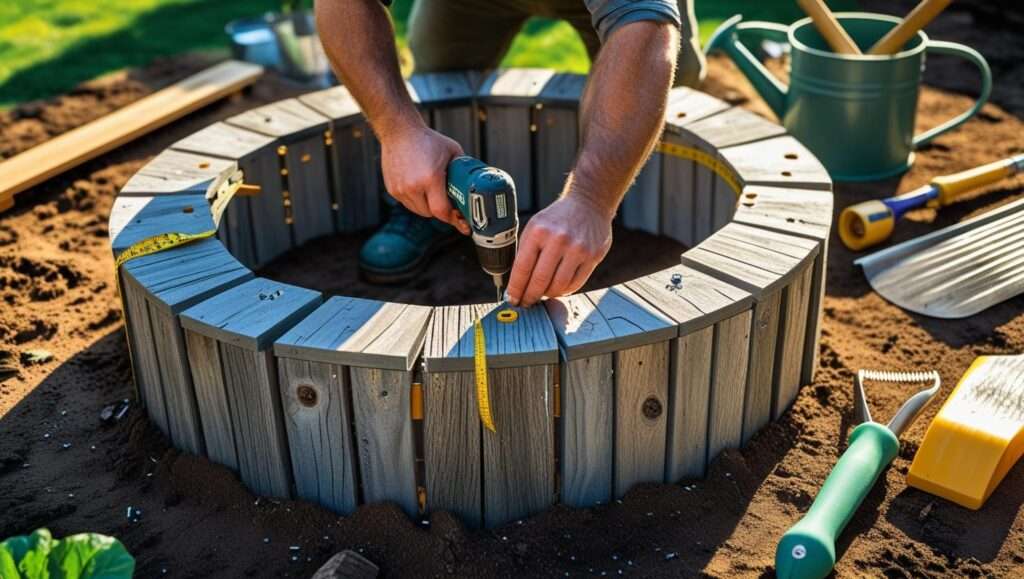
7. Clean and Store Tools, Supports, and Containers
A well-maintained garden begins with well-maintained tools. Cleaning and storing equipment properly during putting the garden to bed prevents rust, disease carry-over, and frustration next spring.
Step-by-step tool care:
- Remove all soil and plant residue with a stiff brush or hose.
- Wash with mild soapy water and disinfect cutting tools (pruners, shears, knives) with a 10% bleach solution or rubbing alcohol to kill any lingering pathogens.
- Dry thoroughly to prevent rust.
- Sharpen blades with a file or sharpening stone.
- Apply a light coat of mineral oil or linseed oil to wooden handles and metal parts.
- Store tools in a dry shed or garage, ideally hung up to save space and prevent damage.
Remove and store supports such as tomato cages, stakes, trellises, and netting. Clean them similarly and store flat or bundled to avoid bending. For wooden stakes, a quick sanding and oiling extends their life significantly.
Containers and pots deserve special attention:
- Empty out spent soil or plants.
- Scrub pots with soapy water and disinfect.
- Terracotta and clay pots are especially prone to cracking if left outside with moisture that freezes — move them to a sheltered area or stack indoors.
- Store empty raised bed frames or greenhouse covers securely.
Taking these steps now means your tools will be sharp, clean, and ready when the first warm days of spring arrive, saving both time and money.
8. Additional Protective Measures
Complete your winter garden preparation with these final touches:
- Composting fall materials: Add clean, disease-free plant debris and shredded leaves to your compost pile. Balance “greens” (nitrogen-rich) with “browns” (carbon-rich leaves and straw) for faster decomposition. Turn the pile occasionally if possible.
- Supporting beneficial wildlife: Leave a few small, clean piles of stems or leaves in a designated “wild corner” away from main beds. This provides overwintering habitat for ladybugs, lacewings, and solitary bees without encouraging pests in your vegetable areas.
- Overwintering tender bulbs and tubers: Dig up dahlias, cannas, gladioli, or elephant ears in colder climates, dry them, and store in a cool, dark, frost-free place. In warmer subtropical areas, heavy mulching may be sufficient.
- Pathway and border maintenance: Clear and mulch garden paths to prevent mud and weed growth during winter rains.
These measures create a balanced ecosystem where your productive garden beds stay clean and protected while still contributing to local biodiversity.
Common Mistakes to Avoid When Putting the Garden to Bed
Even experienced gardeners sometimes make these errors. Avoiding them will dramatically improve your results:
- Leaving diseased or pest-heavy debris in the garden or compost — this is the fastest way to restart problems next year.
- Removing every single piece of plant material — over-cleaning removes valuable organic matter and beneficial insect habitat.
- Adding fresh (uncomposted) manure in fall — it can burn roots or introduce weeds and pathogens.
- Tilling or digging excessively — this disrupts soil structure and brings weed seeds to the surface.
- Applying mulch too early on warm, wet soil — this can trap moisture and encourage rot in some climates.
- Ignoring soil testing — guessing amendments often leads to imbalances.
- Forgetting tool maintenance — rusty or dull tools make spring work far more difficult.
By following the step-by-step guide above, you naturally avoid most of these pitfalls.
Climate-Specific Tips for Putting the Garden to Bed
Garden conditions vary widely, so adapt these practices to your local environment.
In cold temperate zones with hard freezes:
- Apply thicker mulch layers (4–6 inches) for insulation.
- Focus heavily on removing all tender annual debris.
- Use cover crops like winter rye that can survive freezing temperatures.
In warmer, subtropical, or monsoon-influenced regions (such as many areas in Bangladesh and similar climates):
- Emphasize moisture and erosion control rather than cold protection.
- Use mulch to retain soil moisture during the drier winter months while preventing compaction from occasional heavy rains.
- Choose fast-growing cover crops suited to mild winters, such as sunn hemp, cowpea, or buckwheat in transition periods.
- You can often keep some beds active for winter vegetables (radish, spinach, mustard greens, carrots, lettuce) while putting other sections fully to bed for soil recovery.
- Pay extra attention to drainage in raised beds to avoid waterlogging during post-monsoon showers.
- Focus on building soil organic matter to improve resilience against heat stress in the coming hot season.
Raised beds vs. in-ground gardens: Raised beds drain faster and warm up quicker in spring but can dry out or lose nutrients more readily. Mulch generously and top-dress with compost annually. In-ground beds benefit more from deep-rooted cover crops that improve compaction over time.
No matter your climate, the core principles remain the same: protect soil, remove problems, and add organic matter.
Tools and Materials You’ll Need for Efficient Garden Bed Prep
Gather these items before you begin to make the process smoother:
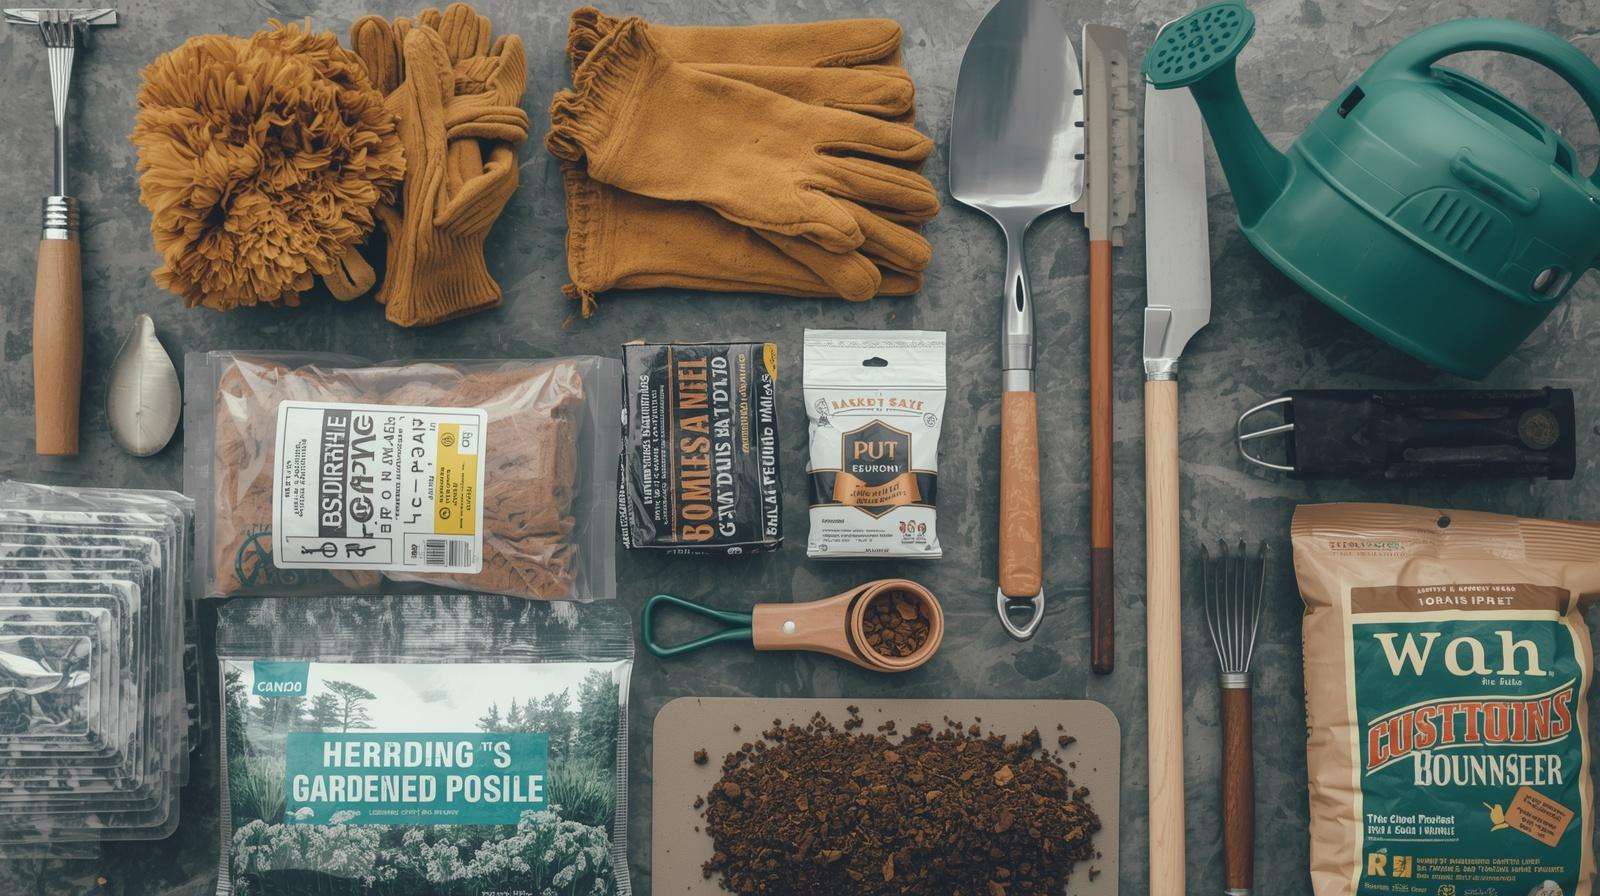
- Sharp pruners, loppers, and garden knife
- Garden fork or broadfork (for gentle lifting)
- Wheelbarrow or garden cart
- Soil test kit or lab submission forms
- Compost, aged manure, or worm castings
- Organic mulch materials (leaves, straw)
- Cover crop seeds (if using)
- Gloves, sturdy boots, and knee pads
- Disinfectant solution and mineral oil for tools
- Tarps or cardboard for smothering weeds
Budget-friendly alternatives: Use fallen leaves instead of purchased straw, repurpose household buckets for soaking tools, and make your own compost tea from garden waste.
Safety note: Lift heavy loads with your legs, take breaks, and stay hydrated — fall garden work can still be physically demanding.
After Putting the Garden to Bed – Planning for a Thriving Next Season
Once your beds are cleaned, amended, mulched, and tucked in, shift your focus to planning. Winter is an ideal time for reflection and preparation:
- Review your garden journal and photos to decide on crop rotation (avoid planting the same family in the same spot consecutively).
- Order seeds and plan your spring layout while varieties are still widely available.
- Maintain tools and repair any garden structures.
- Research new techniques or varieties you want to try.
- Enjoy the slower pace — read gardening books, join local gardening groups, or attend workshops.
The effort you put into putting the garden to bed directly translates into earlier planting dates, stronger plants, and reduced pest pressure next year. Many gardeners notice they can plant 1–2 weeks earlier because the soil is already in excellent condition and relatively weed-free.
FAQs About Putting the Garden to Bed
Can I compost everything from the garden? No. Compost only healthy, disease-free material. Bag and discard (or burn where allowed) anything showing signs of serious fungal or bacterial disease.
Should I till the soil in fall? Generally no. Light top-dressing with compost and mulch is far better for soil biology. Excessive tilling destroys structure and fungal networks.
What if I have raised beds? Raised beds benefit greatly from fall preparation. Add compost, apply mulch, and consider a quick cover crop in larger beds. Ensure good drainage to prevent winter waterlogging.
How thick should winter mulch be? 2–4 inches is ideal for most areas; increase to 4–6 inches in colder climates. Keep mulch a few inches away from plant stems to prevent rot.
Is it too late if frost has already hit? It is rarely too late. Even after light frost, you can still remove debris, amend soil, and mulch. The earlier the better, but any preparation helps.
What is the difference between flower and vegetable gardens? Vegetable beds usually require more thorough removal of debris to break disease cycles. Flower beds allow more standing stems for wildlife and winter interest.
How does proper fall prep help with pests and diseases? By removing overwintering sites and infected material, you reduce the population of problem organisms that would otherwise greet your new plants in spring.
Can I plant winter vegetables while putting some beds to bed? Absolutely. In many climates, you can prepare some beds for full winter rest while keeping others active with cool-season crops like leafy greens, root vegetables, or brassicas.
Final Word
Putting the garden to bed is not the end of the gardening year — it is a vital investment in next season’s success. By harvesting the last crops, removing problem material, weeding thoroughly, amending and protecting your soil with compost and mulch, caring for perennials and tools, and planning ahead, you create conditions for healthier soil, fewer pests, and more abundant harvests.
Your garden will thank you with richer tilth, better water retention, and stronger plants when the days grow longer again. The time you spend now will save countless hours of weeding, watering, and troubleshooting next spring and summer.
Take these steps this season, document your process, and compare results with previous years. You will likely see noticeable improvements in soil quality and garden productivity.
If you have your own favorite techniques for putting the garden to bed or questions about adapting these steps to your specific climate or setup, feel free to share them in the comments below. Subscribe to our agricultural tips newsletter for more seasonal guides, soil health strategies, and practical gardening advice delivered straight to your inbox.
Here’s to healthier soil and more productive gardens — season after season