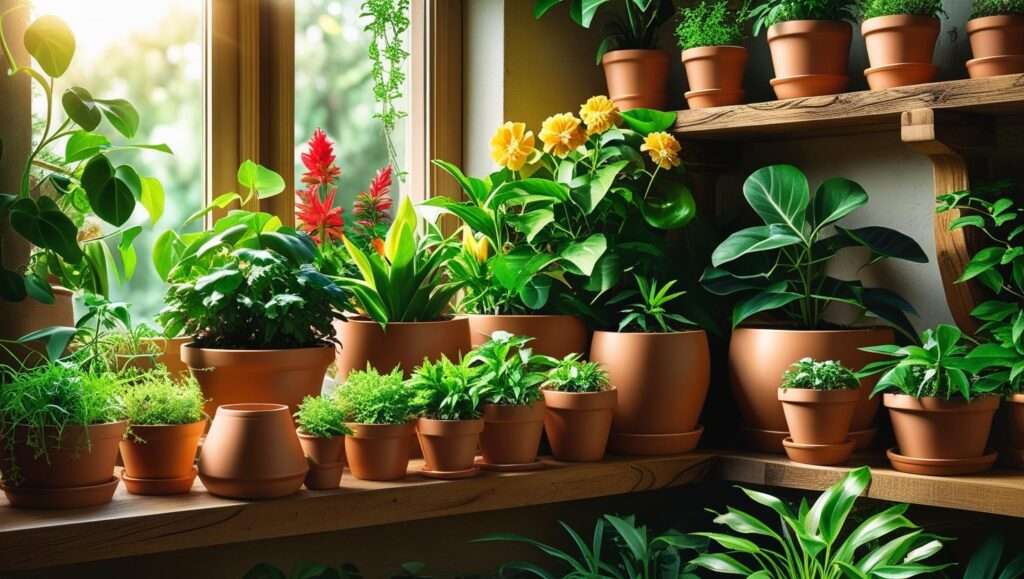
You’ve just planted your first vegetable patch or flower bed, full of excitement for homegrown tomatoes, vibrant blooms, and fresh herbs. But a few weeks later, something’s wrong—leaves are turning yellow, plants look stunted, or fruits refuse to set. The issue isn’t always pests, overwatering, or bad luck. Often, it’s hidden right beneath your feet: unbalanced soil chemistry that starves plants of nutrients or locks them away.
Soil testing for new gardeners is the essential first step to uncover these problems before they derail your efforts. By analyzing your soil’s pH, nutrient levels, and structure, you get precise, science-backed recommendations to amend it correctly—saving money on unnecessary fertilizers, preventing plant stress, and setting the foundation for healthier, more productive gardens. University extension services like NC State, Penn State, and Ohio State emphasize that soil testing is the most reliable way to guide amendments, avoid over-application that harms the environment, and achieve optimal growth.
As an agricultural expert with years of experience guiding beginners through successful home gardens, I’ve seen countless new gardeners transform disappointing starts into abundant harvests simply by starting with a proper soil test. This comprehensive guide draws from trusted sources such as cooperative extension publications to walk you through why testing matters, how to do it right, interpreting results, making targeted amendments, and building long-term soil health. Whether you’re growing vegetables, flowers, or herbs, this knowledge empowers you to garden smarter from day one.
Why Soil Testing Is Essential for New Gardeners
New gardeners often dive in with enthusiasm but little knowledge of what’s happening underground. Without a soil test, you’re essentially guessing—adding generic fertilizers or lime based on what worked for someone else or what a bag label suggests. This approach frequently leads to nutrient imbalances, wasted resources, and frustrated results.
The Real Problems New Gardeners Face Without Testing
Many first-time gardens show classic signs of untested soil issues:
- Yellowing leaves (chlorosis), often from nitrogen deficiency or iron locked up in high-pH soil.
- Stunted growth or poor fruit/flower production due to low phosphorus or potassium.
- Blossom end rot in tomatoes and peppers from calcium shortages, exacerbated by inconsistent watering but rooted in low available calcium.
- Weak plants more prone to pests and diseases because nutrient stress reduces natural defenses.
Over-fertilizing is equally common—and harmful. Excess nitrogen burns roots or causes lush foliage at the expense of fruit; surplus phosphorus can pollute waterways. Soil testing prevents these pitfalls by revealing exactly what’s needed (or not), promoting sustainable, eco-friendly practices.
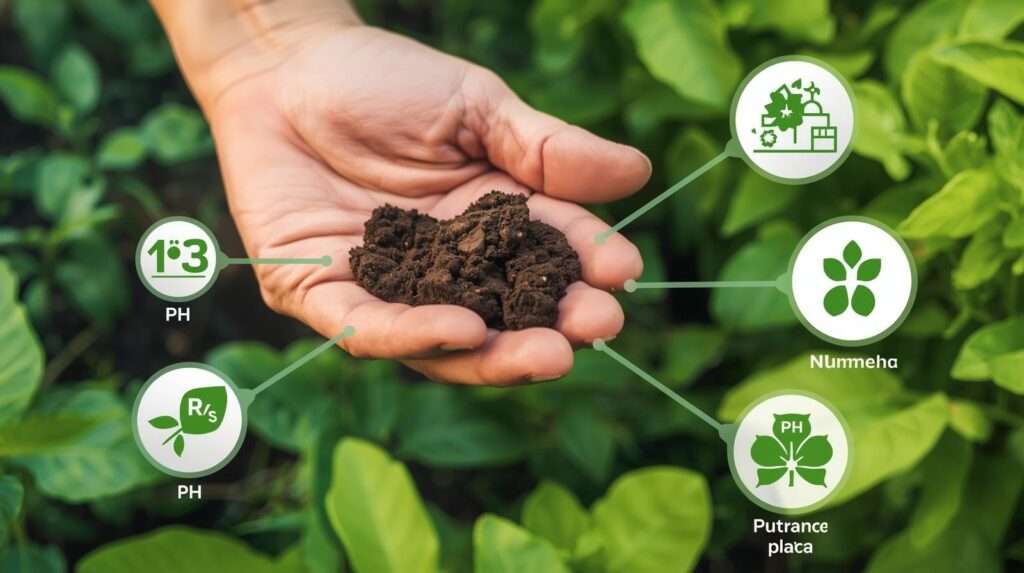
Key Benefits of Soil Testing
A professional soil test provides:
- Accurate soil pH measurement—critical because pH controls nutrient availability. Most vegetables thrive at 6.0–7.0; outside this range, even abundant nutrients become inaccessible.
- Levels of major nutrients (N-P-K—nitrogen, phosphorus, potassium) plus secondaries like calcium, magnesium, and sulfur, and often micronutrients (zinc, iron, manganese).
- Insights into organic matter content and cation exchange capacity (CEC), indicating soil’s ability to hold nutrients and water.
- Customized recommendations for lime rates, fertilizer types/amounts, and organic amendments tailored to your garden and crop goals.
Testing builds resilience: Healthier soil supports stronger roots, better drought tolerance, and fewer inputs over time.
When to Test: Timing for Maximum Impact
The best time is fall or early spring—months before planting—so amendments have time to react. For brand-new gardens, test immediately. In established plots, re-test every 2–3 years, or annually if heavily amended. Avoid sampling right after fertilizing or liming; wait at least 4–6 weeks for accurate baselines.
How to Perform Soil Testing – Step-by-Step for Beginners
Once you understand the “why,” the next question is the “how.” Fortunately, soil testing is straightforward and accessible even for complete beginners. The goal is to collect a representative sample that accurately reflects your garden’s soil conditions.
Two Main Approaches: DIY vs. Professional Lab Testing
You have two primary options:
- Home DIY kits (available at garden centers or online): These typically include color-chart tests for pH, nitrogen, phosphorus, and potassium. They’re quick (results in minutes) and inexpensive ($10–30), making them a good starting point or for quick pH checks. However, they’re less precise, especially for nutrient levels, and rarely provide detailed amendment recommendations.
- Professional laboratory testing (recommended for most new gardeners): Send samples to a university extension lab, commercial soil lab, or services like SoilKit, MySoil, or Logan Labs. Costs range from $15–50 per sample (often including shipping and recommendations). Labs use standardized methods for accurate, reliable results—including pH, nutrient indices, organic matter, and tailored fertilizer/lime suggestions based on your region and crop type.
For the best value and accuracy—especially in your first garden—opt for a professional lab test. Many cooperative extension offices offer discounted or subsidized testing for residents.
Choosing the Right Soil Test
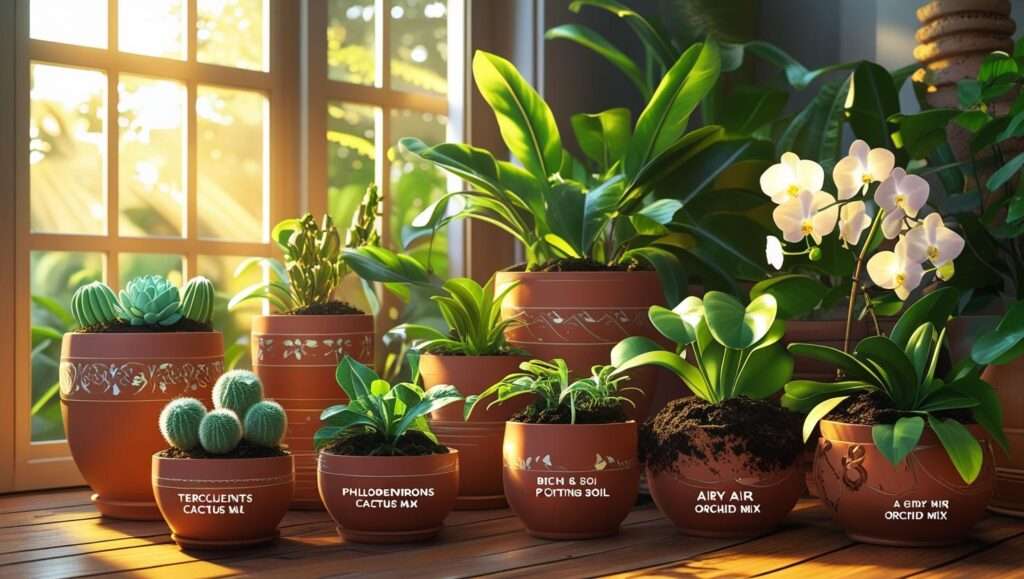
- Basic test: Covers pH + major nutrients (N-P-K). Sufficient for most home vegetable and flower gardens.
- Comprehensive test: Adds secondary nutrients (Ca, Mg, S), micronutrients (Fe, Zn, Mn, Cu, B), organic matter percentage, and CEC. Ideal if you’ve had persistent issues or want to build long-term soil health.
Check your local extension website (search “[your state] cooperative extension soil testing”) for specific kits and instructions—they’re tailored to regional soil types and crops.
Step-by-Step Guide to Collecting Soil Samples
Proper sampling is critical—poor technique leads to misleading results. Follow these steps:
- Gather tools: Clean plastic trowel or shovel (avoid metal contamination), clean plastic bucket, zip-top bag or provided sample bag, permanent marker.
- Divide your garden: If areas differ (e.g., vegetable bed vs. lawn vs. raised beds), sample separately. For a small uniform plot, one composite sample is fine.
- Determine sampling depth: For gardens and vegetables, take samples from 0–6 to 8 inches deep (root zone). Lawns: 0–4 inches; trees/shrubs: deeper.
- Collect subsamples: Walk in a zigzag or grid pattern. Take 10–15 small plugs or slices (about a handful each) from different spots. Avoid areas with recent fertilizer, compost piles, or unusual spots (e.g., near roads).
- Mix thoroughly: Combine all subsamples in the bucket. Break up clumps and remove rocks, roots, or debris.
- Prepare the sample: Remove about 1–2 cups of the mixed soil. Air-dry if wet (spread on newspaper indoors for 1–2 days). Do not oven-dry or microwave.
- Label and submit: Fill out the form with your name, address, garden type (e.g., “vegetable garden”), and crops planned. Seal in the provided bag and mail.
Here are visual guides to help with the process:

Tips: Sample at the same time each year for comparable trends. Wear gloves if concerned about contaminants. Never sample right after rain or when soil is saturated.
Simple At-Home Tests to Complement Lab Results
While waiting for lab results (typically 1–3 weeks), try these easy DIY methods:
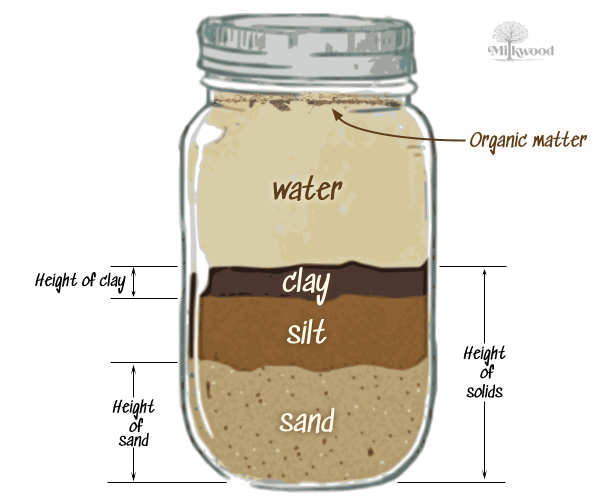
- Mason jar soil texture test — Measures sand, silt, and clay percentages to understand drainage and workability.
- Fill a clear quart jar 1/3 full with soil, add water to near top, shake vigorously for 1–2 minutes, let settle 24–48 hours.
- Layers form: bottom (sand), middle (silt), top (clay). Organic matter floats.
- Ideal garden loam: roughly 40% sand, 40% silt, 20% clay.
- Ribbon test: Moisten a handful of soil and squeeze into a ball, then try to form a ribbon. Long, shiny ribbon = high clay (poor drainage); crumbly, no ribbon = sandy (fast drainage).
- Percolation test: Dig a 12-inch hole, fill with water, observe drainage rate. Good garden soil drains 1–2 inches per hour.
These quick checks help interpret lab results in context—e.g., high clay may need more organic matter even if nutrients test adequate.
Understanding and Interpreting Your Soil Test Results
Receiving your soil test report can feel overwhelming at first—pages of numbers, abbreviations, and bar graphs. But once you know what to look for, it becomes a clear roadmap for success. Most university and commercial labs provide easy-to-read reports with color-coded levels (low, optimum, high) and plain-language recommendations.
Breaking Down a Typical Soil Test Report
A standard report usually includes these key sections:
- Soil pH — Measured on a 0–14 scale.
- Buffer pH (or lime index) — Used to calculate how much lime is needed to raise pH.
- Nutrient levels — Reported in parts per million (ppm) or as an index (0–100 or similar scale).
- Organic matter percentage — Indicates biological health and nutrient-holding capacity.
- Cation Exchange Capacity (CEC) — Measures soil’s ability to retain positively charged nutrients (higher CEC = better nutrient retention, typical of clay/loam soils).
- Base saturation percentages — Shows the balance of calcium, magnesium, potassium, and hydrogen/sodium.
- Recommendations — The most valuable part: exact amounts of lime, fertilizer (in lbs per 1,000 sq ft or 100 sq ft), and suggested products or organic equivalents.
Many reports include crop-specific notes (e.g., “for tomatoes” or “general garden vegetables”).
Here’s what a clean, beginner-friendly report layout often looks like (placeholder for example):
Soil pH Explained – The Gatekeeper of Nutrients
pH is the single most important number on your report for most gardeners.
- Ideal range for most vegetables, flowers, and herbs: 6.0–7.0 (slightly acidic to neutral).
- Below 6.0 (acidic): Aluminum and manganese become toxic; phosphorus, calcium, magnesium, and molybdenum become less available → yellowing between veins, stunted growth.
- Above 7.0 (alkaline): Iron, manganese, zinc, copper, and boron get locked up → interveinal chlorosis (yellow leaves with green veins), especially in young growth.
Blueberries, azaleas, and potatoes prefer acidic soil (4.5–5.5); asparagus and beets tolerate slightly alkaline conditions.
Major Nutrients (N, P, K) and What Levels Mean
- Nitrogen (N): Frequently not measured directly because it’s highly mobile and fluctuates. Labs often recommend based on organic matter and crop needs. Low N → pale green/yellow older leaves, weak stems. Excess → dark green foliage, few flowers/fruits.
- Phosphorus (P): Critical for root development, flowering, and fruiting. Low P → purplish leaves, poor seedling vigor. Many soils test medium-high due to past applications; avoid adding more unless low.
- Potassium (K): Supports overall plant health, water regulation, disease resistance. Low K → scorched leaf edges, weak stalks, small fruit.
Labs categorize levels as Low, Medium/Optimum, High, Very High. Only add when Low or Medium (and crop demand is high).
Secondary and Micronutrients
- Calcium (Ca): Prevents blossom end rot in tomatoes/peppers; important for cell wall strength.
- Magnesium (Mg): Central to chlorophyll; deficiency shows as yellowing between veins on older leaves.
- Sulfur (S): Needed for protein formation; often adequate unless using low-S fertilizers long-term.
- Micronutrients (iron, zinc, manganese, copper, boron): Deficiencies are more common in high-pH or very sandy/acidic soils. Symptoms include chlorosis, distorted growth, or poor fruit set.
How to Read Recommendations
Labs translate results into actionable advice:
Example: “To raise pH from 5.4 to 6.5, apply 80 lbs dolomitic limestone per 1,000 sq ft in fall.” Example: “Phosphorus is low; apply 2 lbs of 0-46-0 triple superphosphate per 100 sq ft before planting, or equivalent organic source like bone meal.”
Always follow regional guidelines—application rates vary by soil type, climate, and lab calibration.
What to Do Next – Amending Your Soil Based on Results
The real payoff of soil testing comes when you act on the recommendations. This section translates lab numbers into practical, step-by-step improvements that new gardeners can implement safely and effectively—whether you prefer organic methods, conventional fertilizers, or a hybrid approach.
Raising or Lowering pH
pH adjustments are usually the highest-priority fix.
- To raise pH (make soil less acidic): Apply agricultural limestone (lime). Two common types:
- Calcitic limestone — High in calcium, good when magnesium is already adequate.
- Dolomitic limestone — Supplies both calcium and magnesium; preferred when your test shows low Mg.
- Application timing: Fall is ideal so winter weathering incorporates it gradually. Spread evenly, incorporate lightly into the top 4–6 inches, then water in.
- Never exceed recommended rates—over-liming can take years to correct and locks up micronutrients.
- To lower pH (make soil less alkaline): Use elemental sulfur (slow-acting, microbial conversion), aluminum sulfate (fast but can build up aluminum toxicity if overused), or organic matter (peat moss, pine needles, composted oak leaves). Sulfur works best applied in fall; expect 0.5–1 unit pH drop per year depending on soil type and amount.
Monitor progress with a follow-up test the next season—pH changes slowly.
Adding Nutrients Organically and Sustainably
Use your test results to target only what’s deficient.
- For nitrogen (N): Build gradually with organic sources—aged manure (composted 6+ months), blood meal, fish emulsion, legume cover crops (clover, vetch, peas), or high-N compost. Side-dress during the growing season rather than dumping it all at planting.
- For phosphorus (P): Bone meal, rock phosphate (slow-release), or fish bone meal. Many urban/suburban soils already have medium-high P from past lawn/landscape use—adding more can harm waterways.
- For potassium (K): Wood ash (also raises pH slightly), greensand, kelp meal, Sul-Po-Mag, or composted banana peels. Avoid fresh wood ash near acid-loving plants.
- Secondary & micronutrients: Dolomitic lime for Ca/Mg, Epsom salts (magnesium sulfate) for quick Mg boost, or chelated micronutrient blends only if the test shows clear deficiency.
Always incorporate amendments into the top 6–8 inches and water thoroughly afterward.
Building Long-Term Soil Health
The ultimate goal isn’t just fixing this year’s numbers—it’s creating living, resilient soil.
- Aim for organic matter ≥5% (most garden soils start at 1–3%). Add 1–2 inches of compost or well-rotted manure annually and mulch heavily.
- Adopt no-till or low-till methods to preserve soil structure, mycorrhizal fungi, and beneficial microbes.
- Use cover crops in off-seasons (e.g., winter rye, crimson clover, buckwheat) to prevent erosion, fix nitrogen, and improve tilth.
- Rotate crops annually to break pest/disease cycles and balance nutrient draw-down.
- Mulch with organic materials (straw, shredded leaves, wood chips) to retain moisture, suppress weeds, and feed soil biology as they decompose.
Healthy soil teems with earthworms, microbes, and fungi—visible signs you’re on the right track.
Common Mistakes New Gardeners Make (and How to Avoid Them)
- Testing too late in the season → amendments don’t have time to work → poor first-year results.
- Ignoring soil texture → sandy soils leach nutrients fast; clay soils hold too much water → add organic matter first.
- Over-applying everything “just in case” → nutrient burn, imbalanced ratios, environmental harm.
- Skipping re-testing → assuming one test is forever (nutrient levels change with cropping and weather).
- Using home pH strips/kits as the only guide → often inaccurate for nutrient advice.
Soil testing is far more than a technical chore—it’s the single most powerful decision a new gardener can make to move from guesswork and disappointment to confidence and abundance. By revealing your soil’s true pH, nutrient profile, organic matter content, and overall character, a simple test eliminates the biggest source of early failure: treating every garden as if it has the same invisible needs.
When you test first, you stop wasting money on fertilizers you don’t need, prevent nutrient lockout or toxicity, reduce environmental runoff, and give your plants exactly what they require to thrive. The amendments you apply—whether a modest application of lime, a generous layer of compost, or strategic cover cropping—become targeted investments rather than hopeful shots in the dark. Over time, this disciplined approach transforms average or even poor soil into rich, living earth that supports healthier roots, stronger plants, better flavor in vegetables, and longer-lasting blooms.
The beauty of starting with soil testing is that the benefits compound. Each season you observe, amend, and re-test, your understanding deepens and your results improve. Many gardeners who began with struggling first-year plots now report that their soil has become one of their most valuable garden assets—requiring less intervention year after year.
If you haven’t tested yet, make this the year you do. Contact your local cooperative extension office (in Bangladesh, reach out to the Department of Agricultural Extension or nearby agricultural university labs for affordable testing services), order a kit, collect your samples this fall or early next dry season, and follow through on the recommendations. Your future self—and your plants—will thank you.
Have you already tested your soil in Mathbaria or elsewhere in Barisal Division? What surprised you most about the results? Share your experience in the comments below—I’d love to hear how it shaped your garden journey, and I’m happy to help interpret any numbers or suggest next steps.
Happy gardening!
Frequently Asked Questions
How much does soil testing cost for beginners? In many regions, university or government extension services offer tests for $10–30 USD equivalent per sample (often cheaper for residents). Commercial options like SoilKit or local private labs usually fall in the $20–50 range, including detailed recommendations. In Bangladesh, check with the nearest Krishi office, BARI (Bangladesh Agricultural Research Institute), or agricultural universities—many provide subsidized or low-cost services for small-scale farmers and home gardeners.
Can I test soil myself at home accurately? Home pH test kits and nutrient color charts give a rough idea and are useful for quick checks, but they lack the precision and comprehensive recommendations of professional lab analysis. For your first garden especially, send a sample to a lab. Use DIY jar texture tests and ribbon tests to complement (not replace) lab results.
What if my soil test shows high nutrients already? This is common, especially with phosphorus in older garden sites. Skip adding more of that nutrient to avoid imbalance, runoff pollution, or luxury consumption (plants take up excess without benefit). Focus on pH correction, organic matter building, and balanced micronutrients instead. High potassium or calcium often needs no action unless pH is off.
How long until amendments take effect?
- pH changes from lime or sulfur: 3–12 months (faster in warm, moist conditions).
- Organic matter additions (compost, manure): noticeable improvement in water retention and tilth within one season; full benefits build over 2–5 years.
- Quick-release fertilizers: days to weeks.
- Slow-release organics (rock phosphate, greensand): 1–3 seasons. Always re-test after 1–2 years to confirm progress.
Best time to re-test after amendments? Wait at least 6–12 months after major liming or heavy fertilization—ideally the following fall or early spring—so the soil has stabilized. Annual testing is wise only if you’re intensively gardening or troubleshooting persistent problems.