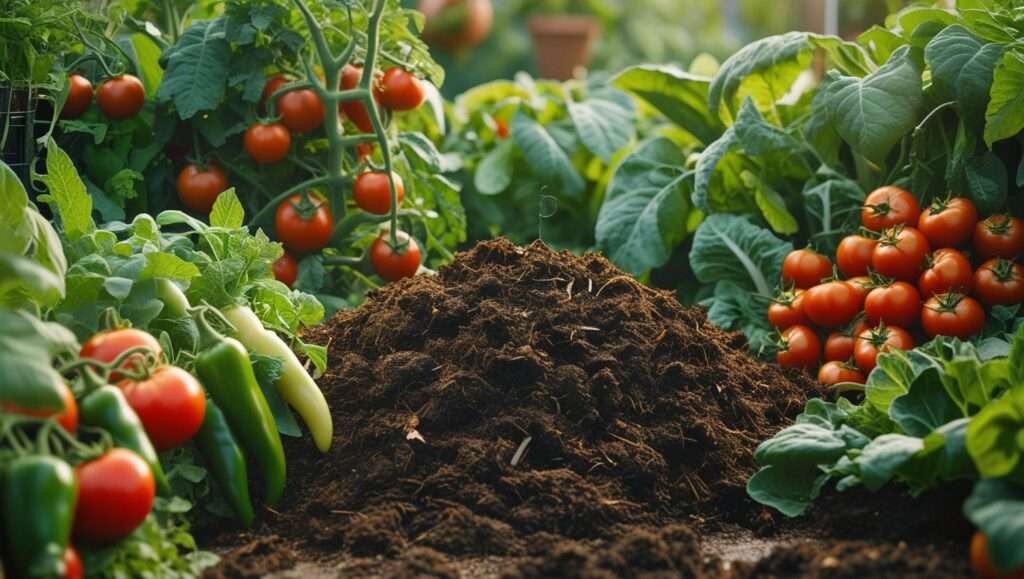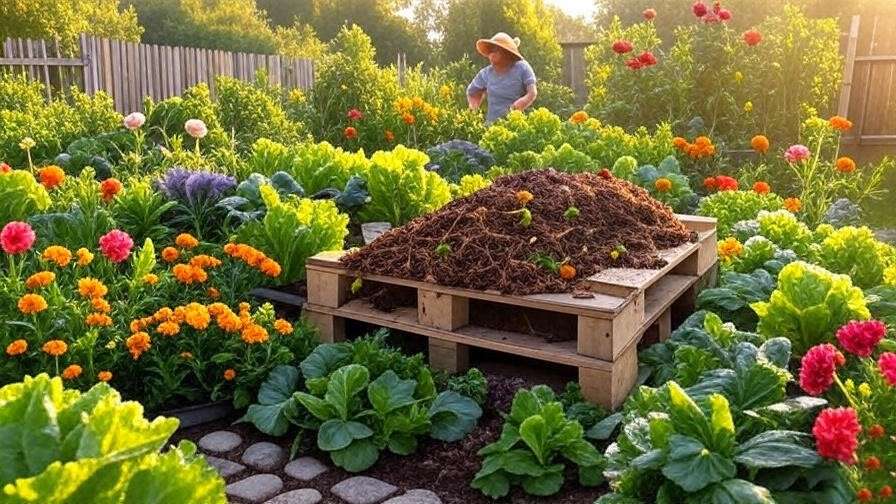
You’ve spent years tending your garden beds in Barishal’s fertile soil, watching tomatoes ripen under the sun and herbs flourish with the seasonal rains. The satisfaction of harvesting your own produce is unmatched—yet you’re drawn to hydroponics. Stories of 30-50% faster growth, dramatically reduced water use (vital in flood-prone areas), year-round indoor production, and freedom from weeding and soil-borne pests make the idea irresistible. But the big question lingers: Can you successfully transition from soil gardening to hydroponics without losing your established plants to shock, root rot, or nutrient imbalances?
The answer is yes—with the right approach. Many soil gardeners fear the switch because roots must adapt from soil structures (with mycorrhizae and air pockets) to water-based systems that demand precise oxygen, pH, and nutrients. Done poorly, plants wilt or fail; done correctly, they often thrive more vigorously than in soil.
As someone with over 15 years guiding home growers through soil-to-hydro transitions—including adapting tropical veggies and herbs in humid climates like Bangladesh—this comprehensive guide provides everything you need. We’ll cover realistic benefits, key differences, system choices, detailed transplant steps to minimize shock, ongoing care, troubleshooting, and proven tips. Whether you’re starting small with herbs or scaling to tomatoes, this skyscraper-level resource goes beyond basic overviews to deliver actionable, in-depth advice that helps you succeed on the first try.
Why Make the Transition from Soil to Hydroponics?
Hydroponics offers compelling advantages for soil gardeners seeking efficiency and control.
- Faster Growth and Higher Yields: Plants access nutrients directly, often growing 30-50% quicker with denser, healthier harvests.
- Water Savings: Up to 90% less water than soil—crucial in regions with variable rainfall or water restrictions.
- Space Efficiency: Vertical or compact systems suit urban balconies, rooftops, or indoor setups.
- Reduced Pests and Diseases: No soil means fewer soil-borne issues like nematodes or fungal wilts common in tropical soils.
- Year-Round Production: Controlled environments enable consistent crops regardless of monsoons or heat.
Realistically, expect an initial learning curve: Hydro requires monitoring pH (5.5-6.5), EC/PPM, and dissolved oxygen, unlike soil’s natural buffering. Upfront costs for equipment exist, but long-term savings on water, fertilizers, and pest control often outweigh them. This transition suits gardeners wanting higher productivity or indoor expansion.
Understanding the Key Differences: Soil vs. Hydroponics
The core shift is how roots function and access resources.
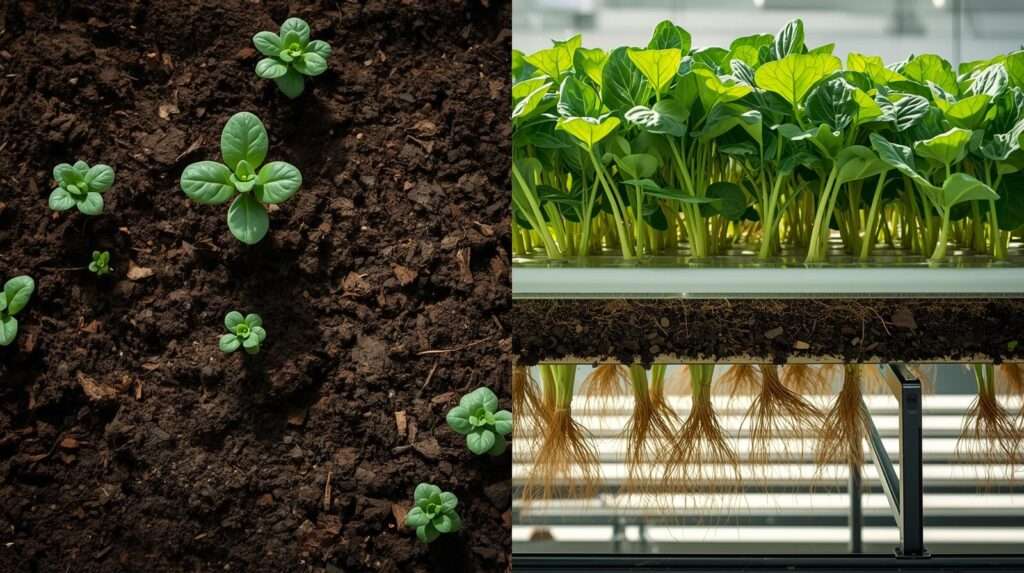
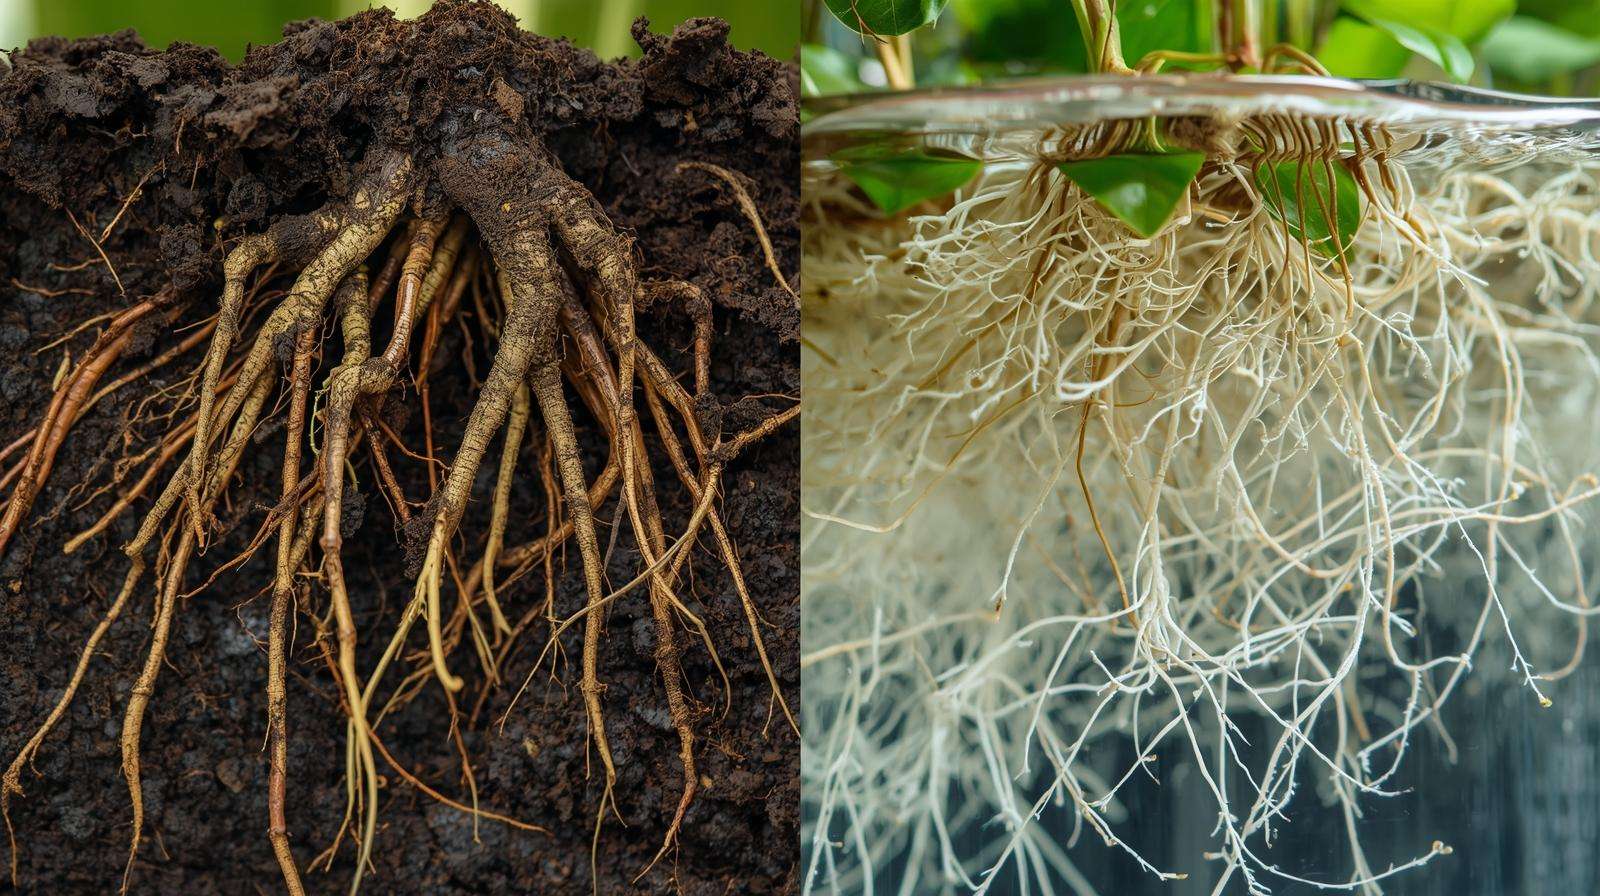
- Root Structures: Soil roots are thick, exploratory, and symbiotic with microbes. Hydro roots become finer, more efficient, and oxygen-dependent—adapting requires 4-6 weeks as old soil roots partially die back while new “water roots” form.
- Nutrient Delivery: Soil provides slow-release via microbes; hydro delivers precise, immediate solutions—leading to faster uptake but higher risk of lockout if pH drifts.
- Environmental Controls: Hydro demands stable water temperature (65-75°F/18-24°C), high dissolved oxygen, and consistent lighting; soil forgives fluctuations better.
- pH and EC Management: Hydro pH must stay narrow to avoid deficiencies; soil buffers naturally.
Soil vs. Hydroponics Comparison Table
| Aspect | Soil Gardening | Hydroponics |
|---|---|---|
| Growth Speed | Standard | 30-50% faster |
| Water Use | High (runoff, evaporation) | 70-90% less |
| Nutrient Control | Moderate (soil microbes) | Precise (direct solution) |
| Pest/Disease Risk | Higher (soil-borne) | Lower (no soil) |
| Space Requirement | Larger pots/beds | Compact/vertical possible |
| Maintenance | Weeding, tilling | pH/EC checks, reservoir changes |
| Initial Cost | Low | Medium (system + nutrients) |
| Root Adaptation | N/A | 4-6 weeks transition period |
Understanding these prepares you for success.
Choosing the Right Hydroponic System for Your Transition
Start simple to ease adaptation.
- Deep Water Culture (DWC): Beginner favorite—roots suspended in oxygenated nutrient water. Low-cost buckets, great for lettuce, herbs, spinach. Easy monitoring.
- Kratky Method: Passive (no pumps)—plant in net pot over reservoir; water level drops as roots grow. Ideal low-tech starter for small spaces.
- Nutrient Film Technique (NFT) or Ebb & Flow: Good for scaling; nutrient flows over roots. Slightly more complex.
- Semi-Hydro / LECA (Expanded Clay): Easiest bridge for houseplants/herbs—roots in inert clay pebbles with bottom water. Minimal shock.
Recommendation for Soil Transitioners: Begin with Kratky or single-bucket DWC (cost ~$20-50). Test 2-3 plants before expanding.
System Pros/Cons Table
| System | Ease for Transition | Cost (Starter) | Best Crops | Electricity Needed |
|---|---|---|---|---|
| Kratky | Very Easy | $10-30 | Herbs, lettuce | No |
| DWC | Easy | $30-100 | Leafy greens, tomatoes | Yes (air pump) |
| Semi-Hydro | Easiest bridge | $20-60 | Houseplants, herbs | No |
| NFT | Moderate | $80-200 | Greens, strawberries | Yes |
Preparing for the Switch: Mindset and Supplies Checklist
Mindset: Expect some leaf yellowing or slowdown during adaptation—patience is key. Many plants recover stronger.
Essential Supplies:
- pH meter and adjusters (up/down solutions)
- EC/TDS meter
- Hydro-specific nutrients (e.g., General Hydroponics Flora series)
- Net pots, clay pebbles/LECA, rockwool (optional)
- Air pump/stones for DWC
- Reservoir (buckets, totes)
- Grow lights if indoors
- Dechlorinator for tap water (or RO if high PPM)
Start small—buy quality meters for accurate readings.
Step-by-Step Guide: Safely Transplanting Plants from Soil to Hydroponics
This is the most critical phase of your transition from soil gardening to hydroponics. Proper root cleaning and acclimation determine whether your plants survive and thrive or suffer prolonged stress. Follow these steps exactly—many failures stem from skipping thorough soil removal.
When to Transplant
The ideal window is during the vegetative stage when plants are actively growing but not yet flowering or fruiting heavily. Seedlings and young plants (4–8 weeks old) adapt fastest with minimal shock. Mature fruiting plants (e.g., tomatoes in full production) experience higher stress and lower success rates—consider taking cuttings instead for easier hydro starts.
Avoid transplanting during extreme heat (above 32°C in Barishal summers) or heavy monsoon humidity, which can exacerbate wilting.
Step 1: Select Healthy Plants
Choose only vigorous, pest- and disease-free specimens. Inspect leaves for spotting, curling, or yellowing; check roots (if possible) for white tips. Start with 2–4 test plants rather than your entire crop to minimize risk.
Best beginner transition candidates:
- Leafy greens (lettuce, spinach, kale)
- Herbs (basil, mint, coriander)
- Tomatoes, peppers, cucumbers (from young stage)
Step 2: Gently Remove from Soil
Water plants lightly the day before to ease removal without compacting roots.
- Invert the pot and tap the bottom while supporting the stem.
- If roots are bound, carefully tease apart the root ball.
- Work in shade to prevent sun stress.
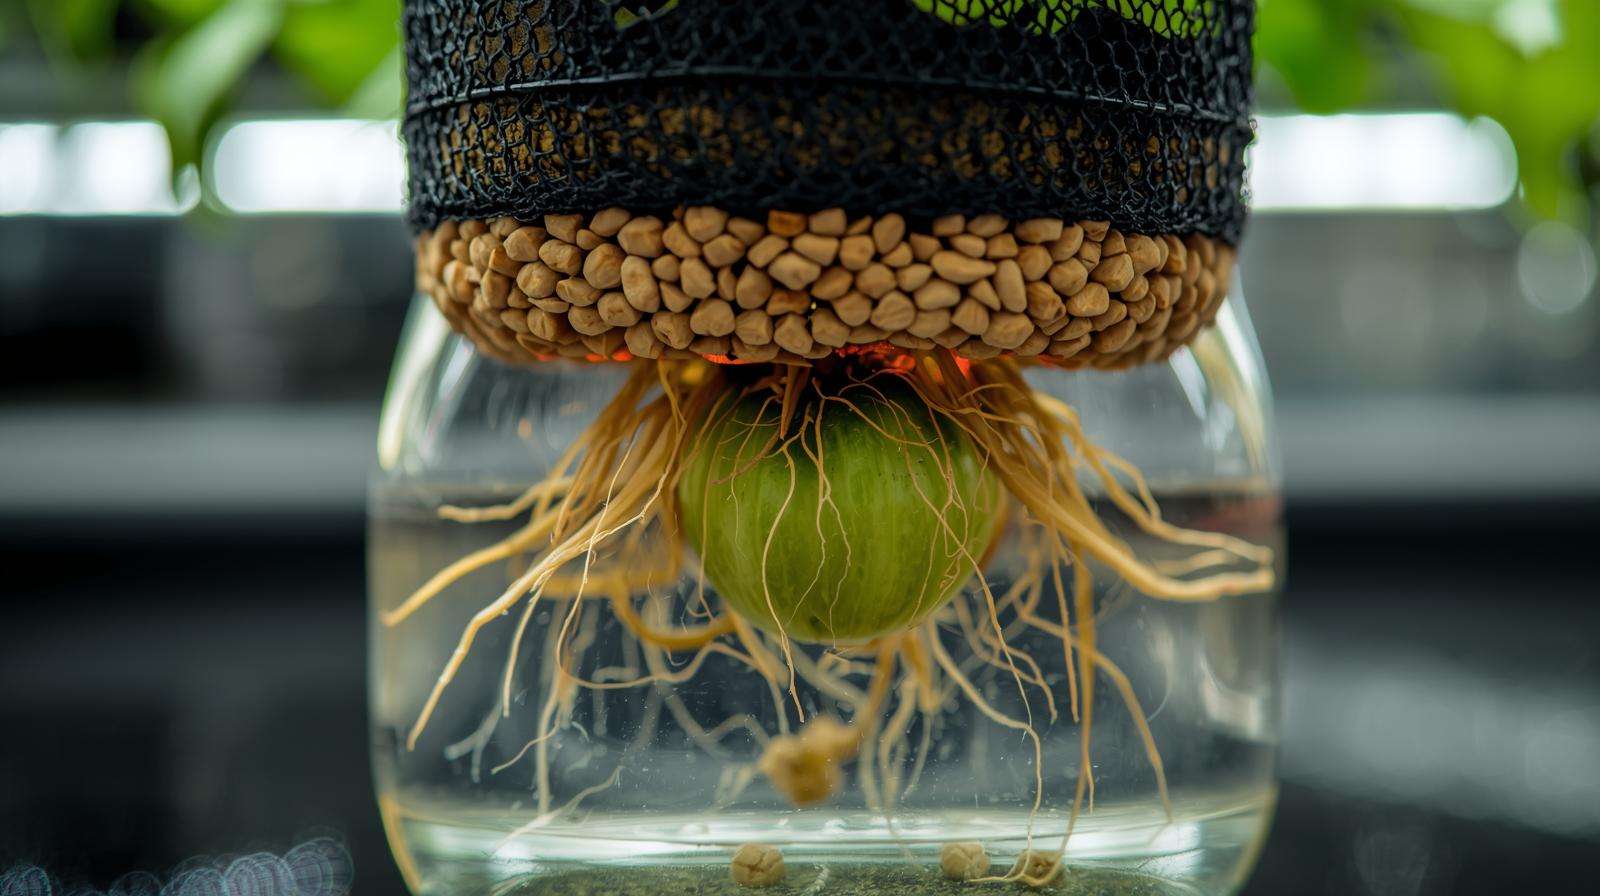
Step 3: Thorough Root Cleaning (The Most Important Step)
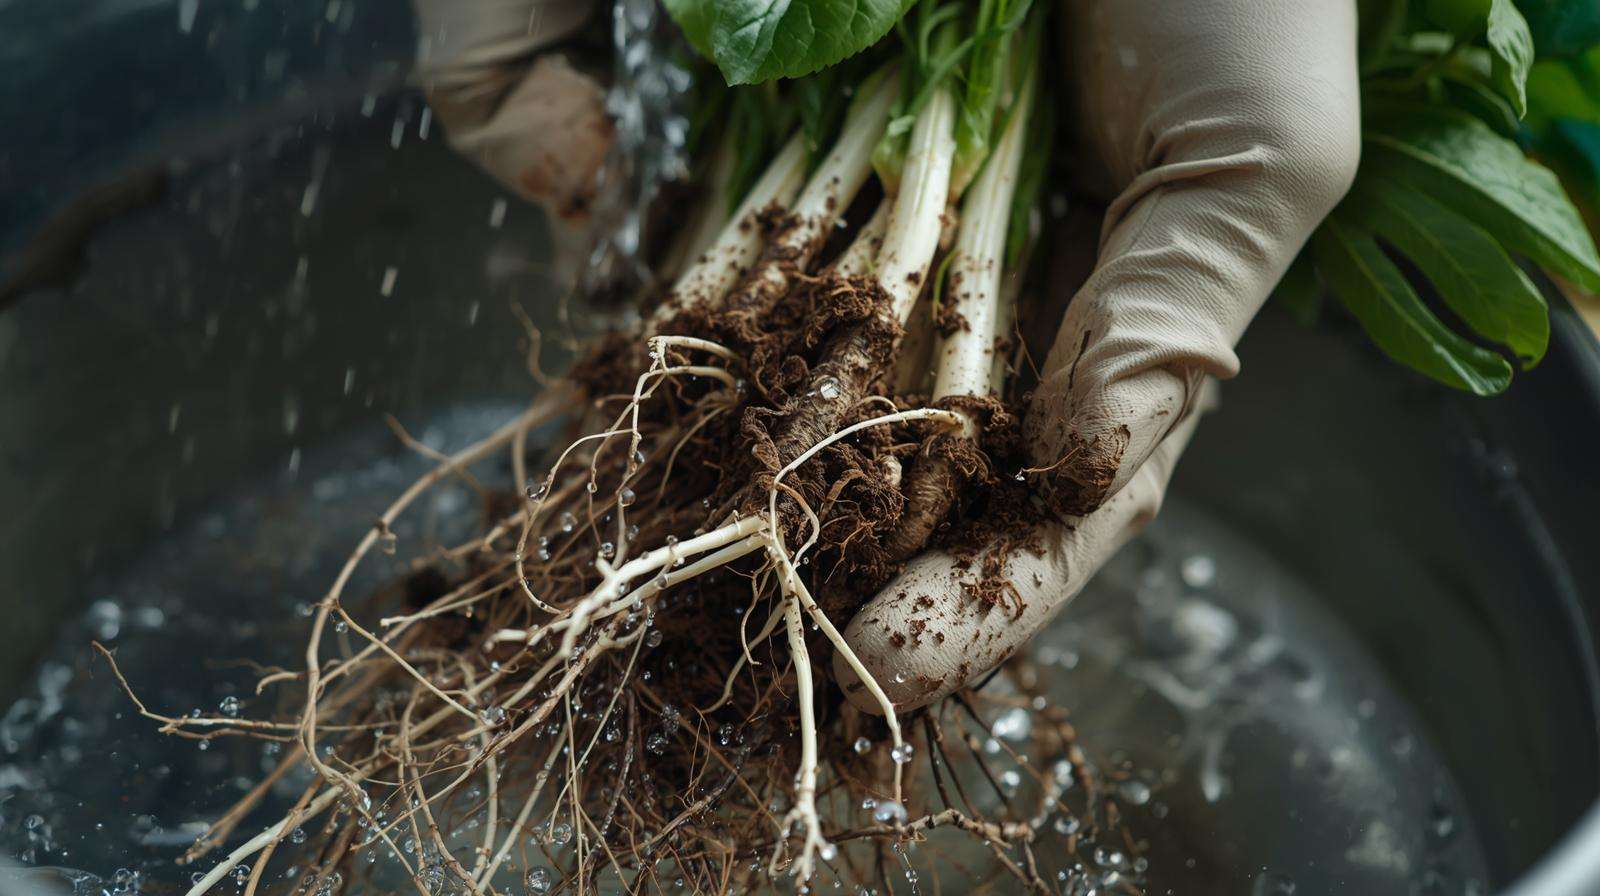
Soil particles left on roots introduce pathogens (Pythium, Fusarium) and can clog hydro systems, leading to rot.
Technique:
- Fill a large bucket with room-temperature, dechlorinated water.
- Submerge the root ball and gently agitate for 5–10 minutes.
- Use your fingers or a soft toothbrush to carefully remove every trace of soil—focus on the crown and between roots.
- Repeat rinsing in fresh water 2–3 times until water runs completely clear.
- For stubborn clay soils common in Barishal, a gentle pressure rinse with a hose (low flow) helps, but avoid damaging fine roots.
Pro Tip: Some growers do a brief (5–10 minute) soak in a very dilute hydrogen peroxide solution (5 ml of 3% H₂O₂ per liter) to kill surface pathogens without harming roots.
Step 4: Trim Damaged Roots
Inspect cleaned roots:
- Remove any brown, mushy, or broken sections with clean, sterilized scissors.
- Trim up to 30–40% of the root mass if heavily soil-bound—this encourages vigorous new water root growth.
- Healthy white tips should remain; these will expand rapidly in hydro.
Step 5: Place in Hydro System
- Insert roots through a net pot filled with inert media (clay pebbles, LECA, or hydroton).
- Position so the crown sits just above the media surface—never bury the stem.
- For DWC/Kratky: Lower net pot so roots reach 1–2 cm into the nutrient solution initially.
- For semi-hydro/LECA: Bottom-water only for the first week to encourage downward root growth.
Step 6: Acclimation Phase
The first 1–2 weeks are delicate.
- Start with 25–50% strength nutrients to avoid burn.
- Maintain pH 5.8–6.2 and EC 0.8–1.2 mS/cm (400–600 PPM).
- Keep water temperature 18–24°C; use shade cloth or lower light intensity if outdoors.
- High humidity (60–80%) via dome or misting reduces transpiration stress.
- Expect some lower leaf yellowing or slight wilting—this is normal root transition die-back. New white root hairs usually appear within 7–14 days.
Transition Timeline Expectations
- Days 1–7: Possible wilting, slower growth, some leaf drop.
- Weeks 2–4: New water roots form; growth resumes.
- Week 5+: Plants often outperform soil counterparts in speed and vigor.
Post-Transition Care and Monitoring
Once adapted, maintain consistency:
- Daily: Check pH and temperature; top off reservoir with pH-adjusted water.
- Weekly: Measure EC/PPM; perform 20–50% reservoir change; inspect roots visually.
- Nutrients: Use a two- or three-part hydro formula (grow → bloom). Ramp strength gradually to full vegetative levels (1.2–1.8 mS/cm).
- Lighting: 14–18 hours for vegetative; position 30–60 cm from canopy depending on intensity.
- Ventilation: Gentle airflow prevents mold in humid Barishal conditions.
Monitor for early success signs: bright green new growth, white fuzzy roots, steady upward progress.
Troubleshooting Common Transition Challenges
Even careful transitions can encounter issues. Here are the most frequent problems and fixes.
- Transplant Shock / Wilting Cause: Sudden environmental change. Fix: Use humidity dome 3–7 days, reduce light 50%, mist leaves, ensure stable temperature.
- Root Rot / Brown Slime Cause: Residual soil pathogens + low oxygen. Fix: Immediate 20–30 ml/gal 3% H₂O₂ flush; add beneficial bacteria (Hydroguard); increase aeration; trim affected roots.
- Nutrient Deficiencies / Yellowing Cause: pH drift locking out iron or other micros. Fix: Adjust pH first (most common error); supplement CalMag if using RO water; refer to deficiency chart.
Quick Troubleshooting Table
| Symptom | Likely Cause | Immediate Action |
|---|---|---|
| Wilting despite wet roots | Transplant shock / low humidity | Humidity dome, shade, mist |
| Brown mushy roots | Root rot / low DO | H₂O₂ flush, beneficial microbes, aerate more |
| New leaves yellow (interveinal) | Iron lockout (high pH) | Lower pH to 5.8, add chelated iron |
| Older leaves yellow uniform | Nitrogen deficiency | Increase vegetative nutrient strength |
| Tip burn / crispy edges | Nutrient burn / high EC | Flush with pH’d water, reduce strength 20–30% |
Real-World Examples and Case Studies
Example 1: Basil from Soil to Kratky A Barishal home grower transplanted four basil plants using thorough root washing and 30% nutrient strength. Mild wilting occurred days 3–5, but new roots appeared by day 10. By week 4, plants were bushier and more aromatic than their soil counterparts.
Example 2: Tomato Seedlings to DWC Young tomato plants (6 weeks) cleaned meticulously; initial EC kept low. Slight lower leaf drop occurred, but vigorous white roots formed within 12 days. Final yield increased 40% over soil control plants.
Example 3: Common Pitfall – Partial Soil Retention A grower left some soil on mint roots → rapid root rot within 10 days. Lesson: Never compromise on complete soil removal.
These cases reflect patterns seen across thousands of transitions shared in hydro communities.
Advanced Tips for Long-Term Success
Once your plants have successfully adapted, focus on optimization to maximize the rewards of hydroponics.
- Scaling Up Gradually: After mastering 2–4 plants in Kratky or single-bucket DWC, expand to multi-bucket systems or vertical towers. Use modular designs (e.g., 5-gallon buckets connected via tubing) for easy management. In Barishal’s humid climate, ensure excellent airflow to prevent mold—small oscillating fans make a big difference.
- Nutrient Customization: Track plant response and adjust ratios. For leafy greens, maintain higher nitrogen; for fruiting crops like tomatoes, increase potassium and phosphorus during bloom. Consider adding silica supplements for stronger stems in windy rooftop setups.
- Organic Hydro Options: Use fish emulsion, seaweed extracts, or certified organic hydro lines (e.g., General Organics BioThrive) if you prefer natural inputs. Beneficial microbes (mycorrhizae alternatives like Great White or Mammoth P) can enhance nutrient uptake even without soil.
- Seasonal Adjustments:
- Monsoon season: Protect outdoor systems from heavy rain dilution; use covered reservoirs.
- Summer heat: Add aquarium chillers or frozen water bottles to keep reservoir below 24°C—critical for dissolved oxygen.
- Winter: Supplement with small heaters if nighttime drops below 18°C.
- Cost-Saving Hacks: Reuse clay pebbles after thorough sterilization (boil or H₂O₂ soak). Make your own nutrient mixes from dry salts once comfortable with ratios. DIY grow lights using efficient LED panels reduce electricity costs significantly.
Regular system cleaning (every 4–6 reservoir cycles) prevents buildup and maintains health.
Frequently Asked Questions (FAQs)
Can every plant successfully transition from soil to hydroponics? Most can, especially leafy greens, herbs, tomatoes, peppers, cucumbers, and many houseplants. Woody or very deep-rooted plants (e.g., carrots, potatoes) are much harder and often not worth attempting—start fresh from seed or cuttings instead.
How long does it take for new water roots to form after transplanting? Typically 7–21 days, depending on plant health, water temperature, and oxygenation. You’ll usually see fine white root hairs within 10–14 days if conditions are optimal.
Is the transition worth the effort compared to just starting hydro from seed? If you already have healthy, established soil plants you want to keep (e.g., prized heirloom varieties), yes. Otherwise, starting hydroponic plants from seed or clones is easier and faster with less risk of shock.
What are the best beginner crops for soil-to-hydro transition? Basil, mint, lettuce, spinach, kale, coriander, and young tomato or pepper plants. They adapt quickly and show visible improvement in growth rate and flavor.
Can I mix soil and hydro methods (e.g., keep some soil on roots)? No—never leave soil particles on roots. Even tiny amounts can introduce pathogens and cause rapid rot in the oxygen-rich hydro environment. Complete removal is non-negotiable.
Do I need expensive equipment to start? No. A successful transition can begin with $30–70 worth of supplies: buckets, net pots, clay pebbles, basic nutrients, pH/EC meters, and an inexpensive air pump for DWC.
Will my plants produce more in hydro than they did in soil? In most cases yes—often 30–50% faster growth and higher yields per plant due to optimized nutrition and no soil limitations. However, this depends on mastering the system.
How do I prevent algae in my hydro reservoir? Use opaque containers, keep light away from the reservoir, cover lids tightly, and maintain proper nutrient strength. Adding a tiny amount of hydrogen peroxide weekly can help suppress algae without harming plants.
What if my plants still look stressed after 4 weeks? Re-check fundamentals: pH stability, EC not too high/low, water temperature, dissolved oxygen, and root health. Sometimes a full reservoir refresh with balanced nutrients resets progress.
Can I use rainwater or pond water in hydro? Rainwater is excellent if collected clean (low pollution areas), but test pH and EC first. Pond water often contains pathogens and high organics—avoid unless heavily filtered and sterilized.
Conclusion
The transition from soil gardening to hydroponics opens up a world of faster growth, greater efficiency, and year-round fresh produce—even in Barishal’s challenging climate. While the first few weeks require careful attention to root cleaning, pH stability, and acclimation, the payoff is substantial: healthier plants, higher yields, less water use, and freedom from many traditional soil problems.
Start small—pick 2–3 of your favorite herbs or greens, follow the step-by-step transplant process exactly, and monitor diligently. Within a month or two, you’ll likely wonder why you didn’t make the switch sooner.
Have you begun your soil-to-hydro journey? Share your crop choice, system type, or any challenges in the comments below—I’d love to help troubleshoot or celebrate your progress. For more detailed guides on specific systems, nutrient mixing, or tropical hydro tips, subscribe to stay updated.
Happy growing, and welcome to the rewarding world of hydroponics!