You’ve carefully sown your tomato, pepper, or leafy green seeds in fresh soil, kept them moist, and checked daily with anticipation—only to see empty trays or weak, failing sprouts days later. This frustrating experience wastes time, money, and precious growing season potential for home gardeners and small-scale farmers alike. Poor seed germination can turn excitement into disappointment, especially when you’re counting on a bountiful harvest.Seed Germination Troubleshooting
Seed germination troubleshooting is essential because most failures stem from a handful of controllable factors: moisture balance, temperature, oxygen availability, and sanitation. The good news? With the right diagnosis and quick fixes, you can dramatically improve your success rates and grow strong, healthy seedlings ready for transplanting or direct garden performance.
In this comprehensive guide, we’ll dive deep into the 10 most common seed germination problems, backed by horticultural best practices from university extension services and real-world grower experience. You’ll learn precise symptoms, science-based causes, fast actionable fixes, and proven prevention strategies. Whether you’re starting seeds indoors on a windowsill, under grow lights, or directly in garden beds, these insights will help you achieve consistently higher germination rates—often 80-95% or better with proper care.
By the end, you’ll have a complete troubleshooting toolkit, including temperature charts, viability tests, and daily care routines tailored for various crops. Let’s turn your seed-starting challenges into reliable success.
Understanding Seed Germination: The Basics
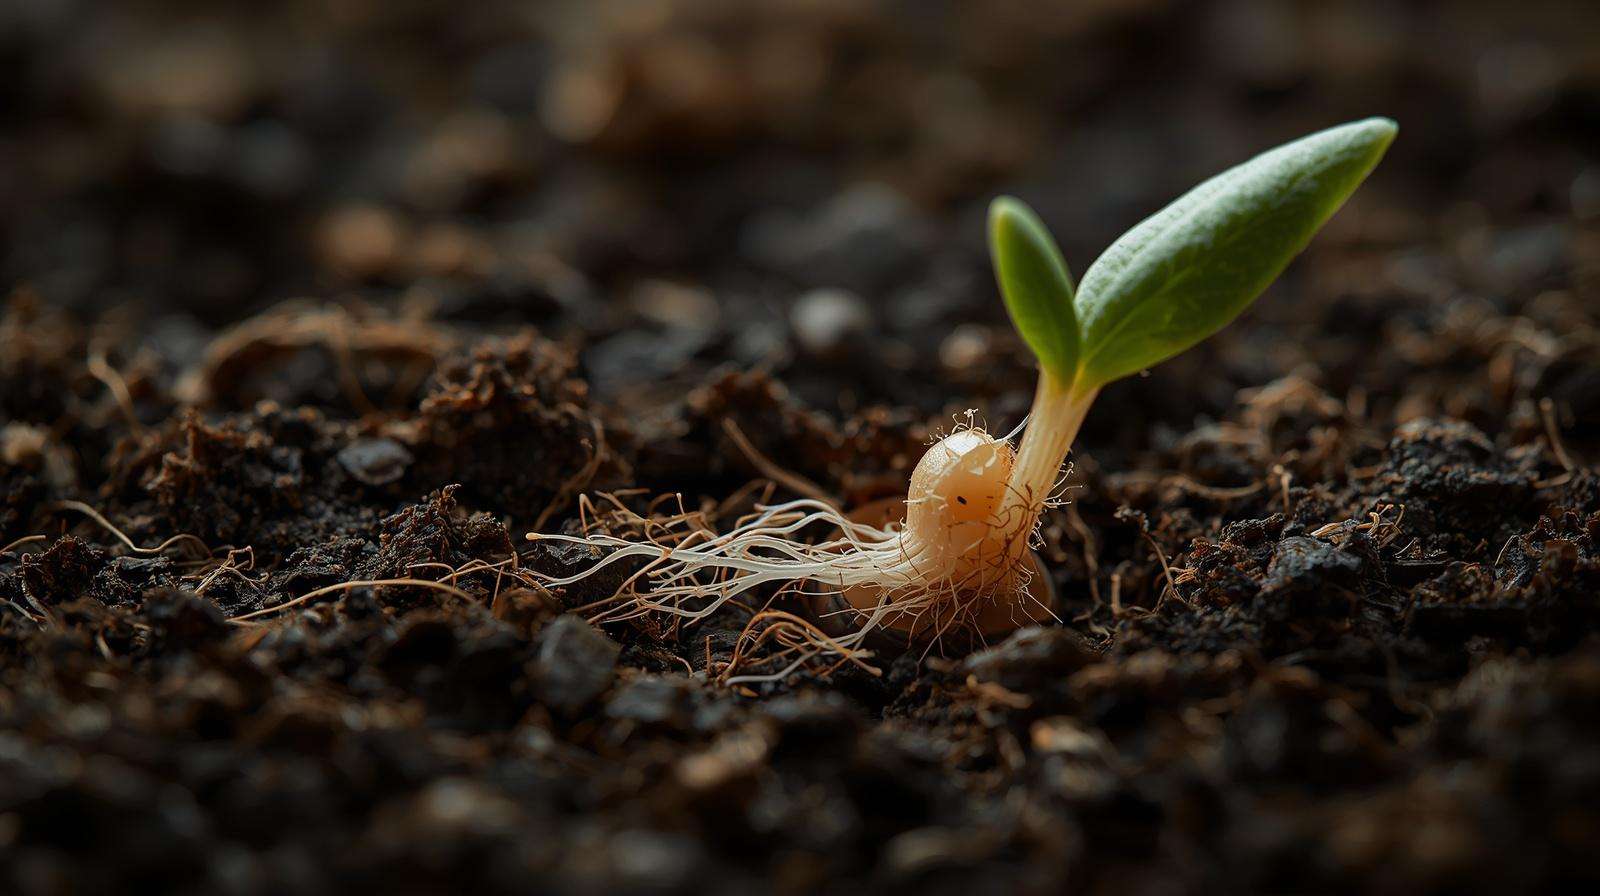
Seed germination is a remarkable biological process where a dormant seed absorbs water (imbibition), activates enzymes, and breaks through its coat to send out a radicle (embryonic root). For this to happen successfully, four key requirements must align: adequate moisture (but not saturation), oxygen for respiration, suitable temperature, and sometimes specific light conditions after sprouting.
When these factors fall out of balance, seeds fail to sprout, germinate unevenly, or produce weak seedlings that quickly decline. Many gardeners mistakenly focus only on watering or light, overlooking that soil temperature often matters more than air temperature during the critical germination phase. Cool-season crops like lettuce and spinach can handle lower temps, while warm-season favorites like peppers and tomatoes demand warmer soil to trigger rapid enzyme activity.
Ideal conditions vary by crop, but most vegetable seeds germinate best when soil temperatures range between 65–85°F (18–29°C). Consistent moisture at the “damp sponge” level—moist enough to stick together when squeezed but not dripping—ensures seeds stay hydrated without drowning in low-oxygen environments. Using a sterile, lightweight seed-starting mix (not garden soil) minimizes disease risks and provides excellent aeration and drainage.
Expert Insight: In regions with variable climates (such as tropical or subtropical areas common in parts of South Asia), soil temperature fluctuations from day to night or during rainy seasons can be a major hidden culprit. Investing in a simple soil thermometer pays for itself many times over by removing guesswork from seed starting problems.
10 Common Seed Germination Problems and How to Fix Them Fast
Here is the core of effective seed germination troubleshooting. Each problem includes clear symptoms, root causes, immediate fixes, and long-term prevention. These solutions draw from established agricultural extension recommendations and practical experience to deliver faster, more reliable results than generic advice.
Problem 1: Seeds Never Germinate (No Sprouts at All)
Symptoms: Days or weeks pass with bare soil—no radicle emergence, no swelling of seeds.
Why It Happens: The most frequent causes include old or low-viability seeds, incorrect soil temperature (too cold or too hot), planting depth errors (too deep suffocates; too shallow dries out), or poor seed-to-soil contact. Expired packets or improperly stored seeds lose vigor quickly in humid conditions.
Quick Fixes:
- Perform a simple paper towel germination test: Moisten a paper towel, place 10 seeds on it, fold, seal in a plastic bag, and keep warm (around 70–80°F). Check after 3–10 days. Calculate viability percentage (sprouted seeds ÷ total tested × 100). If below 50–60%, buy fresh seeds.
- Verify soil temperature with a probe thermometer and adjust using a heat mat for warm crops or by waiting for natural warming.
- Re-sow at the correct depth—generally 2–3 times the seed’s width (very fine seeds like lettuce can be surface-sown and lightly pressed in).
Prevention Tips: Purchase seeds from reputable suppliers with recent packing dates. Store in a cool, dry, airtight container (ideally in the refrigerator in a sealed jar with desiccant). Always label with date and variety. For hard-coated seeds (e.g., beans, okra), consider light scarification or overnight soaking in room-temperature water before planting.
Real Example: Tomato seeds often fail if soil stays below 60°F; providing bottom heat to reach 70–85°F can cut germination time from 14+ days to 5–7 days.
Problem 2: Uneven or Patchy Germination
Symptoms: Some seeds sprout vigorously while others in the same tray remain dormant or emerge much later.
Why It Happens: Inconsistent moisture levels across the tray, temperature gradients (e.g., edges cooler than center), mixing varieties with different requirements in one container, or uneven seed distribution and coverage.
Quick Fixes: Use a humidity dome or plastic wrap for the first few days to maintain even moisture. Switch to bottom watering to avoid disturbing seeds. Separate varieties into dedicated trays or cells. Gently firm the soil surface for uniform contact.
Prevention Tips: Sow one variety per tray when possible. Maintain consistent environmental conditions with a heat mat and fan for gentle air circulation. Check moisture daily by lifting trays—soil should feel evenly damp.
Problem 3: Overwatering or Waterlogged Soil Leading to Rot
Symptoms: Seeds turn mushy, develop fuzzy mold, or fail to emerge; soil smells sour or anaerobic.
Why It Happens: Excess water displaces oxygen, suffocating the embryo and inviting fungal pathogens. Heavy watering from above compacts soil and promotes waterlogging, especially in trays without adequate drainage.
Quick Fixes: Immediately improve drainage—poke additional holes if needed and tilt trays to drain excess. Switch exclusively to bottom watering: place trays in a shallow pan of water for 10–15 minutes until the top feels moist. Allow the surface to dry slightly between waterings. Increase airflow with a small oscillating fan on low.
Prevention Tips: Follow the “damp sponge” rule—squeeze a handful of mix; it should hold shape but release no free water. Use well-aerated, sterile seed-starting mix with perlite or vermiculite. Ensure all containers have drainage holes. Avoid garden soil, which compacts easily and harbors pathogens.
Fast Fix Checklist:
- Bottom water only
- Ensure excellent drainage
- Provide gentle fan circulation
- Monitor for sour smells early
Problem 4: Underwatering or Soil Drying Out
Symptoms: Seeds swell initially but then shrivel; soil pulls away from tray edges; delayed or failed emergence.
Why It Happens: High evaporation from heat mats, grow lights, or dry ambient air (common in heated indoor spaces). Forgetting daily checks in warm or windy conditions.
Quick Fixes: Mist the surface lightly or bottom water more frequently. Cover trays with a clear dome or plastic until sprouts appear, then vent gradually. Group trays on a tray with capillary matting for steadier moisture.
Prevention Tips: Check moisture twice daily when using bottom heat. Use a spray bottle for gentle surface misting. In drier climates, place trays on a humidity tray with pebbles and water (without letting pots sit in water long-term).
Problem 5: Incorrect Soil Temperature (Too Cold or Too Hot)
Symptoms: Extremely slow or no germination (too cold) or rapid but weak/failed sprouting with possible rot (too hot).
Why It Happens: Soil temperature directly controls enzyme activity and metabolic rate. Air temperature can mislead—soil often lags behind.
Quick Fixes: Use a reliable soil thermometer. For cool crops (lettuce, spinach, radish), aim for 60–75°F. For warm crops (tomato, pepper, eggplant, squash), target 75–85°F with a seedling heat mat. Move trays to warmer or cooler spots as needed. Avoid placing near cold windows or hot radiators.
Here is a practical Optimal Soil Temperature Chart for common crops (compiled from university extension data):
- Lettuce: Minimum 35–40°F, Optimum 60–75°F, Maximum ~85°F
- Tomato: Minimum 50°F, Optimum 65–85°F, Maximum 95°F
- Pepper: Minimum 60°F, Optimum 65–85°F (ideally ~80–85°F), Maximum 95°F
- Carrot: Minimum 40°F, Optimum 65–85°F
- Beans (Snap): Minimum 60°F, Optimum 75–85°F
- Cucumber/Squash: Minimum 60°F, Optimum 70–95°F
- Spinach: Minimum 35°F, Optimum 45–75°F (prefers cooler)
Use this as your reference—many failures resolve simply by hitting the optimum range.
Expert Tip: In warmer regions, cool-season crops may bolt or struggle if started too late; use shade or earlier indoor starts. Always prioritize soil temp over air temp.
Problem 6: Insufficient or Excessive Light (Primarily Post-Germination)
Symptoms: While most seeds germinate in darkness, emerging seedlings become leggy or weak if light is poor right after sprouting.
Why It Happens: Seedlings stretch toward inadequate light sources, resulting in tall, spindly stems with small leaves.
Quick Fixes: As soon as the first true leaves appear (or even cotyledons for some), provide strong light—16–18 hours daily from full-spectrum grow lights kept 2–4 inches above foliage. Rotate trays for even exposure. Supplement with south-facing windows if lights aren’t available, but expect slower, weaker growth.
Prevention Tips: Plan your setup before sowing. LED grow lights are energy-efficient and effective for strong, stocky seedlings. Combine with gentle airflow to strengthen stems further.
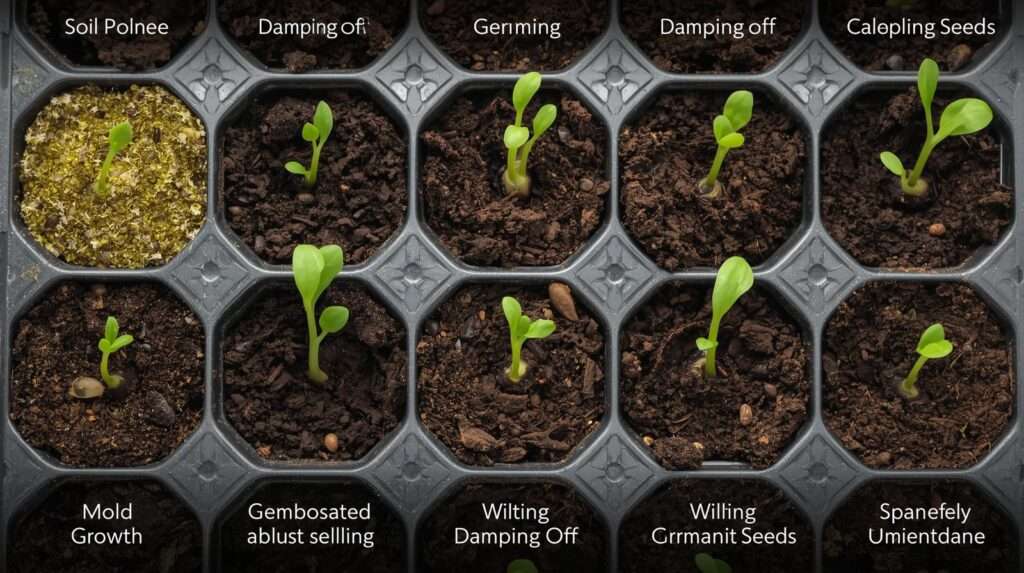
Problem 7: Damping-Off Disease and Fungal Issues
Symptoms: Healthy-looking sprouts suddenly collapse at the soil line, forming a pinched or water-soaked stem; white/gray fuzzy growth may appear.
Why It Happens: Soil-borne fungi (Pythium, Rhizoctonia, Fusarium) thrive in cool, wet, poorly ventilated conditions with non-sterile media. Overcrowding and poor sanitation worsen it.
Quick Fixes: Remove affected seedlings immediately to prevent spread. Improve airflow with a fan. Stop overhead watering. If caught early, some growers report success with natural remedies like lightly dusting the soil surface with ground cinnamon (antifungal properties) or spraying with weak chamomile tea (mild antifungal tannins). However, these are supportive—prevention is far more effective than cure.
Prevention Tips:
- Always use fresh, sterile seed-starting mix
- Sanitize trays and tools with a 10% bleach solution or hydrogen peroxide between uses
- Avoid overwatering and maintain good circulation
- Sow at proper spacing to reduce humidity buildup
- Use bottom heat to keep soil warmer (many pathogens prefer cooler temps)
Note: Once damping-off strikes a tray, it’s often best to discard the mix and start fresh with better practices rather than trying to salvage.
Problem 8: Leggy or Weak Seedlings
Symptoms: Tall, thin stems that flop over; pale color; small leaves.
Why It Happens: Primarily insufficient light intensity or duration after germination. Can be compounded by excessive heat, over-fertilizing too early, or overcrowding.
Quick Fixes: Lower grow lights closer (without burning foliage) and extend photoperiod to 16+ hours. Provide gentle breeze from a fan to encourage thicker stems. Thin seedlings to proper spacing. Hold off on fertilizer until true leaves develop.
Prevention Tips: Invest in quality lighting from day one. Start seeds in cooler conditions if possible, then transition to brighter setups. Brush seedlings gently with your hand daily to simulate wind and promote sturdy growth.
Problem 9: Planting Depth or Soil Issues (Crusting, Poor Mix, High Salts)
Symptoms: Seeds struggle to push through crusted soil; poor root development; stunted growth.
Why It Happens: Heavy or compacted soil, improper depth, or using fertilized potting mix (high salts can inhibit germination). Surface crusting from overhead watering prevents emergence.
Quick Fixes: Use only light, fluffy seed-starting mix. For light-requiring seeds (e.g., lettuce, petunia), press gently into surface without covering. Mist instead of pouring water to avoid crusting. If salts are suspected, flush gently with plain water.
Prevention Tips: Choose professional-grade, peat- or coco-based seed mixes without added fertilizers for the germination phase. Plant at recommended depths listed on seed packets.
Problem 10: Old, Poor-Quality, or Damaged Seeds + Other Factors (Pests, Chemicals)
Symptoms: Low overall germination even under ideal conditions; irregular or damaged-looking seeds.
Why It Happens: Age reduces viability; improper storage (heat/humidity) damages embryos. Outdoor sowing can introduce birds, insects, or soil crusting. Residual chemicals or poor seed quality from unreliable sources add risk.
Quick Fixes: Always run the paper towel viability test first. For outdoor beds, lightly rake soil for better contact and cover with row cover or netting if pests are an issue. Scarify hard seeds (nick or sand lightly) or soak overnight for better imbibition.
Prevention Tips: Buy fresh seeds annually from trusted companies. Store properly. For direct sowing, prepare a fine, level seedbed and keep moist until established. In tropical or monsoon-prone areas, time sowing to avoid heavy rains that can wash seeds away or cause crusting.
Advanced Tips and Best Practices for Reliable Seed Germination
Beyond fixing problems, adopt these proven techniques to boost rates consistently:
- Seed Soaking and Scarification: Soak large or hard seeds (beans, peas, morning glory) 8–24 hours. Scarify thick coats with sandpaper for faster water uptake.
- Stratification: Some perennials or wildflowers need cold-moist periods—mimic in the refrigerator.
- Bottom Watering Mastery: Place trays in a shallow water reservoir until top is moist; this keeps foliage dry and reduces fungal risk.
- Record Keeping: Note sowing date, temperature, variety, and germination percentage. Over seasons, this data becomes your personal goldmine for local adaptation.
- Humidity Management: Use domes early, then gradually acclimate by venting more each day.Seed Germination Troubleshooting
Indoor vs. Outdoor Seed Starting: Indoor offers control over temperature and protection from pests/weather but requires lights and space. Outdoor (direct sowing) is simpler and hardens plants naturally but exposes seeds to variables like birds, heavy rain, or temperature swings. In many warmer climates, direct sowing works well for beans, squash, carrots, and radishes once soil warms sufficiently. Hybrid approaches—starting tender crops indoors and direct-sowing robust ones—often yield the best results.
Essential Tools:
- Soil thermometer
- Heat mat (with thermostat)
- Full-spectrum grow lights
- Sterile seed-starting mix
- Spray bottle and bottom-water trays
- Small fan for circulation
- Labels and permanent marker
Prevention: How to Avoid Seed Germination Problems Altogether
The best seed germination troubleshooting is proactive prevention. Follow this pre-planting checklist:
- Test seed viability before large sowings.
- Sanitize all equipment.
- Choose the right medium and containers with drainage.
- Match sowing time and temperature to crop needs.
- Maintain the “damp but not wet” moisture level with bottom watering.
- Provide appropriate light immediately after sprouting.
- Ensure gentle airflow without cold drafts.
- Monitor daily and adjust promptly.
Long-term, build healthy soil in your garden beds, save seeds properly from strong plants, and adapt practices to your local microclimate (e.g., accounting for high humidity or monsoon patterns).
Final word
Most seed germination failures are not due to bad luck but to imbalances in moisture, temperature, oxygen, or sanitation—factors you can control with knowledge and simple adjustments. By applying the 10 troubleshooting solutions in this guide, along with the supporting best practices and charts, you’ll move from frustrated “why won’t they sprout?” moments to confident, high-success seed starting seasons.Seed Germination Troubleshooting
FAQ Section
Here are answers to the most frequently asked questions about seed germination troubleshooting. These address common pain points and provide quick, practical guidance based on proven horticultural practices.
Why are my seeds not germinating even after watering? The most likely culprits are incorrect soil temperature, old or low-viability seeds, planting depth errors, or lack of oxygen from overwatering. Water alone is not enough—seeds need the right temperature range for enzyme activity and a balanced moist-but-aerated environment. Run a paper towel viability test first, check soil temperature with a probe thermometer, and ensure seeds are planted at 2–3 times their width (or surface-sown for tiny seeds). Adjust with a heat mat if needed, and switch to bottom watering to prevent compaction.Seed Germination Troubleshooting
What is the ideal temperature for seed germination? There is no single ideal temperature—it varies by crop. Most warm-season vegetables (tomatoes, peppers, eggplant, squash) germinate best at soil temperatures of 65–85°F (18–29°C), with many preferring the higher end around 75–85°F. Cool-season crops (lettuce, spinach, radish, peas) do well at 60–75°F, with some tolerating as low as 40–50°F. Always prioritize soil temperature over air temperature, as it directly affects the germination process. Use the chart below as a quick reference (sourced from university extension guidelines):
| Crop | Minimum Soil Temp (°F) | Optimum Range (°F) | Maximum (°F) |
|---|---|---|---|
| Tomato | 50 | 65–85 | 95 |
| Pepper | 60 | 65–85 | 95 |
| Lettuce | 32–35 | 60–75 | 85 |
| Cucumber/Squash | 60 | 70–95 | 105 |
| Beans (Snap) | 60 | 75–85 | 95 |
| Spinach | 32 | 45–75 | 75–85 |
| Radish | 40 | 65–85 | 95 |
| Carrot | 40 | 65–85 | 95 |
Adjust your setup accordingly—heat mats help warm-season crops in cooler indoor or early-season conditions.
How do I test if my old seeds are still viable? Use the reliable paper towel germination test:
- Moisten a paper towel until damp but not dripping.
- Place 10–20 seeds evenly on one half, fold the towel over them, and place inside a loosely sealed plastic bag (to retain moisture while allowing some air).
- Keep the bag in a warm spot (around 70–80°F) and check after the expected germination days for that crop.
- Count sprouted seeds and calculate the percentage. Seeds with 70%+ viability are still good; below 50% means it’s time to buy fresh ones. Label with date and variety for future reference. This test removes guesswork from seed starting problems.
Can overwatering prevent seeds from sprouting? Yes—overwatering is one of the top causes of failure. Excess water fills soil pores, displacing oxygen that seeds need for respiration. This leads to rot, mushy seeds, or fungal issues like damping-off. Follow the “damp sponge” test: a handful of mix should hold together when squeezed but release no free water. Use bottom watering and ensure trays have good drainage and airflow.
How do I prevent damping-off in seedlings? Damping-off is a fungal disease causing seedlings to collapse at the soil line. Prevention is far more effective than treatment:
- Use only sterile, fresh seed-starting mix (never garden soil).
- Sanitize trays and tools with a 10% bleach solution or 70% alcohol between uses.
- Avoid overwatering and overhead watering—bottom water instead.
- Provide gentle airflow with a small fan.
- Maintain warmer soil temperatures (many pathogens prefer cooler, wet conditions).
- Sow at proper spacing and thin seedlings early. If symptoms appear, remove affected plants immediately and start fresh with better practices.
Do all seeds need light to germinate? Most vegetable seeds germinate best in darkness or low light; light requirements usually apply after sprouting. However, some tiny seeds (e.g., lettuce, petunia, snapdragon) are light-sensitive and should be surface-sown and lightly pressed into the mix without covering. Once cotyledons (seed leaves) emerge, provide strong light immediately—16–18 hours daily under grow lights—to prevent leggy growth.Seed Germination Troubleshooting
What’s the best way to water seeds during germination? Bottom watering is the gold standard: Place trays in a shallow pan of room-temperature water for 10–20 minutes until the top surface feels moist. This keeps foliage dry, reduces fungal risk, and prevents soil crusting or seed displacement. For very small sowings, gentle misting with a spray bottle works initially. Always check moisture daily—aim for consistently damp, never soggy or bone-dry.
How deep should I plant different types of seeds? General rule: Plant seeds at a depth 2–3 times their diameter. Very fine seeds (lettuce, carrot, petunia) are often surface-sown and gently pressed in for light contact. Larger seeds (beans, corn, squash) go deeper—about ½ to 1 inch. Always check the seed packet for specific recommendations, as depth affects moisture retention and emergence strength. Poor depth is a frequent hidden cause in seed germination troubleshooting.
Is it better to start seeds indoors or directly in the garden? It depends on your climate, crop, and season. Indoor starting gives control over temperature, moisture, and protection from pests/weather—ideal for tender warm-season crops like tomatoes, peppers, and eggplant in shorter seasons. Direct sowing works well for robust cool-season or fast-germinating crops (radish, beans, carrots, lettuce) once soil reaches proper temperature. Many gardeners use a hybrid approach: start sensitive crops indoors and direct-sow hardy ones. In warmer or tropical regions with long growing seasons, direct sowing often succeeds with proper bed preparation and moisture management.
What should I do if only some seeds germinate? Patchy germination usually results from uneven moisture, temperature gradients, or mixed varieties. Thin or transplant the successful seedlings carefully, then re-sow the empty spots with fresh seeds under corrected conditions (uniform bottom heat, consistent moisture via dome initially). For future trays, dedicate one variety per container and use a heat mat with thermostat for stability.
Final Tips for Long-Term Success
Mastering seed germination troubleshooting comes with observation and small adjustments over time. Keep a simple log: sowing date, variety, soil temperature, moisture notes, and germination percentage. Over seasons, this builds localized expertise tailored to your environment—whether in cooler temperate zones or humid subtropical areas.